A beauty dish is a shallow round reflector that bounces your flash off a small centre deflector plate, giving you compact, slightly directional light and a clean circular catchlight in the eyes. Learning how to use a beauty dish comes down to three moves: mount it above and to one side of your subject, put a reflector opposite it, and take one test shot before you touch the power again. Rigging takes about 15 minutes, and most people need an hour of practice before the result feels repeatable.
The confusing part is that a beauty dish is not a softbox with better branding. It is small, fast, and directional, and the pattern it throws has a shape you can see on the backdrop. Once you know what that pattern is supposed to do, the modifier stops being mysterious.
This guide covers the setup, the angle, the exposure, and the handful of mistakes that produce the hot spots and flat light beginners usually hit first. If you want the short version, mount the dish about 45 degrees above and to one side, aim it at the face, and fill the other side with a white reflector.
Table of Contents
- What You Need
- How to Use a Beauty Dish: Step-by-Step
- 1. Choose the Right Beauty Dish and Light
- 2. Mount and Angle the Light
- 3. Position the Subject and Camera
- 4. Add a Reflector and Fill the Shadows
- 5. Set Power, Aperture, and ISO
- 6. Take a Test Shot and Evaluate It
- 7. Refine the Look for the Portrait
- Common Mistakes
- Frequently Asked Questions
- Should I use a beauty dish with a softbox or diffuser?
- Where should I place a beauty dish for a portrait?
- Do I need a reflector when using a beauty dish?
- Is a beauty dish better than a softbox for beginners?
- Should I use a beauty dish with a grid or diffusion sock?
- Conclusion
What You Need
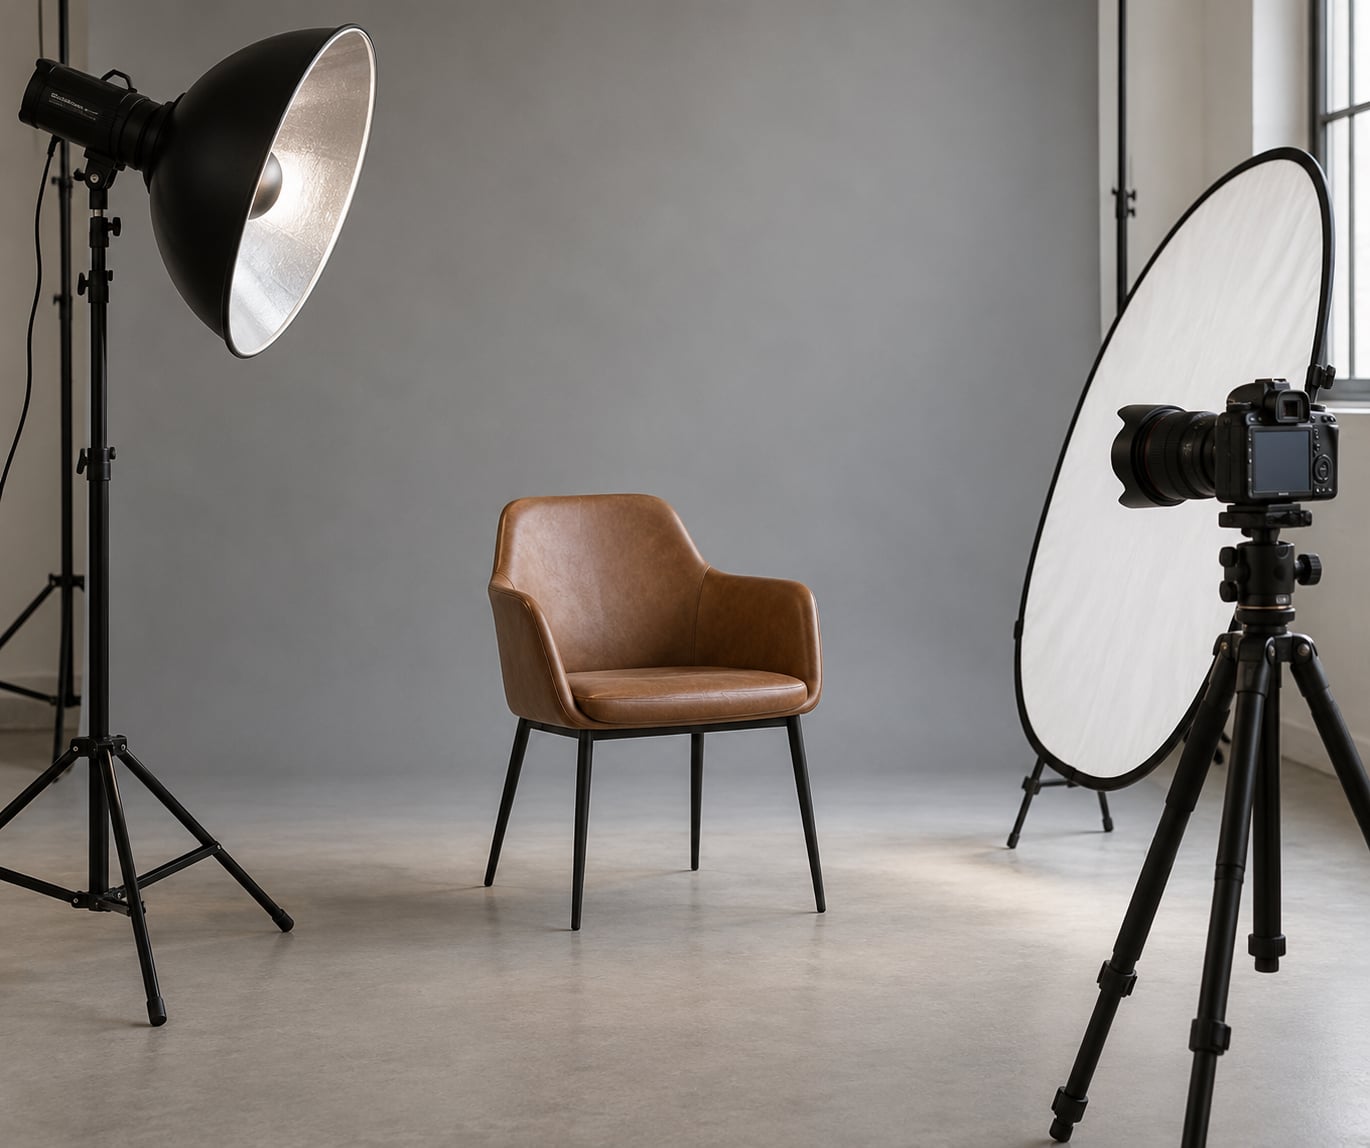
A beauty dish is only the reflector. The light does the work, so the full rig is five pieces, and two of them are optional.
- The beauty dish itself. Most are hard metal, usually 22 inches across, with a speed ring that screws onto a standard strobe or monolight. Some versions fold flat for packing.
- A compatible light. A studio strobe with a modelling light works best, because you can see the pattern before you fire. A speedlight will do, though output is limited.
- A light stand or boom arm. A stand is enough for a seated or standing headshot. A boom arm lets you place the dish overhead for clamshell-style light.
- A reflector. Optional in theory, essential in practice. A 32-inch white or silver collapsible reflector opposite the dish fills the shadow side.
- A trigger or timer. Required for strobes so you are not firing by hand. Radio triggers also let you work with the camera away from the light.
- A diffusion sock or honeycomb grid. Both optional. A sock softens and enlarges the apparent source, a grid narrows the spread so you stop spilling onto the backdrop.
A subject to test on comes next, and it does not have to be a paying client. Shoot yourself first, tethered, which is the standard advice from photographers working in this modifier daily.
Two safety notes before anything else. Dishes are wide and catch wind, and a large metal modifier on a light stand is top-heavy, so sandbag the base and keep the dish below head height while you are moving it. And never carry an assembly by the dish itself, always lift the stand or the boom arm, because the rim and speed ring are the parts most likely to bend. On the electrical side, keep cables away from walkways, use a rated extension lead, and let strobes cool before packing them.
How to Use a Beauty Dish: Step-by-Step
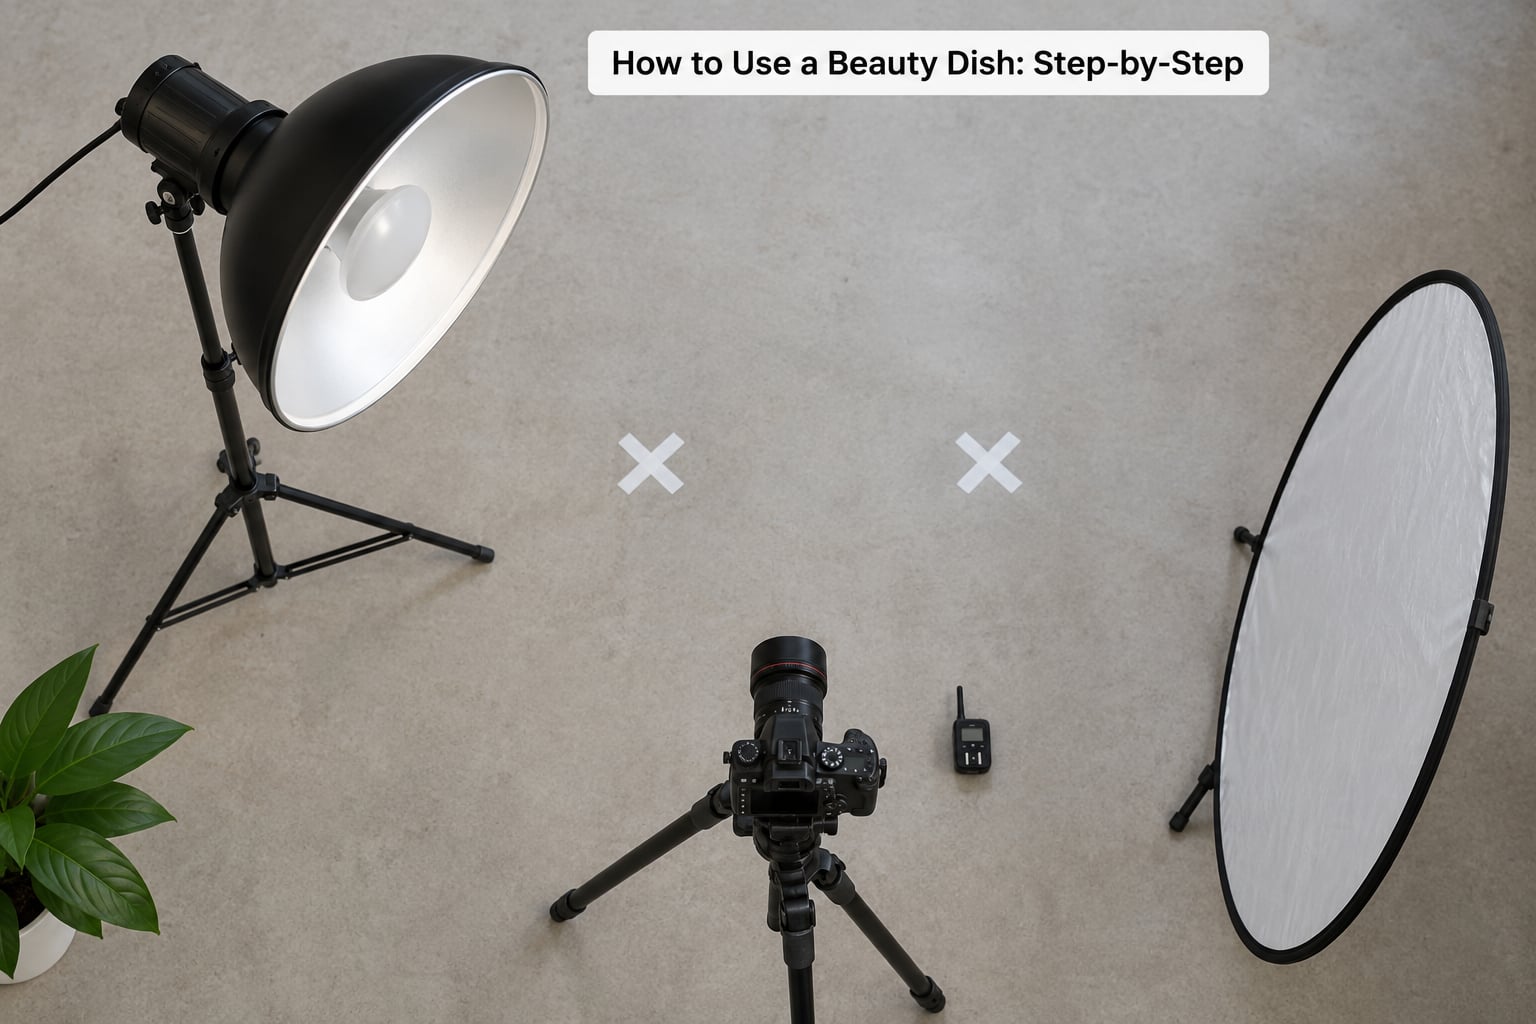
Work through these in order and check the result after each one. The checks matter more than the steps themselves, because a rig that looks right and a rig that lights right are not always the same thing.
1. Choose the Right Beauty Dish and Light
Dish size sets how much of the subject you can light and how fast the light drops off toward the edges of the face. A 22-inch dish is the workhorse most portrait shooters reach for, since it covers a head and shoulders without spilling badly onto a backdrop.
The light matters as much as the dish. If your strobe has a modelling light, turn it on and stand where your subject will stand, because you can see the shape of the pattern, the edge of the beam, and any hot spot before a single frame is taken. In a bright room with a bright window, the light ratio is invisible and you are working blind. Block the windows with black cloth and turn off ceiling lights if you want the pattern to read honestly.
Finish with the modifier decision. Standard, grid, or sock is not a preference, it is a control choice. Grid when spill is the problem, sock when hardness is the problem, and neither when the dish is close enough to a face that it is already soft.
2. Mount and Angle the Light
Screw the dish onto the speed ring until it seats fully, then tighten the locking screw on the light itself. Half-seated modifiers are the most common cause of a lopsided pattern, and the fix is to remove and refit the ring rather than tighten harder.
Set the stand so the dish sits above eye level and angle it down toward the face. If the light is at or below chin height you get uplight, under-eye shadows, and a hotter look than most beginners want. Raise the stand first, aim second.
Sandbag the base, and keep the dish at a height where you can reach the controls without standing in the shot. Aim it at the face rather than at the wall behind your subject, because the back of the dish throws no useful light anywhere else.
3. Position the Subject and Camera
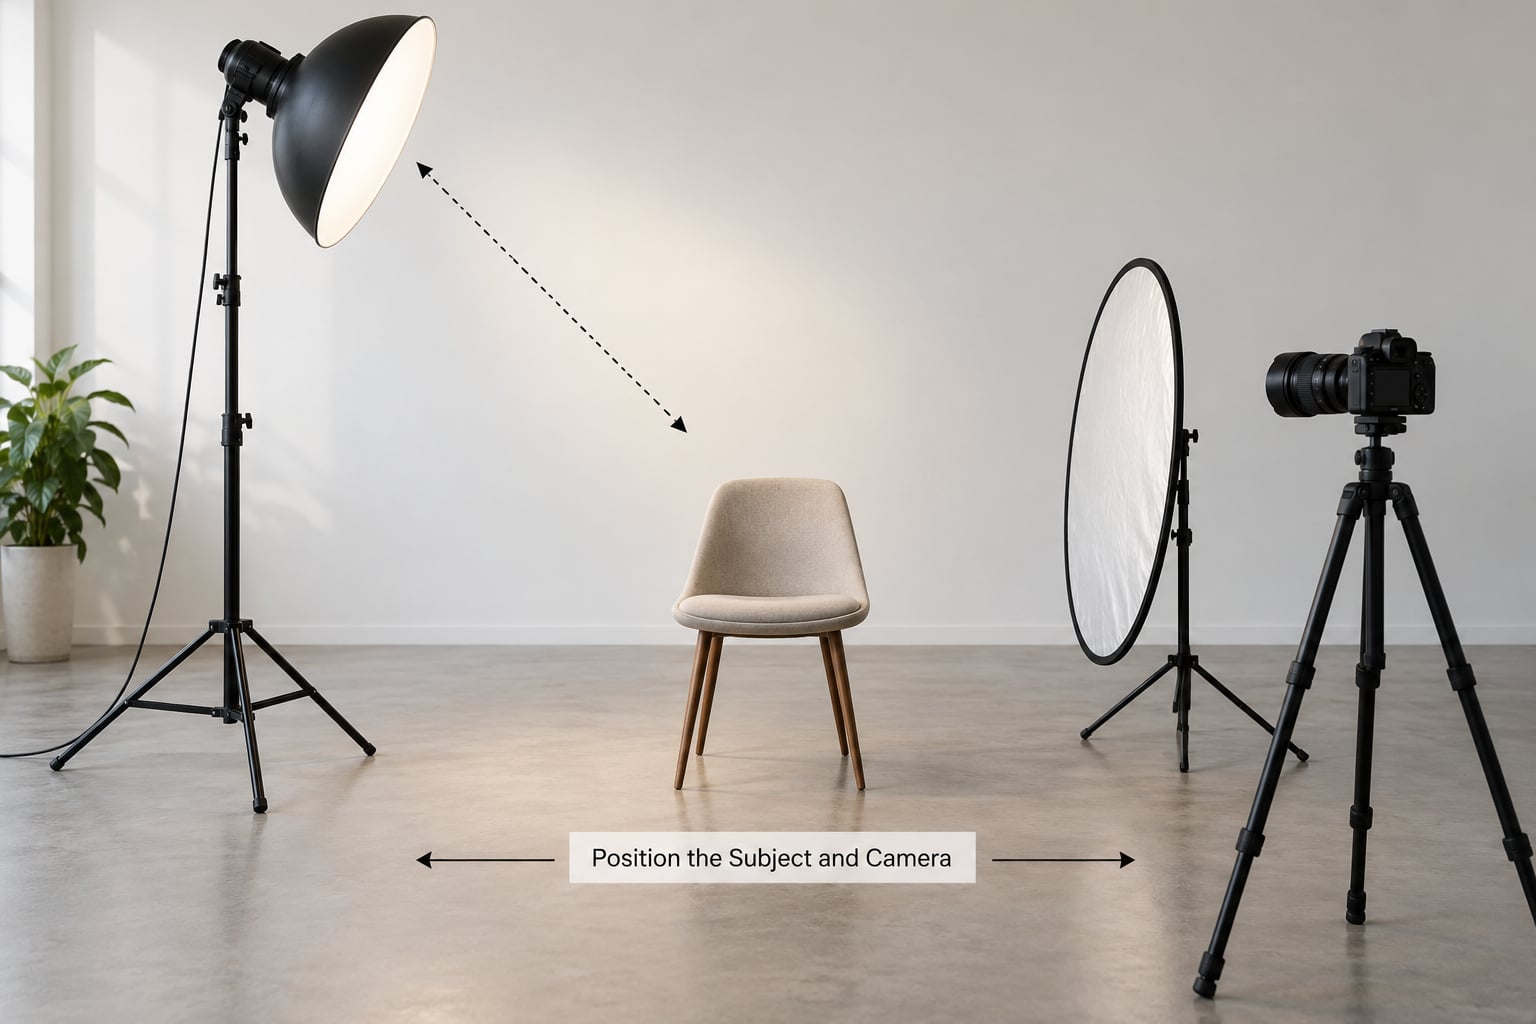
Start with the light about 45 degrees to one side of the camera axis and above the subject’s eyes, with the camera at eye level. That single starting position gives you a loop-style shadow pattern, which is forgiving and easy to read while you learn.
Everything about the face changes when you move things, so it helps to know what each move does. Move the light further to the side and the shadow on the far cheek deepens toward split lighting. Raise the dish toward the overhead position and you approach clamshell lighting. Bring the subject closer to the dish and the catchlight grows and the falloff gets faster.
The check after this step is simple. Look at the shadow under the nose. If it points down and slightly to one side, the light is up and to a side, which is where you want it.
4. Add a Reflector and Fill the Shadows
Place a white or silver reflector on the opposite side of the subject from the dish, close enough that it fills the shadow side without blocking your camera angle. White bounces softer and more neutral, silver adds a touch of sparkle and contrast, and both are usually enough for a headshot.
Use a black card or black foam board instead when you want the shadow side to stay dark. Negative fill is how you keep a face from looking flat and featureless, and it is the one adjustment that costs nothing.
If you have a second strobe, place it a stop or two under the key and opposite the dish. That is a small amount of power, and it takes the guesswork out of reflector placement when your subject is wearing dark clothing.
5. Set Power, Aperture, and ISO
Put the flash in manual power and set your camera to manual as well. Fire a test frame and meter off the face using the spot or centre-weighted reading, then adjust strobe power in small steps until the skin sits just under clipping.
Depth of field matters more with a dish than most people expect, because the light source is small and the transition from lit to shadow side is quick. On a full-length lens, f/4 to f/5.6 usually gives you enough focus across the face without softening the catchlight edge. If you need a wider aperture, lower the ISO first, then open up.
Never raise the ISO to save flash power on a setup where the light is already borderline. Skin that is a third of a stop hot clips faster than almost any other subject matter, and clipped highlights cannot be recovered in editing.
6. Take a Test Shot and Evaluate It
Check five things on every test frame, in this order: highlight clipping on the forehead and cheeks, the shape and position of the catchlights, whether the shadow side holds detail, whether the backdrop has picked up spill, and the overall contrast on the face.
Change one variable at a time. Moving the dish a few inches changes the pattern and the falloff at the same time, so if you move the light and the power and the aperture together you have no idea which one fixed the frame.
The fastest diagnostic is to look at the background. A bright halo behind the head usually means the dish is aimed too wide for the distance, and a grid is the clean fix. A dim background with a bright face usually means the dish is angled in toward the subject, which is fine.
7. Refine the Look for the Portrait
Move the dish further from the subject and the same power produces a broader, softer wrap with a smaller apparent catchlight. Move it closer and the catchlight grows, the falloff gets faster, and the dish reaches a hot spot more easily. That trade is the whole game with this modifier.
For a Rembrandt-style shadow, raise the dish a little higher and rotate it so the beam edge crosses the face rather than facing it flat. You keep the characteristic dish look, which comes from feathering the edge, while still creating a triangle of light on the shadow-side cheek.
Add diffusion last. A sock on an already close dish can go from flattering to flat, and the usual reason is that the light is no longer directional enough to shape the face. If the frame still feels hard after you have adjusted distance, try moving back before you reach for another modifier.
Common Mistakes
Most disappointing beauty dish results come down to one of these eight things.
- The modifier is not fully seated. A half-screwed speed ring gives a tilted, uneven pattern. Refit it rather than tightening harder.
- The stand is unballasted. A wide dish on a light stand tips easily. Sandbag it and keep the dish below head height while moving it.
- The light is too low. Below eye level produces uplight and under-eye shadows. Raise the dish and re-aim.
- The reflector is misplaced. Too high fills the eye sockets and flattens the face. Keep it opposite the key and slightly below eye line.
- Highlights are clipping. Meter off the face, then pull a third of a stop under the reading and check the forehead again.
- Confusing dish size with apparent source size. What matters is the size the subject sees, which is roughly half the dish because the rim curves away. A 22-inch dish at arm’s length reads as a small light.
- Too much diffusion. A sock plus a close dish plus a white reflector gives flat, shadowless light. Remove one of them.
- Judging softness without measuring distance. Softness changes with subject-to-light distance, so compare two frames from the same distance before blaming the modifier.
One last note from the long-running conversations on the dpreview.com studio lighting forum: the deflector disc casts a real shadow, extending roughly one dish diameter behind it. Aim the dish at the face and the disc shades the forehead, cheeks, and nose, which is exactly the effect that gives the modifier its look. Move the subject further than one diameter away and the dish stops behaving like a beauty dish and starts behaving like a big reflector.
Frequently Asked Questions
Should I use a beauty dish with a softbox or diffuser?
Yes, but decide which problem you are solving first. A diffusion sock softens the light and enlarges the apparent source, so use it when shadows look too hard. A softbox is a different modifier entirely, giving a larger and softer source with more spill control. Running both together usually produces flat light. Start with the bare dish, then add only what your test frames say you need.
Where should I place a beauty dish for a portrait?
Start about 45 degrees above and to one side of the camera axis, with the dish at or slightly above eye level and aimed at the face. Keep the subject within roughly one dish diameter so the deflector disc still shades the forehead and nose. Move the light higher and further to the side for deeper shadows, and closer to the subject for a larger catchlight and faster falloff.
Do I need a reflector when using a beauty dish?
You do not need one, but you will probably want one. A beauty dish throws light quickly to the side, which leaves a shadow side that can be very dark on a face. A white or silver reflector opposite the dish fills it for free and keeps the contrast flattering. Use a black card instead when you want that shadow side to stay dark and the face to look sculpted.
Is a beauty dish better than a softbox for beginners?
A beauty dish is more compact and quicker to set up, which makes it a good first modifier for headshots. A softbox gives softer, more even light and more spill control, so it is easier to get a forgiving result with. If your priority is fast, repeatable beauty and headshot work, the dish is easier to carry and to rig. If you are shooting groups or need very soft light, a softbox suits you better.
Should I use a beauty dish with a grid or diffusion sock?
Use a honeycomb grid when light is spilling onto your backdrop and you need a narrower beam. Use a diffusion sock when the light is too hard or the shadows are too crisp. Adding both at once flattens the light and removes the shape the dish is known for. Most setups work best with a bare dish, a grid for control, or a sock for softness, rarely two modifiers at the same time.
Conclusion
Here is your first session in one paragraph. Mount the dish about 45 degrees above and to one side of your subject, aim it at the face from a little under one dish diameter away, and put a white reflector opposite it. Fire one test frame in manual, meter off the face, and pull back a third of a stop if the forehead is hot. Then look at the backdrop, the catchlight, and the shadow under the nose before changing anything else.
Repeat that until the pattern looks the same twice. Once it does, learning how to use a beauty dish gets quick, because you already have a repeatable starting point to move away from, whether you are chasing softer light, faster falloff, or a deeper shadow side.