To create a Lightroom preset, edit a photo in the Develop module with the look you want, click the plus icon in the Presets panel, choose Create Preset, decide which settings to include, give it a name and a group, then click Create. It takes about five minutes once you know which sliders belong in a reusable preset.
A preset is just a saved record of your Develop adjustments. Apply it to the next photo and those moves happen instantly, which is the difference between culling a wedding in the evening and still being there for the speeches.
The trick is restraint. Most bad presets come from saving every slider you touched on one photo, including exposure and white balance that only worked for that one frame. This guide covers the full create, save, test and organise cycle, plus what to tick and what to leave unticked in the dialog.
Table of Contents
- What You Need
- How to Create a Lightroom Preset Step by Step
- How to Choose the Right Edit for a Preset
- How to Save Your Lightroom Preset
- How to Apply and Test the Preset
- How to Organize Presets for Repeated Use
- How to Create Presets Without Making Images Look Washed Out
- Common Lightroom Preset Mistakes and How to Fix Them
- Frequently Asked Questions
- Can I create my own Lightroom presets?
- Can AI create Lightroom presets?
- Do professional photographers use Lightroom presets?
- Why does my Lightroom preset look different on every photo?
- Is there a keyboard shortcut to cycle through presets?
- How do I export or share a Lightroom preset with someone?
- Conclusion
What You Need
You need Lightroom, a representative RAW file, and about fifteen minutes. That is genuinely it.
Three versions exist and the menu paths differ enough to trip you up:
- Lightroom Classic is the desktop catalog version. Presets live in the Presets panel on the right-hand side of the Develop module.
- Lightroom (formerly Lightroom CC) is the cloud and desktop version that syncs with the mobile app. Presets are under the Edit panel, behind the three-dot menu.
- Lightroom mobile uses that same cloud catalog, so a preset you create on your phone shows up on your desktop and vice versa. Classic presets do not sync this way.
Your sample image matters more than people expect. Pick a well-exposed RAW frame shot in the conditions you edit most, not the hardest shot in the folder. A preset is built on the assumption that most of your images resemble the one you made it from.
You also need some familiarity with the Develop module itself. If you have never touched the Basic panel, start there; everything in this guide assumes you can adjust exposure, contrast and colour temperature and undo what you do not like.
How to Create a Lightroom Preset Step by Step
The short version, if you just need the path:
- Open a RAW image and press G to enter the Develop module in Lightroom Classic.
- Make your adjustments using the Basic, Tone Curve, HSL, Color Grading and Detail panels.
- Open the Presets panel and click the plus icon, or right-click a preset and choose Create Preset.
- In the New Preset dialog, click Check None, then re-select only the settings you want to store.
- Name it, choose a group folder, click Create. It appears in that folder immediately.
On Lightroom mobile and the cloud version, tap Edit, then Presets below the panel, then the three-dot icon in the top corner and choose New Preset. The dialog is the same, just narrower.
How to Choose the Right Edit for a Preset
Decide what your images have in common, then only save those moves. If every shot in your set is slightly flat in the midtones with blown window highlights behind the subject, a preset with contrast and highlight recovery earns its place. If that is not true across most of your work, leave those sliders out.
The settings most photographers find useful in a general preset:
- Exposure is the one to leave unticked unless every photo needs the same correction.
- Contrast works well when your RAW files come out of the camera looking soft.
- Highlights and shadows are the recovery sliders, usually negative highlights and positive shadows.
- Whites and blacks set the endpoints. Push them too far and you clip highlights to pure white or crush shadow detail into flat black.
- Temperature and tint should stay out unless your mixed lighting genuinely skews the same way in every frame.
- Texture adds midtone detail and behaves more gently than clarity.
Everything in the Develop module is non-destructive, so nothing you do here damages the file. That matters when a preset turns out to be wrong on a particular photo: you can dial the intensity down or reset entirely instead of re-shooting.
Leave lens corrections and camera calibration out of most presets. Lens correction profiles are matched to a specific lens, and calibration differs between camera bodies, so baking them into a general preset causes the exact complaints you will read in every photography forum about blurry corners and colour shifts.
How to Save Your Lightroom Preset
In Lightroom Classic, open the Presets panel in the Develop module. Click the plus icon at the bottom of the panel, or right-click inside the panel and pick Create Preset from the menu. Adobe renamed this dialog along the way: older tutorials call it the New Develop Preset dialog, current versions call it New Preset. Same dialog, different label, which is why some readers following a five-year-old video cannot find the screen.
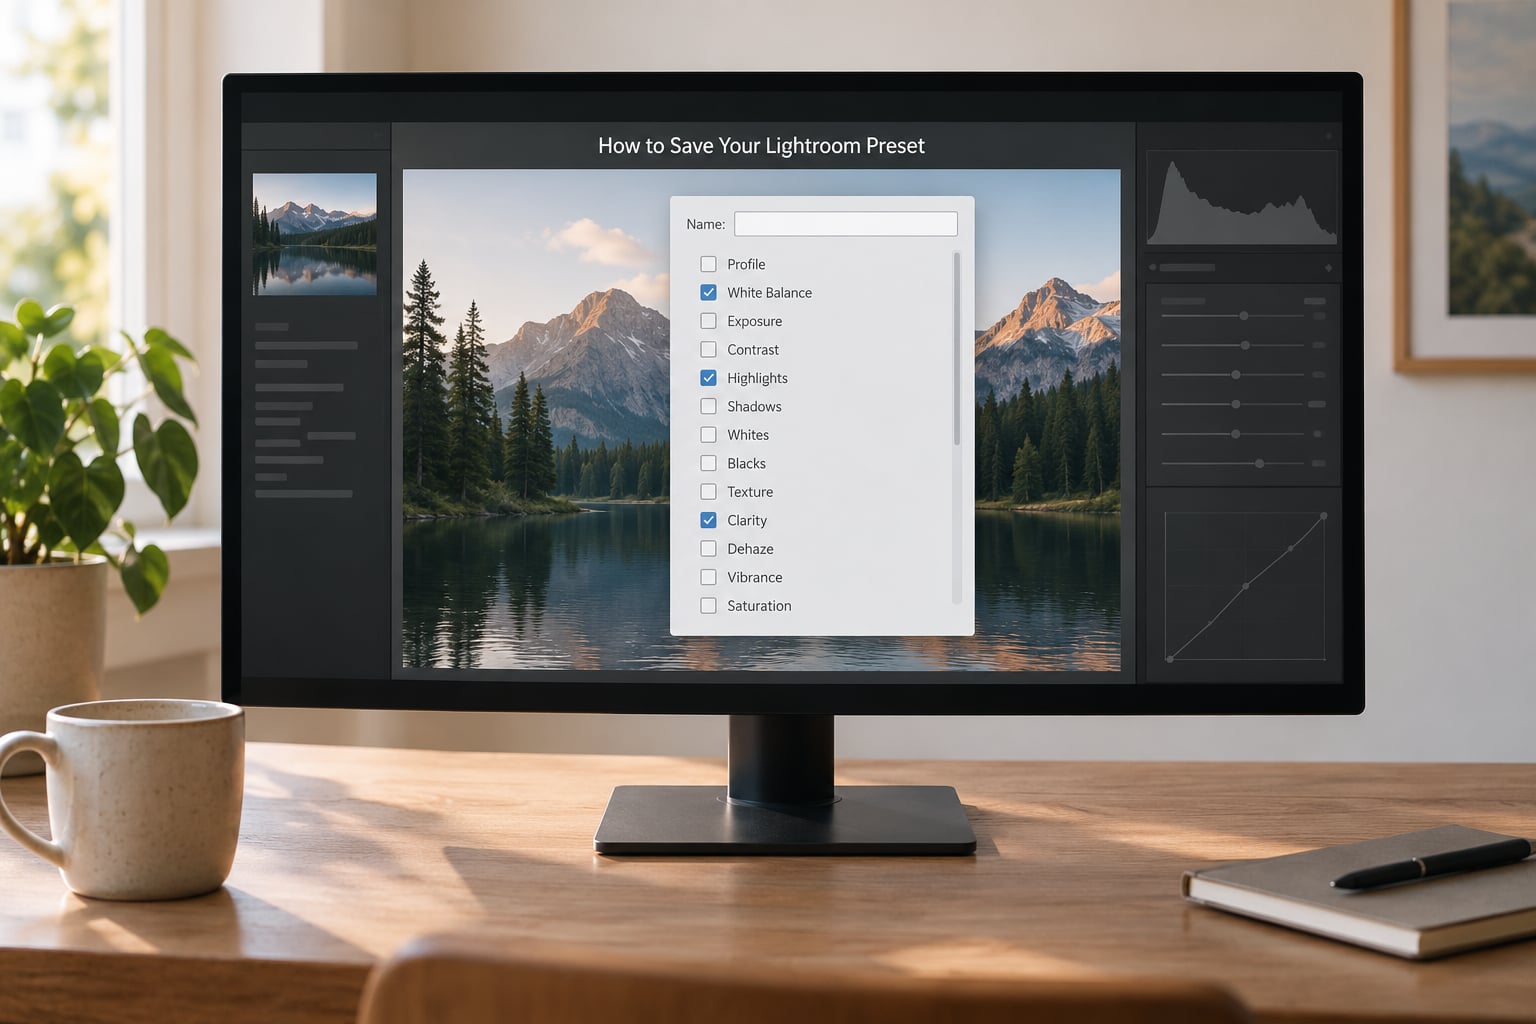
Inside the dialog there are three things to get right. First, the name. Second, the group or folder you want it stored in, with My Presets as the default. Third, and this is the part most people skip, the checkbox list at the bottom.
Click Check None first. That clears every box instantly, and then you re-tick only what you actually want baked in. Selecting from a list of forty ticked boxes is how you end up shipping a preset that overwrites your camera profile, strips lens corrections and forces a white balance on every image you touch it with.
A safe default set to start from: Basic (contrast, highlights, shadows, whites, blacks), Presence or Texture, Color Mixer if you are correcting a specific hue, Color Grading for a look, and Detail for sharpening. Leave Process Version, Camera Calibration, Lens Corrections, White Balance and Exposure unticked.
Once you click Create, the preset appears in the group you named. To change it later, make your edits on an image, right-click the preset and choose Update with Current Settings. That overwrites the stored values with what is on screen right now, so make those adjustments on a photo that already has the preset applied.
How to Apply and Test the Preset
Click any preset in the Presets panel and it applies to the selected photo instantly. Nothing is baked into the file, so you can apply, adjust and remove as much as you need.
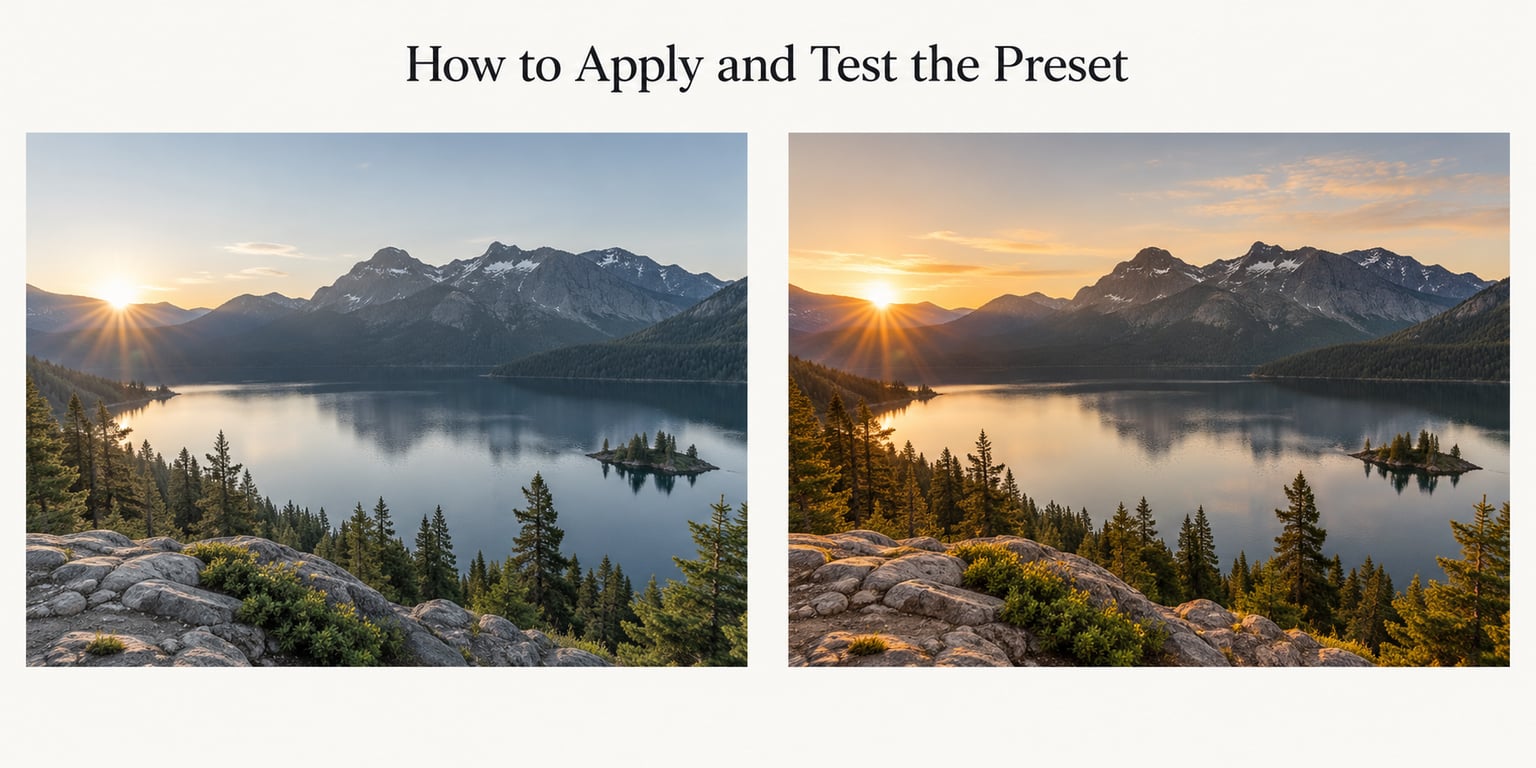
There is an intensity slider under the preset name in Lightroom Classic. Drag it to about 60 percent and the look sits closer to your original instead of slamming all the adjustments in at once. Most photographers land between 50 and 80 once they discover it exists.
For a quick look without applying, hover over the preset and the Navigator panel previews it on the thumbnail. Lightroom has no built-in keyboard shortcut for cycling through presets, which is the single most common complaint in preset threads; hovering with the mouse is still the fastest way to compare looks.
Test before you trust it. Apply the preset to at least five photos: one in the same light as your sample, one in much brighter light, one indoors, one with a different camera body if you shoot more than one, and one rotated to vertical. If it survives all five without clipping or shifting skin tones, it is a working preset.
To start over on a photo, press the Reset button at the bottom of the Develop panel to return it to the imported settings, or hold Alt (Windows) or Option (Mac) and click Reset to reset a single slider back to zero.
To apply it automatically, use the Copy Settings feature during the Lightroom Classic import dialog. Pick Saved Preset, choose yours, then decide whether to allow Auto-Sync to overwrite any presets that share the same name on import.
How to Organize Presets for Repeated Use
Number presets by workflow order rather than alphabetically. If your process runs Quick Fix, then Curve, then Split Toning, then Skin, name them 01 Quick Fix, 02 Curve, 03 Split Toning, 04 Skin. The panel sorts them the way you intend to apply them.
Keep folders flat and small. A folder per subject works fine: Portraits, Landscapes, Product, Black and White. A folder per photo or per client is how a preset library becomes useless within a year.
Start with three presets and add more only when a shoot demands it. The beginner fear of building fifty presets is real, because choosing between presets takes longer than the corrections they save. Professionals tend to use presets as a starting point that gets each image close, then fine-tune, and that only works if the list is short enough to read at a glance.
How to Create Presets Without Making Images Look Washed Out
The washed-out look almost always comes from one of three things: a preset built on a single high-contrast sample, whites pushed until they clip, or a preset that includes image-specific settings that fight the next photo.
A useful rule is to only bake in an adjustment you make to more than 80 percent of your images. A Lightroom preset that includes temperature because one session was under green fluorescent light will make twenty correct outdoor photos look wrong.
Watch the histogram after applying. If the whites pile up at the far right edge, pull whites down. If shadows collapse into a solid block, raise shadows or reduce blacks. Checking clipping with the Outline view (Y for Show Mask Edges in Classic) tells you exactly which pixels are about to be unrecoverable.
Build on a representative image, keep the adjustments flexible, and test across a small set before you call it finished. A preset that works on five varied photos is worth more than one that looks stunning on the single frame you made it from.
Common Lightroom Preset Mistakes and How to Fix Them
Baking exposure and white balance in. This is the most repeated complaint on photography forums and the reason purchased preset packs get returned. Exposure and white balance are per-image decisions, so leave those boxes unticked and handle them in Quick Develop after applying.
Saving every slider you touched. If a preset does not produce a good result on the fourth photo you try it on, the problem is usually a setting that only made sense on the first one. Rebuild from Check None rather than trimming the original.
Stripping lens corrections or camera calibration. A preset that includes those settings replaces whatever your profile already did, and the damage shows up as soft corners or a colour shift on certain lenses. Keep them out and let Lightroom handle it per camera.
Expecting one preset to cover every lighting condition. An outdoor portrait preset applied to an indoor shot produces unpredictable, blown-out results. That is not a broken preset, it is a preset doing exactly what it was told. Build one per lighting situation instead.
Treating presets like copy and paste settings. Paste applies every adjustment to the whole image at once. A preset with a selected checkbox list gives you control over which parts travel, which is the whole reason to bother making one.
Confusing develop presets with import presets. The Saved Preset option in the Quick Develop area of the Classic import dialog is a separate mechanism that applies during import. It is useful for a batch of RAW files, but it is not the same object as a develop preset.
Preset bloat. Fifty near-identical presets are worse than three. If two presets look the same, merge them.
Expecting a preset to travel between Classic and mobile. Classic presets stay on your computer. Presets created in Lightroom cloud or mobile sync across devices, but they are a different library, so re-create or import them separately.
Frequently Asked Questions
Can I create my own Lightroom presets?
Yes, and every preset you see in the panel started as somebody’s own edit. Make the adjustments you want on a photo in the Develop module, click the plus icon in the Presets panel, choose Create Preset, pick the settings to include, name it, and click Create. You can edit, update or delete any preset you make later.
Can AI create Lightroom presets?
AI tools can propose slider values or approximate a look from a reference image, but the result is still a set of numbers, not a preset. You still have to build it in the Develop module and test it across several photos before it is trustworthy. Treat any generated values as a starting draft, and check whites, blacks and skin tones yourself.
Do professional photographers use Lightroom presets?
Most do, as a starting point rather than a finished result. The point is to get each image close to the intended look so the remaining time goes into fine-tuning a face, a sky or a background. Professionals typically keep a short, well-named list built from their own edits rather than large generic packs.
Why does my Lightroom preset look different on every photo?
Usually because it includes image-specific settings such as exposure or white balance, or because you built it from one unusual frame. Fix it by clicking Check None in the New Preset dialog and re-selecting only the adjustments you make to most of your images, then retest on five varied photos before trusting it.
Is there a keyboard shortcut to cycle through presets?
No built-in shortcut exists for stepping through presets in Lightroom Classic. The usual workaround is to hover the mouse over a preset, which shows a live preview in the Navigator panel, and then click the one you want. You can also assign a preset to the Quick Develop panel for faster access.
How do I export or share a Lightroom preset with someone?
Right-click the preset in the Presets panel and choose Export to save it as an .xmp file. Anyone can then install it with File, Import, Import Settings, or in Lightroom mobile through the presets menu. Export your whole library periodically as a backup, since deleting a preset from Lightroom cannot be undone.
Conclusion
Your first move is small: open one well-exposed RAW file, make the edits you would have made anyway, then click Create Preset and use Check None so only the adjustments that travel well get saved. Name it clearly, drop it in one folder, and apply it to five different photos before you believe it.
Most people who get stuck are not stuck on the button, they are stuck on deciding what belongs inside. Take the middle path, keep the list short, and refine the settings as real shooting turns up conditions your sample image never had.