Learning how to use masks in Lightroom comes down to one idea: change one part of a photo and leave the rest alone. Instead of dragging a global slider that pushes shadows, color and exposure across the entire frame, you build a selection, and every adjustment you make afterwards stays inside that selection. Most beginners get their first usable mask in about two minutes, and the whole workflow takes maybe ten minutes per photo once you’re used to it.
There is a catch worth naming up front: what the masking tools can do depends on which Lightroom you have. The desktop app, the older Lightroom Classic, and Lightroom Mobile share a name but not a feature set. This guide covers all three and flags where they differ.
Table of Contents
- What You Need to Use Masks in Lightroom
- Step-by-Step: A Complete Masking Workflow
- Create Your First Mask in Lightroom
- Use Masking to Adjust Only Selected Areas
- Refine Mask Edges for Natural Results
- Shape a Selection with Gradients
- Create More Complex Masks with AI Select Subject
- Target Colors and Brightness with Range Masks
- Save and Reuse Masks on Other Photos
- Common Mistakes That Make a Mask Look Fake
- Frequently Asked Questions
- Where do I find the masking tools in Lightroom?
- What does masking do to an image?
- How do I erase part of a mask in Lightroom?
- Why can’t I mask in Lightroom?
- Do masks work in Lightroom Mobile?
- How do I copy a mask to multiple photos in Lightroom?
- Conclusion
What You Need to Use Masks in Lightroom
You need three things: a photo open in the Develop module, the Masking panel, and a selection tool. There is no separate plugin and nothing to install.
The Masking panel lives inside the Develop module, which trips up a lot of people. It is not in the Library module, and it is not the row of sliders across the top. Press M with the cursor over the image and the masking toolbar appears under the Develop panel. In Lightroom Classic the same shortcut opens the masking tools, and the panel is a strip of icons rather than a dropdown, so the two feel different even though the job is the same.
A word on versions. The current desktop version of Lightroom builds selections with Adobe’s machine learning tools, so Select Subject, Select Sky and Object Selection are one click and usually land close to what you wanted. Lightroom Classic and Camera Raw use the older Select Subject panel, where you nudge edges with Shift Edge and feather sliders by hand. The result is the same photo, just with a different amount of cleanup. If you follow a tutorial and the buttons don’t match, that gap is usually why.
On iPad and iPhone, Lightroom Mobile has Select Subject, Select Sky and the brush, but it lacks Object Selection and the range-based masks. Brush-based add and subtract is noticeably laggy on touch screens, so plan on doing the fiddly edge work on the desktop later if you shoot on mobile.
Step-by-Step: A Complete Masking Workflow
Before you start, it helps to know which tool to reach for. The split is simple: the AI tools pick things out for you, the manual tools are ones you shape by hand, and the range tools work from the pixels.
| Mask tool | AI or manual | Best for | Weak spot |
|---|---|---|---|
| Select Subject | AI | People, pets, one main object | Hair and overlapping subjects |
| Select Sky | AI | Outdoor scenes and sky-heavy shots | Sky seen through branches or gaps |
| Object Selection | AI | Grouped objects, specific items | Desktop only, not on mobile |
| Brush | Manual | Anything the AI gets wrong | Slow, easy to overdo |
| Linear Gradient | Manual | Foregrounds, roads, edges of frame | Visible band without feather |
| Radial Gradient | Manual | Light sources, a single subject | Needs a high feather to hide |
| Color Range | Manual | One specific color in a frame | Breaks when the light changes |
| Luminance Range | Manual | Brights, darks, midtones | Desktop only, fiddly to aim |
A workable order for beginners: Select Subject, then Brush for cleanup, then Linear and Radial Gradients. Add the range tools once the first three feel routine.
Create Your First Mask in Lightroom
Open a photo, switch to the Develop module, and press M. That gives you the Masking panel with your AI tools on one side and the manual tools on the other. Pick a tool, then click or drag on the area you want to change, and the selection appears as a tinted overlay.
Start with Select Subject. Click on your main subject — a person, a dog, a car — and a mask is created instantly with a name and a pin dropped where you clicked. The overlay is your before-and-after check: everything tinted is inside the mask, everything untinted is protected.
If your subject isn’t the thing you want, or the AI grabs the wrong thing, hold Alt (Windows) or Option (Mac) as you click and Lightroom selects a different region. On the desktop app, Object Selection lets you draw a rough box or lasso around an object and it figures out the rest, which is more reliable for grouped subjects like a bouquet or a dog with a person.
Brush is the manual fallback. Choose it, set the size with the brackets, and paint directly over the area. It’s slower, and it gives you complete control, which is exactly why working photographers keep coming back to it.
What success looks like: a visible overlay covering the area you meant, with clean edges and nothing extra. If there’s no overlay at all, your mask exists but the visibility switch is off. Tap the key or the Show Mask Overlay toggle in the masking toolbar to turn it back on.
Use Masking to Adjust Only Selected Areas
Once the selection is right, everything below the mask name is a set of sliders that now apply only to that selection. This is the payoff: an exposure drop of minus 0.30 hits your subject and nothing else, while the background holds its original brightness.
Start small. Exposure around minus 0.30 and Texture plus 10 is a common combination for making a subject read as the focal point. For a sky, Dehaze plus 15 to 25 with a small Saturation nudge is plenty. For a light source, a Radial Gradient over a lamp or window with a plus 0.40 exposure and a warmer Temperature separates it from the room. The numbers vary with every photo, but keeping adjustments in that low range is what keeps the edit from looking processed.
Turn the overlay off with to see the real result. Then turn it back on and look again. If the change is invisible, push it slightly further. If you can see the mask boundary as a hard line, the problem is the edge, not the adjustment, and that’s what the next section fixes.
You can also invert a selection. The Invert checkbox under the mask name flips the mask inside out, so the adjustment applies to everything you didn’t originally select. That’s how you darken a whole background after masking the subject — build the subject, invert, drop exposure by 0.50.
Refine Mask Edges for Natural Results
Hard edges are what make a local edit look fake. The transition between selected and unselected pixels should be a gradient, not a cut, and Lightroom gives you three controls to make that happen.
Feather softens the transition between mask and background. A small amount, roughly 5 to 15 percent, stops the edge from looking cut out. Shift Edge moves the boundary inward or outward — negative values pull the mask in so the selection stops short of the object’s rim, positive values push it out so the background bleeds in. Smoothness on the newer desktop app evens out the ragged little bumps the AI leaves behind, especially around hair and fur.
For a portrait, the standard fix is a Select Subject mask, Shift Edge at about minus 10 to eat the halo, Smoothness up to around 40 to calm the flyaway hairs, and a light manual brush with Subtract to clean the shoulder line. You are not trying for a perfect cutout. You’re trying for an edge a viewer’s eye slides across without noticing.
Add, Subtract and Intersect are the three combination controls, and they apply to the whole mask rather than to a single stroke:
- Add merges a new selection into the existing mask, so the adjusted area grows.
- Subtract removes the new selection from the mask, so the adjusted area shrinks.
- Intersect keeps only the overlap between the old and new selections, which is how you carve a window inside a larger mask.
To darken just the road in a street shot: make a Linear Gradient over the road, then Add a Select Sky mask and Subtract it, leaving road and sky dark while the buildings stay bright. Two minutes of work, and no global slider comes close to that result.
Shape a Selection with Gradients
Two gradients cover most of what the other tools cannot. Linear Gradient draws a line with a drag, and everything beyond the line is selected, which is how you darken a foreground or a road without touching the middle distance. Radial Gradient draws a circle, and everything outside it is selected, so the same drag works in reverse. Either one can be flipped between outside and inside with the 0 key, or by checking the Invert box under the mask name.
Both have their own Edge panel, and it is where masks go from obvious to invisible. Set the Feather high, around 50 to 70, so the adjustment fades in gradually rather than stopping at a line. Then drag the Edge sliders to move the fade in and out, Shift to tighten it, and Reduce to bring the far end of the feather in so it doesn’t wrap around the frame. A gradient with a Feather near zero is one of the most common reasons a photo looks like it has a stripe across it.
Press D while the gradient handle is selected to delete it if you want to start again. The handles themselves are draggable, so a gradient made on the first frame can be resized on later ones without a full repaint.
Create More Complex Masks with AI Select Subject
Select Subject earns its reputation on portraits, but it struggles with a few predictable situations: fine hair against a similar-toned background, subjects that overlap each other, transparent or patterned objects, and anything where the foreground and background are the same color. When it fails it usually fails by including too much, grabbing the background, or missing a limb entirely.
Check the result before you adjust anything. Click the eye icon to see the mask without the slider changes, then zoom to 100 percent and look at the edges that matter: hair against sky, a shoulder against a wall, a hand holding something. Those are the spots people notice.
Then combine AI with manual work. Select Subject to get 90 percent of the way there, lower the mask’s Flow to zero, and use the Brush with Add or Subtract at a small size to fix the strays. Set Flow to around 20 to 40 so a single pass builds up gradually instead of depositing a hard stripe. Hold Alt or Option while brushing to switch temporarily to the opposite mode, and hold Shift to constrain a stroke to a straight line.
The same approach works for clothing. Mask the whole person with Select Subject, then use Intersect with a second brush drawn over a jacket to isolate just that garment, and lift texture or drop exposure inside it. Two selections, one mask, no layers.
Target Colors and Brightness with Range Masks
Color Range and Luminance Range are the two tools that build a selection out of the pixels themselves rather than out of clicks, and they are worth learning after you are comfortable with the basics.
Color Range works by sampling a color. Open it, set the pointer to Sample, and click on the red of a stop sign or the green of a jacket. Use Shift to add more samples and Alt to remove them, then drag the Range slider until the preview shows only the color you want. A Refine slider controls how strictly it matches, and the Feather and Smoothness sliders under the mask then soften the result. It is the fastest way to bring one specific color back to life in a frame where everything else is muted, and it is the tool that breaks most often on a batch, because the same red under different light is a different red.
Luminance Range selects by brightness, which makes it the one selection that survives a change in exposure. Set Range from Min to Max, then check Min and Max with the eyedroppers to define the tonal band you want. Targeting the brights to darken a blown sky, or the darks to lift shadows, are the classic uses. A narrower band targets midtones, which is handy when you only want to dodge a face or a rock face without touching anything else. Narrow bands are more precise and more fragile, so widen the range until the selection matches what you actually meant.
Range masks combine well with the Add, Subtract and Intersect controls. Brushing over a face and Intersecting it with a midtones luminance mask lifts the face and leaves a bright sky or a dark jacket alone. Once you start combining selections this way, remember to name the masks, because three unnamed selections in a list is a puzzle you will be solving again in a month.
One thing neither tool does well on mobile. Both Color Range and Luminance Range are desktop-only, so if you built an edit around a luminance mask you will need to redo it by hand in Lightroom Mobile.
Save and Reuse Masks on Other Photos
A refined mask on a single frame is useful. The same mask across forty frames from one shoot is what actually saves time, and this is the part most tutorials skip.
To copy a mask, select the photo with the finished mask, hold Ctrl (Windows) or Cmd (Mac), and click the copy icon at the bottom of the Masking panel — it looks like two overlapping pages. Then move to the next photo, open the panel, and click the paste icon. Every mask comes across with its pins, its edge settings and its adjustments intact.
Masks built from Select Sky, Select Subject and gradients usually travel well across a series shot from a fixed position. Color range masks are the exception that catches people out, because a mask tied to a specific red or a specific green breaks the moment the light shifts. Luminance range masks do the same thing: they’re built from brightness, so they follow a change in exposure but not a change in the scene itself. Reviewers on Reddit and the LightroomQueen community describe re-fixing color range masks on nearly every frame for exactly that reason.
Even when a pasted mask looks right, check three things on each new photo: where the edges land, whether the exposure shift still reads correctly, and whether the subject moved. Turn the overlay on for the first frame, adjust if needed, and copy the corrected version forward.
Common Mistakes That Make a Mask Look Fake
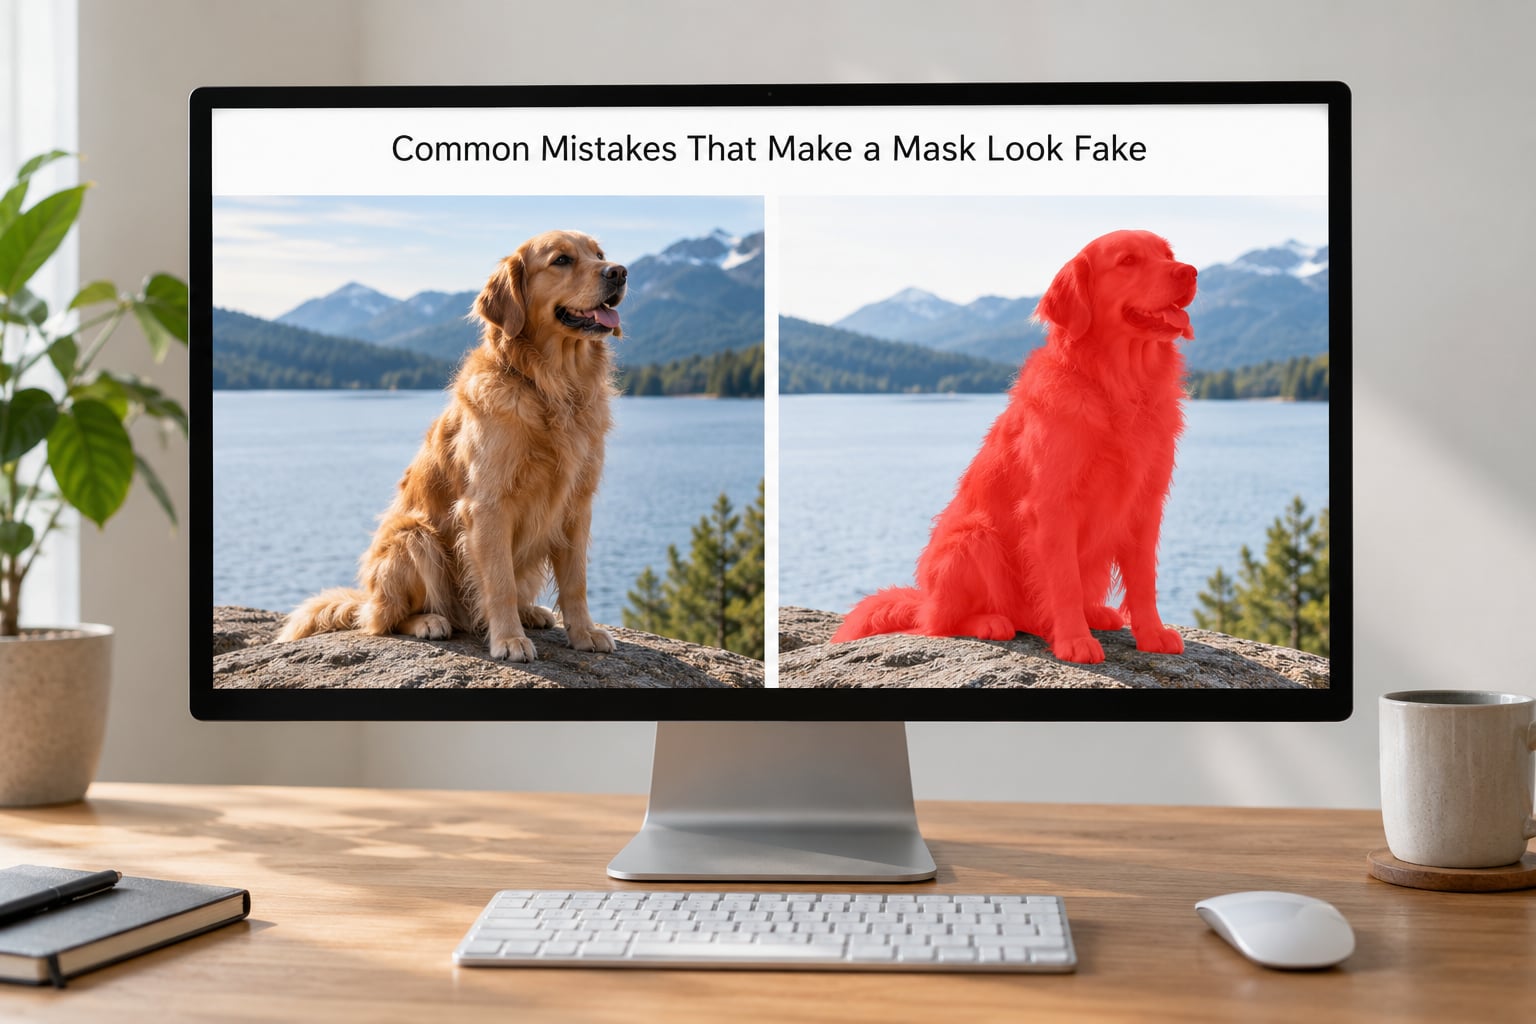
Most bad local edits come down to one of six things, and all six are quick to fix.
Painting the wrong area. The most common version is forgetting that Add is active, so you keep growing the selection when you meant to shrink it. Hold Alt or Option while you check, and watch the overlay, not the sliders.
Ignoring the overlay. You can’t judge an edge while a pink tint is covering it. Toggle the overlay off for the final look, and on again for every check before it.
Too much feathering. Feather above roughly 20 percent on a small subject blurs the boundary into the surrounding area, so your adjustment spills onto things you didn’t select. Start at 5 and raise it only as far as the edge requires.
Too little feathering. The opposite problem, and the more obvious one. A crisp edge around a person reads as a cutout every single time.
Adjustments that are too strong. A local edit should be nearly invisible on its own. If you can see it before you compare against the original, back it off. Global edits can carry more weight because they apply everywhere; a local edit applies to a small area, so it reads much louder.
Trusting an AI selection blindly. Select Subject is fast and usually close. “Usually close” is not “always right,” and the misses are the kind viewers spot instantly.
A few habits that keep you out of trouble: do your global adjustments first so you’re masking a photo you’ve already balanced, name your masks so you know what each one does six months later, work at 100 percent zoom on the edges that matter, and resist stacking more than three or four masks on one photo. If you need more than that, the fix usually belongs in Photoshop with real layers.
Frequently Asked Questions
Where do I find the masking tools in Lightroom?
The masking tools live in the Develop module, not the Library module. With a photo open, press M or click the masking icon at the right end of the Develop panel toolbar. On the current desktop version you get a dropdown of AI tools above a list of manual tools. In Lightroom Classic the same shortcut opens a strip of masking icons along the bottom. Lightroom Mobile puts the same tools under the masking icon at the bottom of the edit screen.
What does masking do to an image?
Masking applies an adjustment to one selected part of a photo and leaves the rest unchanged. A global slider darkens the whole frame every time you move it. A mask confines your change to a subject, a sky, a single color or a range of brightness, which is what lets you push one area forward and pull another back. That separation is what gives a photo depth instead of the flat, evenly processed look you get from global adjustments alone.
How do I erase part of a mask in Lightroom?
You cannot delete a mask, but you can shrink it. Select the mask in the Masking panel, click the Brush icon, and make sure the Subtract button is active rather than Add. Hold Alt on Windows or Option on Mac to flip to Subtract temporarily, then paint over the area you want to remove. On a portrait, a second pass with Select Subject and Subtract cleans up larger stray areas faster than painting them out by hand.
Why can’t I mask in Lightroom?
Most of the time it is a version difference. Lightroom Classic and Camera Raw use the older Select Subject panel instead of the one-click AI tools on the current desktop app, and Lightroom Mobile has no Object Selection or range masks. On a synced catalog, a mask can also be waiting on the cloud. Check that you are in the Develop module, that the photo is downloaded, and that your subscription includes the features your version shows. Press M to confirm the panel is opening at all.
Do masks work in Lightroom Mobile?
Yes, though with fewer tools. Lightroom Mobile supports Select Subject, Select Sky, the Brush, Linear and Radial Gradients, plus Feather and Shift Edge, and it handles the same copy and paste across photos. It does not have Object Selection, Color Range or Luminance Range. Brush-based add and subtract is also noticeably laggy on a touchscreen, so detailed edge cleanup is faster on a desktop with a mouse or tablet with a stylus.
How do I copy a mask to multiple photos in Lightroom?
Select the photo that has the mask you want, then hold Ctrl on Windows or Cmd on Mac and click the copy icon at the bottom of the Masking panel. Move to the next photo in the catalog, open the Masking panel, and click the paste icon. Every mask carries across with its edge settings and adjustments intact. Painted and AI masks usually transfer cleanly between frames, while color range masks often need small corrections because the color shifts with the light.
Conclusion
Masks turn a flat global edit into a photo with depth, and the whole process is a handful of clicks once you know where the panel lives. Press M in the Develop module, pick Select Subject or a gradient, check the overlay before you touch a single slider, and give the edge a little feather and a small Shift Edge. Then make one restrained adjustment, look at it with the overlay off, and only then decide whether it needs more.
That is the whole loop. Once it’s automatic, the masks you build on one photo are worth copying across the rest of the shoot.