To feather a light, you angle your modifier so the edge of it, not the middle, falls across your subject. The light points slightly in front of them instead of straight at them, which cuts spill onto the background and gives the face more shape. It takes about ten minutes once you know what to look for.
One thing to clear up first, because search results for this phrase are full of biscuit recipes and feather-light phone cases. In studio photography, feathering has nothing to do with actual feathers. It is a placement technique, and it works on any continuous or strobe source.
Here is the honest version up front: feathering a light does not make it softer. Most of the time it makes the light harder, and it always costs you some brightness. What you gain is control over the ratio between the light on your subject and the light on the background, which is usually the thing you actually needed to fix.
Below is the setup I use, the numbers that matter, and how to tell when you have overdone it.
Table of Contents
- What You Need to Feather a Light
- A Light Source
- A Modifier With a Defined Edge
- A Stand That Holds Position
- A Trigger or Timer
- Something to Judge the Result With
- A Subject or Test Setup
- Step-by-Step: How to Feather a Light
- Set Up the Subject and Background
- Choose a Modifier That Can Feather
- How Far Off Axis to Feather a Light
- Measure the Light and Dark Sides
- Refine the Feathered Transition
- Lock the Result and Test It
- Common Mistakes
- Expecting Feathering to Soften the Light
- Rotating Until Half the Face Goes Black
- Leaving the Subject Too Close to the Backdrop
- Feathering Every Light the Same Amount
- Forgetting the Camera Sees a Different Light Than the Subject
- Practical Habits Worth Keeping
- Frequently Asked Questions
- What angle should I feather a softbox at for portraits?
- Is feathered light softer than light pointed straight at the subject?
- Can I feather a light and still get a soft look from a single source?
- Should I feather the key light or the fill light in a two-light setup?
- How do I stop my feathered light from hitting the background?
- Conclusion: Start With a Small Feathering Test
What You Need to Feather a Light
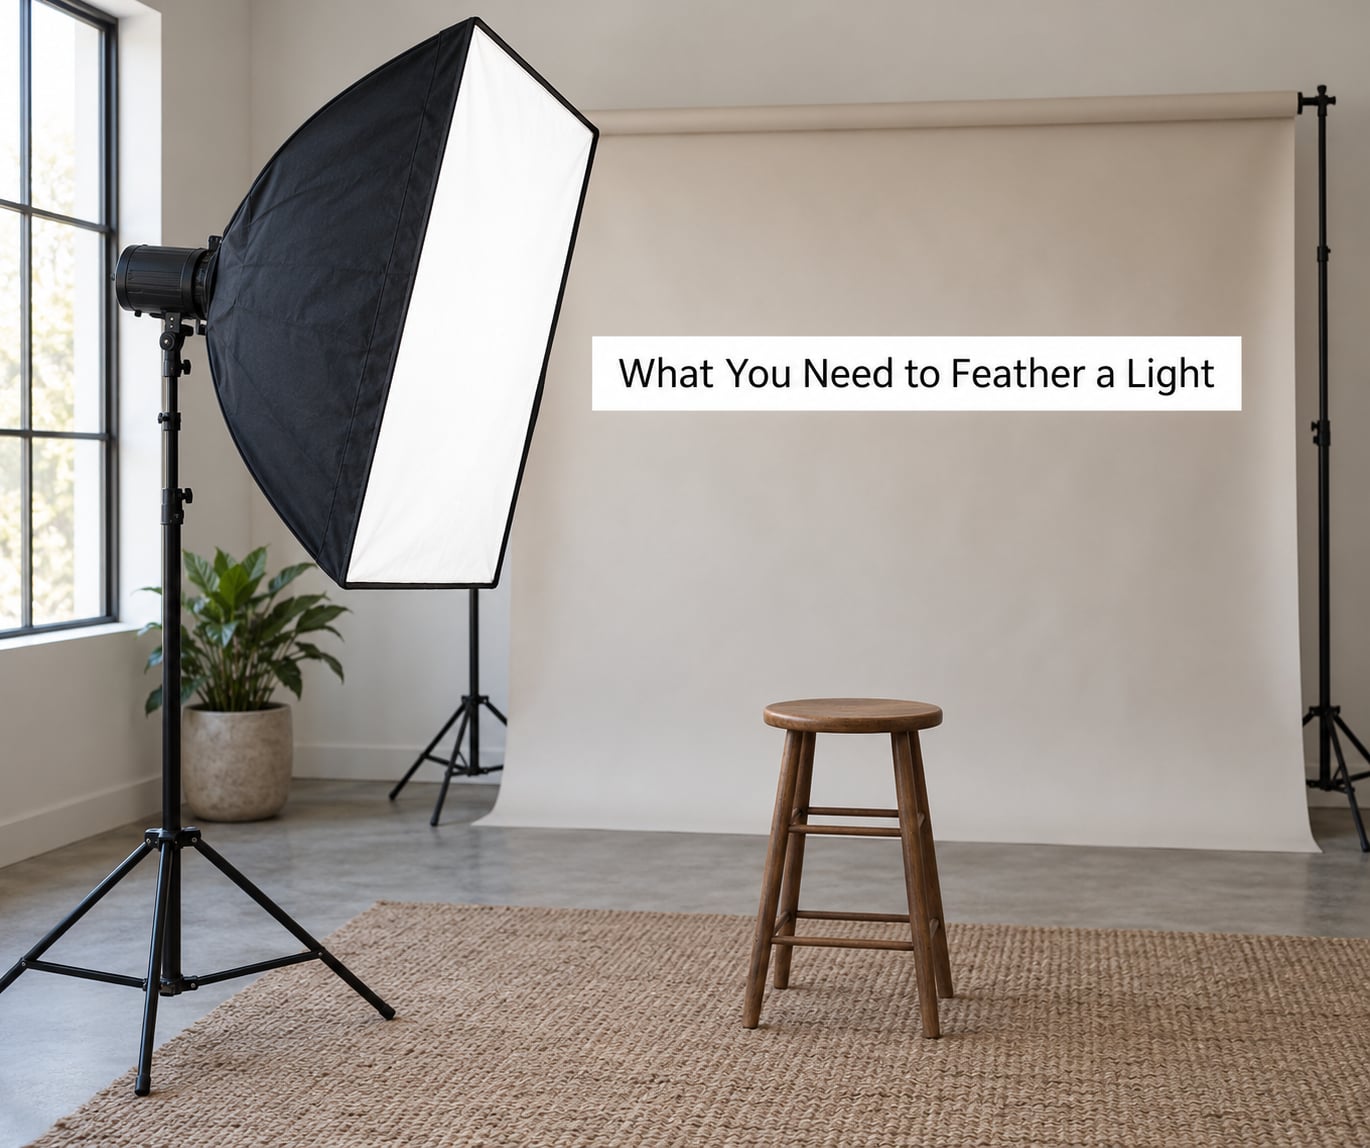
You need very little. Feathering is a placement decision, not a gear purchase.
A Light Source
Any strobe head, continuous LED panel, or off-camera flash works. Strobes give you the brightest output for the least money, which matters because feathering wastes light. Continuous panels are quieter to shoot with and behave almost identically as far as the technique goes.
A Modifier With a Defined Edge
This is the piece that actually makes feathering possible. A softbox has edges, so when you rotate it, part of it stops pointing at the subject. A bare flash head has a hotspot in the middle and falls off in every direction, so rotating it changes very little.
Rectangular softboxes feather more predictably than round ones because the long axis keeps throwing light along its length as you rotate. A round softbox is fine. It just gives you a more gradual, less predictable transition across the shoulders.
A Stand That Holds Position
Feathering is a precise angle, so the light needs to stay where you put it. A boom arm or a stand with a sandbag on the base saves you from the drift that ruins a setup mid-shoot. Once I start feathering, I touch the stand less and move the subject more.
A Trigger or Timer
Anything that fires the light off camera. You need your hands free to move the light a few degrees and retake the frame without walking over to the camera.
Something to Judge the Result With
A light meter is useful but not required. The histogram and the shadows on the backdrop tell you almost as much. A plain grey card held where your subject’s face will be is the cheapest option and gives you the most repeatable reading.
A Subject or Test Setup
Before you bring a person in, put a mannequin head or a stand-in at the mark and shoot ten frames. You learn the angle far faster on something that does not move while you reposition the light.
Step-by-Step: How to Feather a Light
Set Up the Subject and Background
Place your subject first, then the background, then the light. Working in that order keeps you from moving the backdrop twice.
Put the subject about 1.5 to 2 metres from the backdrop, or roughly 6 feet. Every step the subject moves closer to the backdrop narrows the gap your feathered light has to stay inside. When the subject is close to the paper, a feathered light will wash it out no matter how well the angle is set.
Choose a Modifier That Can Feather
Modifiers behave very differently under this technique, so pick with the edge in mind.
- Softbox: The most predictable option. Clear edges mean a clear cut-off across the face, and rectangular shapes keep light consistent along their length.
- Shoot-through umbrella: Feathers poorly. The light comes off the whole canopy at once, so rotating it mostly shifts the shadow direction rather than the transition width. It still helps with background spill, just less predictably.
- Beauty dish: Feathers, but the effect is subtle. You get a small cut-off and a stronger specular hit on the skin, which some people love and others find unflattering.
- Bare flash head: Almost no feathering available. The centre hotspot keeps hitting the subject regardless of angle. Grid it or leave it.
- Barn doors: Work like a flag on the back of the source, which is a related tool with a different job.
The simple test is whether the modifier has a hard boundary. If you can point at where its light ends, you can feather it.
How Far Off Axis to Feather a Light
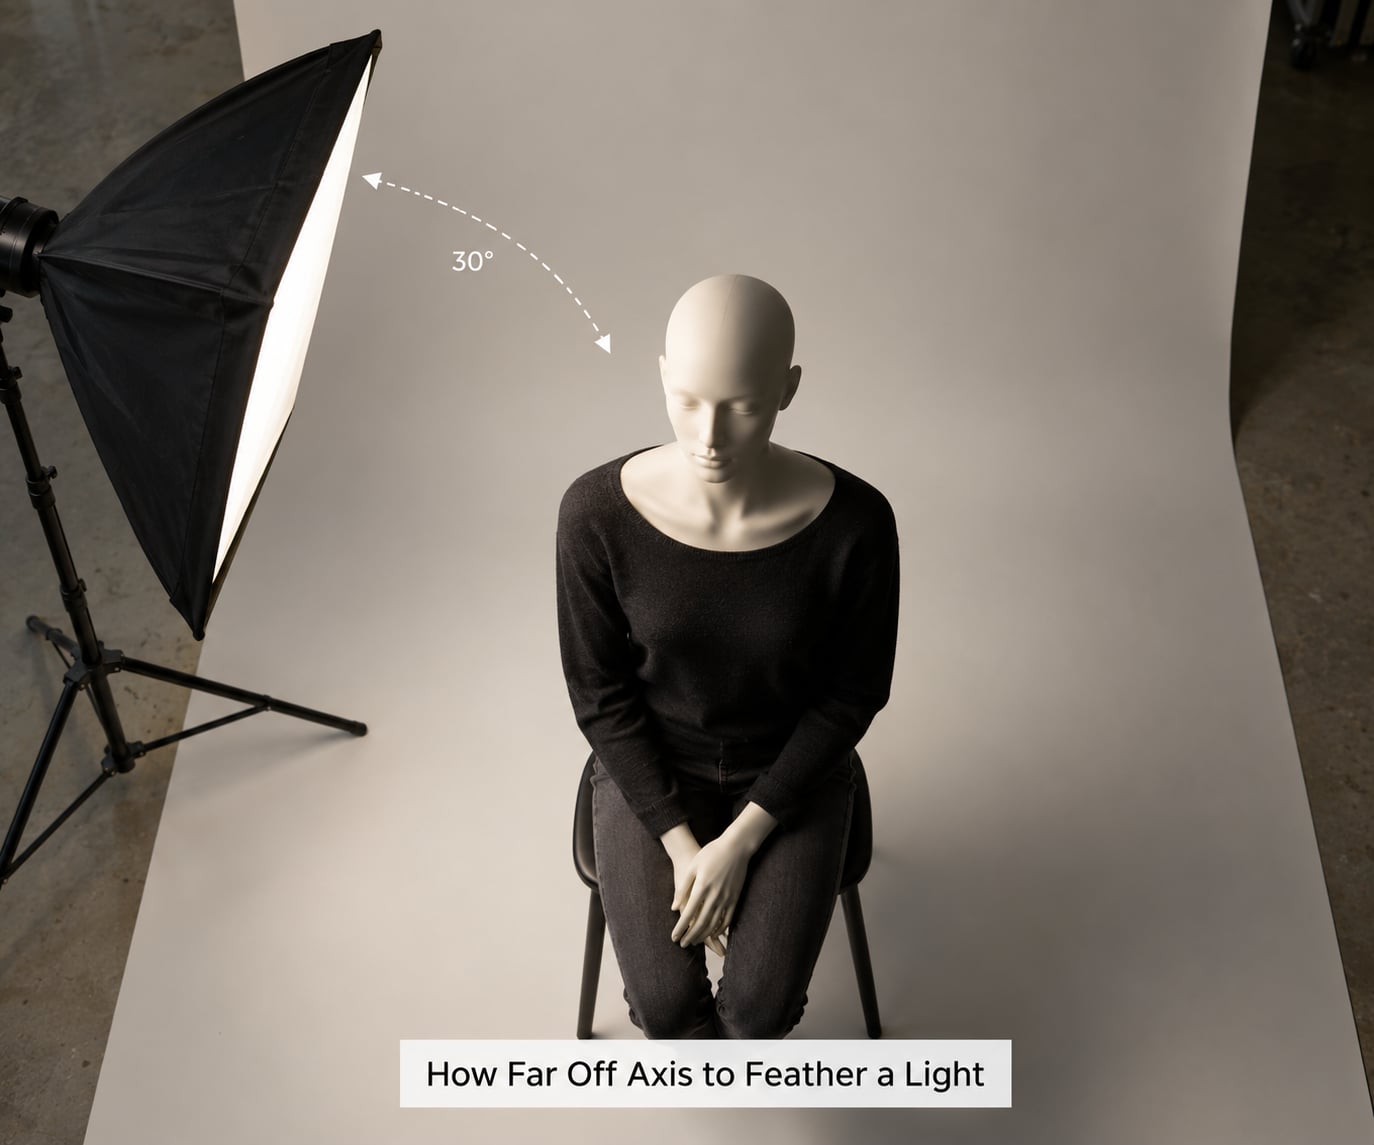
Start at 30 degrees off axis and adjust from there. Thirty degrees is shallow enough to keep the face evenly lit while pulling the beam clear of the backdrop.
Measure from the camera’s point of view, not the subject’s. The useful reference is the line between the subject’s nose and the camera. Aim the centre of the softbox just in front of that line, so the far edge of the softbox lands on the far side of their face.
That placement is the one most tutorials call the L position. The bottom of the modifier sits near the subject’s jaw on the near side, and the back of the modifier extends forward past the face on the far side. Picture an L drawn from above, with the long leg running past the subject.
Push past 30 degrees and the transition narrows fast. Between 45 and 60 degrees the shadow edge on the far side of the face becomes crisp, and you have a proper Rembrandt-style shape. Beyond about 70 degrees you are usually better off using the light as a rim or backlight instead of a key.
Measure the Light and Dark Sides
This is the step that decides everything, and most people skip it. Meter both sides of the face, not just the lit one.
Aim your meter at the cheek on the camera side and note the reading. Then aim at the cheek on the shadow side. A difference of about one stop is a classic ratio and reads as natural. Two stops is dramatic and works well for moody portraits. Three stops or more is a lighting effect, not a portrait, unless that is what you are going for.
Check the backdrop at the same time, using the same settings. If your key light is at f/8 and the backdrop reads two stops under it, the subject separates cleanly. If the backdrop reads the same as the lit cheek, your feather is not doing anything yet.
If you do not have a meter, look at the histogram. A well-feathered setup shows the backdrop clustered well down in the shadows while the lit cheek sits near the middle grey.
Refine the Feathered Transition
Small adjustments give you the most control. Rotate the light by five degrees at a time and reshoot, rather than making one big move.
Moving the light further off axis narrows the shadow edge and increases contrast. Moving the light closer to the subject increases the ratio of the softbox to the head, which softens the transition on the shadow side. Moving it further away and keeping the power up does the same thing on the light side.
Watch three things as you adjust: the shadow edge on the nose, the catchlight shape, and the edge of spill on the backdrop. If the catchlight is a hard-edged rectangle sitting near the edge of the pupil, you have turned the light too far. Move it back toward the camera until the catchlight softens.
You will also lose brightness as you rotate. Most modifiers throw a large share of their output past the subject. Compensate in this order: add power first, open the aperture second, raise ISO last. Opening the aperture costs depth of field, so treat it as the last resort when the background needs to stay sharp for a product shot.
Lock the Result and Test It
Write the setup down before you move anything. Note the light’s distance from the subject, the off-axis angle, the power setting, and the camera settings.
Then test it at different exposures. Shoot the same frame at your working aperture, at one stop over, and at one stop under. Feathered light shifts as brightness changes, because the shadow edge is a ratio rather than an absolute value. A setup that looks balanced at f/5.6 can look harsh at f/2.8.
Repeat the setup the next session with the mannequin and the notes before you bring a person in. That check takes two minutes and saves an hour of a model sitting under lights that are not quite right.
Common Mistakes
Expecting Feathering to Soften the Light
This is the most common one. Feathering reduces the portion of the source your subject actually sees, so the effective source gets smaller and the shadows get harder. If you want softness, move the light closer to your subject or use a larger modifier. Those two actions do what people wrongly expect feathering to do.
Rotating Until Half the Face Goes Black
Past about 60 degrees you lose more light than the technique is worth. If the shadow side drops three stops or more, dial the light back toward the camera until the ratio reads closer to two stops.
Leaving the Subject Too Close to the Backdrop
Feathering cannot fix a subject pressed against the paper. Give yourself a metre or two of separation and the spill misses the backdrop entirely.
Feathering Every Light the Same Amount
In a two-light setup, feather the key lightly, around 20 to 30 degrees, so the face stays open. Feather the fill much harder, or turn it down further, because fill light already sits near the camera axis and needs less shaping. A hair or kicker light can be feathered hard, or pointed almost straight at the subject, because its job is the edge it puts on the shoulder rather than the face.
Forgetting the Camera Sees a Different Light Than the Subject
You judge the face by looking at it. The camera judges it from its own position, and the shadow edge you are admiring on the shadow side may sit behind the nose from that angle. Always check the frame, not the face.
Practical Habits Worth Keeping
- Shoot a test frame every time you touch the stand. Guessing from memory does not work.
- Feather window light the same way, by having your subject stand just outside the brightest part of the window rather than facing it square.
- An off-camera flash feathers identically to a strobe. The technique is about position, not the light source.
- Mark the stand’s height and position on the floor with tape so you can rebuild the setup in seconds.
- Use flags when the spill is small, a grid when you need the light to travel further, and feathering when you want the transition itself to change.
The last one matters because people use the four tools interchangeably. Flagging blocks spill with a physical black surface outside the light. A gobo cuts a shaped pattern of light through the beam. A grid narrows the beam. Feathering rotates the source so its own edge does the cutting. If you need a beam that simply stops, a flag or grid is faster and more predictable than rotating anything.
Frequently Asked Questions
What angle should I feather a softbox at for portraits?
Start at 30 degrees off axis, measured from the line between the subject’s nose and the camera. Aim the centre of the softbox just in front of that line so its far edge falls on the far side of the face. Move to 45 or 60 degrees for a more dramatic shape, and back off before 70 degrees unless you are using the light as a rim.
Is feathered light softer than light pointed straight at the subject?
Usually not. Rotating a modifier reduces the part of the source your subject actually sees, so the effective source gets smaller and the shadow edge gets tighter. Feathering buys you background separation, contrast and shape, not softness. To soften the light, move the modifier closer to the subject or use a larger one.
Can I feather a light and still get a soft look from a single source?
Yes, but the softness has to come from somewhere else. Keep a large modifier close to the subject for a big apparent source, then feather it gently at around 20 degrees. The small rotation gives you a cleaner background and a little more shape while the close distance keeps the shadows soft. Heavy feathering and soft light work against each other.
Should I feather the key light or the fill light in a two-light setup?
Feather both, by different amounts. Feather the key light lightly, roughly 20 to 30 degrees, so the face stays open. Feather the fill harder or reduce its power, since fill already sits close to the camera axis and needs less shaping. A hair or kicker light can be feathered hard because its job is the edge it puts on the shoulder.
How do I stop my feathered light from hitting the background?
Give the subject more distance from the backdrop, roughly 1.5 to 2 metres, and feather the light further off axis. If the spill still lands on the paper, add a flag or barn doors on the back of the source. A grid is the better tool when you need the light to throw further without spreading, such as on a face in front of a distant background.
Conclusion: Start With a Small Feathering Test
Set up one light on a stand, put your subject 1.5 to 2 metres off the backdrop, and rotate the modifier until its edge falls across the face at about 30 degrees. Take one frame, then meter the lit cheek and the shadow cheek. The gap between those two readings tells you everything about whether the feather is right, and it costs you five minutes.
Keep the modifier close to your subject if you want soft shadows, add power or open up when you need the brightness back, and remember that feathering makes light harder rather than softer. Once you can read that two-sided ratio in your histogram, placing two or three lights becomes a lot less guesswork.