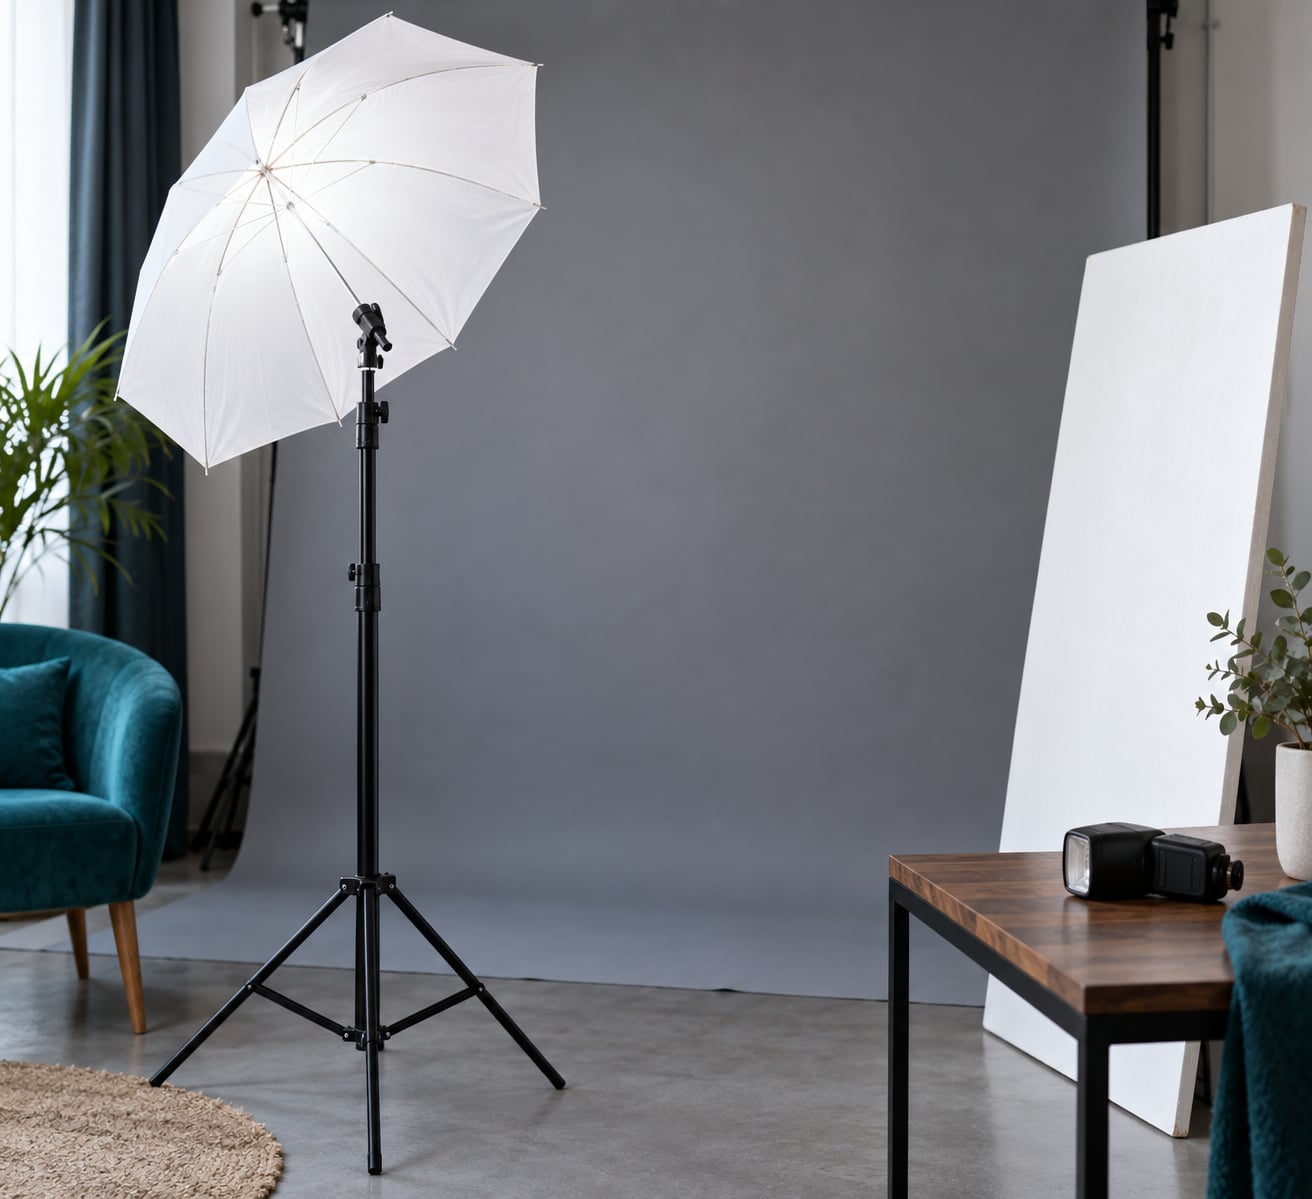
A photography umbrella is a light modifier that mounts on a stand in front of a speedlight or strobe. You aim the flash into it, and the umbrella turns that small, harsh source into something much larger and softer. That is the whole trick, and it is why one cheap umbrella beats bare flash for most portrait work.
Before we get into it, a note on search confusion: this is not about patio or table umbrellas. If you typed the query and half the results were furniture, you are in the right place now. A photography umbrella is also not much like the golf umbrella in your closet, though you can convert one in about five minutes.
Learning how to use an umbrella for lighting takes about ten minutes to set up and a few sessions to make instinctive. I have shot entire portraits with a single speedlight, one 33-inch umbrella, and a white foam core board, and the results beat most multi-light setups I have watched other photographers build.
Table of Contents
- What You Need
- How to Use an Umbrella for Lighting: Step-by-Step
- Choose the Umbrella and Light
- Set Up the Umbrella and Reflected Light
- Position the Subject Relative to the Light
- Test, Meter, and Fine-Tune the Portrait
- Common Mistakes
- Frequently Asked Questions
- Should the umbrella point toward the subject or away from the subject?
- What is the best umbrella for portrait photography?
- How far should the subject stand from an umbrella light?
- Can I use an umbrella without a flash or studio light?
- How do I control reflections and shadows with an umbrella?
- Conclusion
What You Need
Here is the honest minimum. You can get a usable portrait out of the first four items, and everything after that solves a specific headache.
- An umbrella. Shoot-through, reflective, or convertible. If you are buying one thing, get a 36 to 42 inch convertible with a black outer shell.
- A light source. A speedlight is the cheapest start. A small studio strobe gives you more power, a faster recycle time, and a modelling lamp you can actually see by.
- A light stand. Any sturdy stand with a tilt head (called a tilthead) on top. The tilt is what lets you angle the umbrella instead of pointing it straight at the subject.
- A trigger. If you are off-camera, you need a radio trigger or the optical sensor on the camera. Manual full-power flash works if you do not have one, but it is exhausting.
- A reflector or bounce. White foam core, a collapsible reflector, even a sheet of white poster board. This fills the shadow side so the contrast ratio drops into a flattering range.
- A sandbag. Non-negotiable outdoors. An umbrella on a stand is a sail, and stands tip.
The terms below come up constantly, and half the confusion on photography forums is people searching for gear by the wrong name. Get these straight and the rest of the process gets easy.
- Shoot-through umbrella
- A translucent white umbrella where the flash fires through the fabric and the light exits the front. Softest and most forgiving, but it eats power and can leave a hotspot on shiny surfaces.
- Reflective umbrella
- A silver, white, or gold lined umbrella where the flash fires into the back and bounces off the interior toward the subject. More efficient and better contained by the black outer shell, a touch harder than shoot-through.
- Convertible umbrella
- Removable or movable centre panel, so one umbrella does shoot-through, reflective, and bare-bulb. Most beginners should buy this.
- Crash umbrella
- A small shoot-through umbrella on a short bracket, used close to the subject for food, beauty and detail work.
- Feathering
- Rotating the umbrella until the light wraps around the subject and falls off into the background instead of blasting it. This is how you get separation without a second light.
You can skip the shopping entirely and convert what you own. A standard household umbrella becomes a reflective modifier in about five minutes: open it, tape a sheet of aluminium foil to each interior panel with gaffer tape or duct tape, leave a small gap at the centre so the shaft fits through, and tape a black bin bag over the exterior. It will not be prettier than a bought one and it behaves the same way. This is the cheapest way to find out whether you actually enjoy off-camera light before committing to a modifier collection.
Before you mount anything, two safety notes. If you use a modelling lamp or a high-powered strobe, never look into the front of the flash head, and keep the head clear of the umbrella fabric when packing away, because hot heads and melty nylon are an unpleasant combination. Outdoors, weigh the base of the stand no matter how calm the forecast looks.
How to Use an Umbrella for Lighting: Step-by-Step
The whole process takes about ten minutes once you have done it a few times. Here is the sequence, in the order that saves you the most time: umbrella choice, physical assembly, subject position, then metering.
Choose the Umbrella and Light
Start with a shoot-through or white reflective umbrella for portraits, and match it to a light that is bright enough to fill a normal room. Shoot-through fabric is translucent, so the flash fires through it and the light comes out facing the subject from a wide, even source. Reflective umbrellas bounce the flash off an interior lining, which is more efficient but slightly harder because the source is a curved mirror rather than a diffuser.
The finish inside the umbrella changes the look more than most people expect. This is the comparison that matters when you pick one:
| Finish | Softness | Contrast | Colour effect | Best for |
|---|---|---|---|---|
| Translucent white (shoot-through) | Softest | Low | Neutral, no cast | Beauty work, close-range portraits, beginners |
| White reflective | Medium-soft | Low to medium | Neutral, slightly warm | Everyday portraits and groups |
| Silver reflective | Medium, harder than white | Medium | Neutral to cool | Adding punch or separating from background |
| Gold reflective | Medium | Medium | Noticeably warm, adds glow | Deliberate warm looks, tanned skin tones |
| Zebra (half silver, half gold) | Medium | Medium | Split warmth, tricky to balance | Experienced shooters only |
| Blue-lined | Medium | Medium | Cool blue cast | Editorial and stylised colour |
For size, most portrait shooters land somewhere between 33 and 42 inches. Smaller umbrellas are easier to get close to the subject, and closeness matters more than diameter. Larger umbrellas make softer light but need a bigger room and a stronger light to punch through.
On the light side, match brightness to distance using the inverse square law in plain terms: double the distance, and you need roughly four times the power. A speedlight in a small room is genuinely fine. In a bright room, a window, or outdoors, you will want a strobe.
Set Up the Umbrella and Reflected Light
Assemble in this order. First, mount the umbrella into the tilthead. Most tiltheads have a small shaft hole and a thumbscrew on the side: push the umbrella shaft through until the shaft tip sits just below the screw, then tighten. If your model has no centre shaft at all, the bracket uses the handle and a spring instead, and it mounts at the bottom of the stand instead. Check which type you have before you start cranking screws.
Next, insert the light. For a reflective umbrella, the flash head goes inside, aimed at the middle of the canopy, close to the centre panel. Push it in far enough that the head is shaded by the fabric from the subject’s viewpoint, which is what kills stray flare. For a shoot-through umbrella, the head goes inside too, but the light exits the front, so orient the head straight down the shaft.
For a speedlight specifically, slide it into the tilthead bracket first with the head pointed wherever the tilt knob allows, then slide the umbrella onto the speedlight’s small bracket arm. Keep the shaft pushed all the way in for softer light. Sliding the shaft down narrows the apparent source and hardens the result, which is a useful adjustment once you know what you are looking at.
Set the stand height so the centre of the umbrella sits roughly level with the top of your subject’s head, and angle the canopy down toward them. That small downward tilt is what fills eye sockets and under-chins, and it is the single most common difference between a flat, uninspired portrait and a flattering one.
Hang the sandbag on the base of the stand, on the side opposite the direction the umbrella is leaning.
Position the Subject Relative to the Light
Angle the umbrella 30 to 45 degrees from the camera axis, not straight at the lens. Straight-on flattens the face and makes the catchlights sit symmetrically like headlights. Off-axis one side gives the nose a small shadow, which reads as depth.
For distance, the useful rule is that the closer the modifier sits to the subject, the softer the light, even if the umbrella is small. This trips people up because they are used to thinking bigger modifier equals softer, and they assume a small umbrella close in is a compromise. It is not. A 33-inch shoot-through umbrella about three feet from your subject gives noticeably softer light than the same umbrella at six feet.
Light falloff follows from that distance. At three feet you get fast falloff and visible darkening on the far side of the face, which is flattering. At eight feet the light wraps further and the contrast flattens out, which is also useful when you want even skin. Adjust distance to set contrast, not just softness.
To control the background, feather the umbrella. Rotate the canopy so the axis of the light misses the backdrop and the subject stays lit. You can usually see this on the background before the subject, so check it as you rotate.
Place a white reflector on the shadow side, below the subject’s chin level, angled back toward the umbrella. You are looking for a small catchlight in each eye and roughly a three-to-one contrast ratio between the lit and shadow sides of the face. If the reflector reads as a hotspot on the cheek, move it further out and further back.
Users on r/AskPhotography ask this angle question constantly, and the consistent answer is to stop thinking of the umbrella as a lamp pointed at a person. Think of it as a window. A window does not stare at you; it sits off to one side and lights everything at once, and that is exactly the effect you are after.
Test, Meter, and Fine-Tune the Portrait
Turn on the modelling lamp, or take a test frame with the flash at full power. Check three things before you commit.
First, the histogram. Expose for the skin, not the background. For a basic start, set ISO 100, 1/200 second as your sync speed, and the widest aperture that still gives you enough depth, which is usually somewhere around f/4 to f/5.6. Then adjust the flash or strobe output, not the aperture, unless you need to change depth of field.
Second, the catchlights. Look for a small, round highlight near the top of each eye, positioned toward the side the umbrella is on. Square highlights mean a softbox or scrim; rectangular highlights mean you are pointing at a window, not an umbrella.
Third, the background. If the umbrella is hitting the backdrop, feather it. If the subject is dropping off too fast into darkness, move the light closer, add a reflector, or add a second low-power flash aimed at the background.
Expect shoot-through umbrellas to cost you power compared with a softbox, often a stop or two, and set your flash accordingly. If your frame is underexposed and you are tempted to raise ISO first, try the flash output first, because noise is much harder to remove later.
One last diagnostic: shoot a white sheet of paper or a grey card where the subject stands, then look at the falloff across it. An even sweep means your setup is right. A bright band in the middle of a reflective surface means you have a hotspot, which is a shoot-through problem.
Common Mistakes
Nearly every umbrella problem I have seen traced back to one of these seven. The first four fix themselves the moment you know what is causing them.
| Problem | What is causing it | Fix |
|---|---|---|
| Hotspot on the subject | Light concentrates at the centre of a shoot-through umbrella, strongest on glossy surfaces | Move the subject further from the umbrella, switch to a reflective umbrella, or add a diffusion layer |
| Light spilling on the background | Umbrella is aimed past the subject, and umbrellas have no flags or grids | Feather the umbrella, move the subject away from the backdrop, or add a small flag to the stand |
| Light leaking around the rim | Black outer shell is worn, or you are using a shoot-through umbrella with no backing | Keep the reflective umbrella’s black exterior, or gaff-tape black card to the outside of a shoot-through |
| Uneven illumination across the face | Light is too close, so falloff is too steep for the framing | Move the light further back, or raise the umbrella and tilt it down more |
| Hard, ugly shadows under the chin | Umbrella is too high, or there is no reflector on the shadow side | Lower the centre to head height, add white fill below chin level |
| Stand tipping over outdoors | Umbrella catches wind like a sail | Sandbag the base, angle the umbrella down, work close to a wall if you can |
| Odd colour cast in mixed light | Different umbrella finishes mix warm and cool light in one frame | Stick to one finish per frame, or correct white balance on a grey card |
The hotspot problem deserves extra attention because it catches out beginners badly. Shoot-through umbrellas put a bright pool of light at the centre of the frame, and on anything reflective, that pool shows up as an obvious circle. Real estate photographers running r/RealEstatePhotography hit this constantly on wood floors, glass, and glossy kitchen surfaces. Move further back or switch to a reflective umbrella and the problem mostly disappears.
Low ceilings are the other recurring complaint. If you cannot get the umbrella close enough to the subject to make the light soft, you have three options: skip the umbrella and bounce a bare flash off the ceiling, move the subject to the wall furthest from the window and shoot a frame with off-camera flash at close range, or forget the modifier and use a reflector as your key.
Low-cost bounces work surprisingly well. A strip of white foam core about four feet long, propped beside the camera at eye level, handles most of what a fill light does. It also never tips over, never needs a trigger, and fits in a backpack.
And when you feel the pull of a softbox, resist it for now. Professionals reach for softboxes when they need control over spill and direction, which is a commercial problem, not a learning problem. The community consensus in the photography forums is that an umbrella is the cheapest way to get soft light, and it stays true.
Frequently Asked Questions
Should the umbrella point toward the subject or away from the subject?
A reflective umbrella points at the subject, because the flash fires into the back and the light bounces off the interior to land on them. A shoot-through umbrella points at the subject too, but the light passes through the translucent fabric rather than bouncing. What should point away from the subject is the axis of the light in a feathering setup, where you rotate the umbrella so it lights the subject without hitting the backdrop. In short: umbrella toward the subject, always, unless you are deliberately feathering.
What is the best umbrella for portrait photography?
A 36 to 42 inch convertible shoot-through umbrella with a black outer shell is the best all-round choice for most portrait photographers. Convertible means you can remove the centre panel and use it as a reflective umbrella, shoot through it, or run it bare for harder light. Black backing keeps spill off the background, which a plain patio-style umbrella with a white exterior cannot do. If you only photograph one type of subject, go shoot-through for beauty work and reflective white for groups and mixed ages.
How far should the subject stand from an umbrella light?
Three to five feet works for most portraits, and the closer rule beats the bigger rule. Moving a 33-inch umbrella from six feet to three feet softens the light noticeably because the apparent size of the source relative to your subject grows. Closer also means faster falloff, which adds a gentle shadow on the far side of the face. Start at four feet, take a test frame, then move the light in or out until the contrast looks the way you want.
Can I use an umbrella without a flash or studio light?
You can, but the umbrella will only give you soft light if something inside it is bright enough to push through the fabric. A strong lamp with a diffuser panel works in a pinch, and window light bounced into a reflective umbrella is a genuine option on an overcast day. What will not work is expecting an empty umbrella to create light. If you are just starting out and want to know how to use an umbrella for lighting without buying a strobe, a speedlight and a small stand is still the cheapest complete setup.
How do I control reflections and shadows with an umbrella?
Two moves handle most of it. First, control the highlight on the subject by keeping reflective surfaces away from the centre of a shoot-through umbrella, or by switching to a reflective umbrella, which spreads the centre pool out. Second, control the shadow side with white fill: a foam core board or reflector placed below chin level on the side away from the light. You are aiming for a small catchlight in each eye and a three-to-one ratio between lit and shadow skin.
Conclusion
Start with the cheapest useful thing: one shoot-through or reflective umbrella, one speedlight, one light stand, and a sheet of white foam core. Mount the umbrella, set the centre at head height, push it to about four feet away, angle it 45 degrees off camera, put white fill on the shadow side, and take a test frame.
That positioning rule is the whole lesson. Off-axis, close, slightly above, and filled. Once those four are second nature, the rest is exposure, and you have already covered the fundamentals of how to use an umbrella for lighting without spending more than a beginner needs to.
This guide was checked against current gear practice in 2026, and the fundamentals it covers have not moved in a decade. Go make the ugly test frame. The tenth one will surprise you.