
The fastest way to organize photos in Lightroom catalogs is to split the job in two: let your folders on disk hold only the facts that never change, mostly when you shot the photo, and let keywords, ratings, collections, and Smart Collections hold everything you interpret later. Use one master Lightroom Classic catalog for the whole archive rather than a new one per shoot, and never move or rename photo folders in Finder — do that inside Lightroom or you break the catalog’s link to your originals. This guide covers both a clean setup and a rescue plan for a library that is already a mess.
Those two ideas solve most of the confusion in the Lightroom forums, where the same question keeps resurfacing: should I organize by folder, by project, or by catalog? The answer is that each layer has one job, and mixing them is what turns a library into a maze.
Table of Contents
- What You Need
- Step-by-Step: How to Organize Photos in Lightroom Catalogs
- 1. Decide What Your Catalog System Must Support
- 2. Create a Predictable Folder Structure
- 3. Back Up the Catalog and Original Files
- 4. Use Collections for Working Sets
- 5. Apply Keywords and Metadata Consistently
- 6. Add Ratings, Color Labels, and Flags
- 7. Create Smart Collections for Repeat Searches
- 8. Test, Export, and Maintain the System
- Common Mistakes
- Frequently Asked Questions
- Should I use folders or collections in Lightroom?
- Does a Lightroom catalog contain my original photos?
- How do I reorganize photos in an existing Lightroom catalog?
- What is the best folder structure for Lightroom?
- How do I move photos between Lightroom catalogs without losing metadata?
- How often should I back up my Lightroom catalog?
- Conclusion
What You Need
A Lightroom catalog cannot organize files you cannot reliably open. Before touching the Library module, sort out storage and backup. Once those are stable, the organizing itself takes maybe an hour for a fresh setup, and most of an afternoon for a rescue.
Here is the short version of the prerequisites:
- Fast, stable storage for the catalog file. The active .lrcat belongs on your computer’s internal drive, not a card reader or a network share that might not be mounted when you open the app.
- A real backup of your original files. Two copies on two drives, one of them somewhere else. Organizing is not backing up, and a tidy library on a failing disk is still gone.
- A naming decision for your catalog files. Something like
StongMaster-2026.lrcatso you can tell several apart when you are three years from now. - A basic grasp of the four organizational layers and which one answers which question.
That last point is where most tutorials get muddy, so here it is in one table. Folders mirror your disk. Collections are your own saved groups. Smart Collections are saved search rules. Metadata is the information attached to each photo.
| Layer | What it holds | Good for |
|---|---|---|
| Folders | A mirror of the folder structure on your drive | Finding files again in Finder or Bridge |
| Collections | Manual groups of photos you drag in | Working sets, client proofing, a current edit |
| Smart Collections | Rule sets that fill themselves automatically | Repeat searches you would otherwise type every time |
| Metadata | Title, caption, rating, flag, color label, keywords, GPS | Anything that might change or mean two things |
One more thing to settle before you start: which version you are using. This guide is written for Adobe Lightroom Classic, where the catalog is a file on your drive and the photos stay where you put them. Lightroom (the cloud app) stores originals in the cloud and syncs Smart Previews to your devices, so the file-management half of this workflow does not apply there at all. Check the title bar before you follow any menu path below.
Step-by-Step: How to Organize Photos in Lightroom Catalogs
Here is the workflow in order. It starts with deciding what the system has to do for you, then builds the folder backbone, layers metadata on top, and ends with a maintenance routine. Each step has something you can check to know it worked.
1. Decide What Your Catalog System Must Support
Write down the three jobs your library has to do before you open any panel. Most people need some mix of culling a shoot, delivering images to a client, and finding a specific photograph again years later. A hobbyist might only need the third. A wedding photographer needs all three, on a deadline.
Then pick one organizing axis for the disk. Date is the one I would recommend, because a shoot always happens on a day and a day never changes meaning. Client or project feels tidier on day one, then falls apart the moment one client has three separate bookings, a project spans two years, or you decide to stop working with someone.
You worked it out if you can say, in one sentence, where you will look for last Tuesday’s photos without opening Lightroom. Mine is: I open the Folders panel, click the year, click the month, and I am there.
2. Create a Predictable Folder Structure
Build the hierarchy on your drive first, then import. Lightroom mirrors whatever it finds, so a tidy disk becomes a tidy Folders panel with no extra work. Here is the tree I use, and it has not needed changing in years:
Photos/
  2019/
    01-January/
      HarborShoot/
        RAW/
        Export/
  2020/
    02-February/
      ...
  Lightroom/
    StongMaster-2026.lrcat
  Backup/
    Catalog/
    Sidecars/
Two details matter more than they look. First, use numeric prefixes on your month folders. Alphabetically, “April” sorts before “August” and “March” before “May,” so a plain month name scrambles your archive; “01-January” through “12-December” fixes the order. Second, keep RAW files and exports in separate subfolders inside the shoot, so an export never overwrites an original and never gets imported twice by accident.
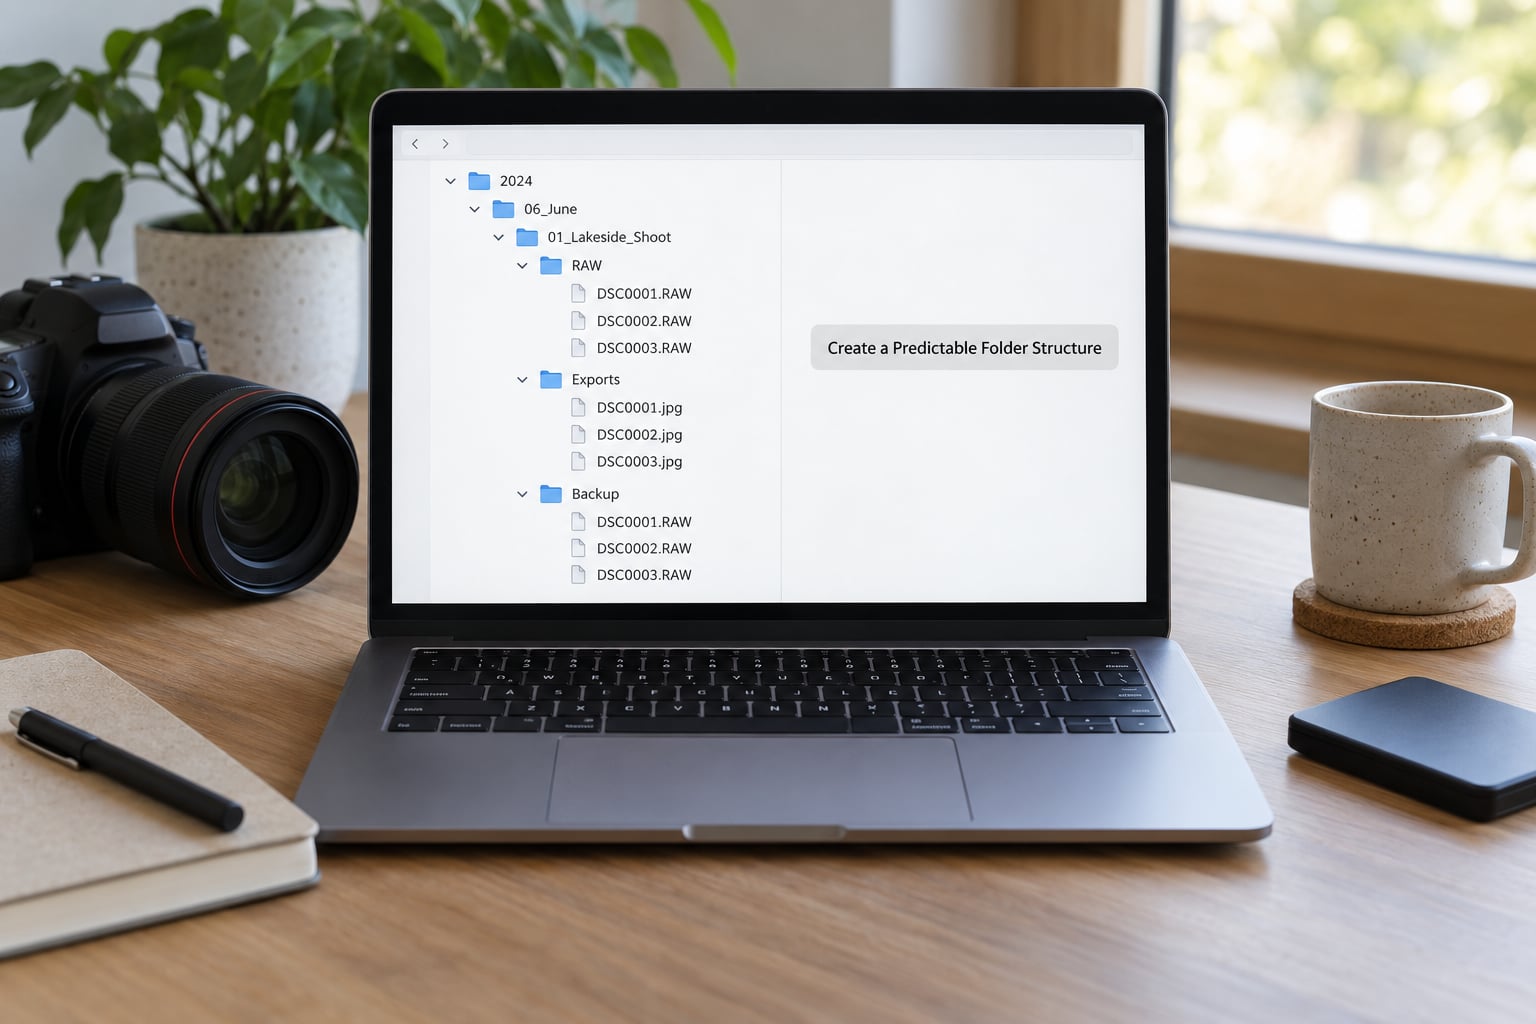
Keep the active catalog in its own folder, not buried inside your photos. When you upgrade machines or need to reinstall, having one obvious place to copy the .lrcat from saves an hour of hunting.
Check: open the Folders panel in the Library module and confirm your tree looks the way Finder does. If the two do not match, something was renamed outside Lightroom at some point, which brings us to the warning that matters most.
Never move, rename, or delete photo folders in Finder or File Explorer. Do it inside Lightroom’s Folders panel by dragging, or with the right-click Relocate command. The catalog stores the path to every photo. Change the path behind its back and those images show up with a question mark, and Lightroom cannot edit what it cannot find. This is the single most common way people break a working library, and it is entirely avoidable.
3. Back Up the Catalog and Original Files
Organization is not a backup. A catalog can be beautifully structured and still vanish with a failing drive, because the catalog only holds the instructions, not the pictures.
Think about what you own, and where each piece of evidence lives:
- Your RAW files. These are the photographs. Two copies minimum, one of them off-site.
- The .lrcat file. This holds every rating, keyword, collection, and non-destructive edit you have ever made. Back it up daily, or turn on the automatic catalog backup in Preferences.
- Your sidecar files. With Metadata set to Write sidecar XMP, your keywords and develop settings live in small .xmp files next to each image, and your camera raw settings in .acr files. Those are the only reason your archive stays readable if you ever stop using Lightroom, so include them in the same backup job as the images.
The standard advice is three copies, on two kinds of media, one of them off-site. For a multi-terabyte archive, that usually means a local NAS for the working copy, a rolling cloud backup for recent shoots, and a cold copy for the old years.
Test it rather than assuming. Once a month, open a few RAW files from the backup, not the working drive, and check that your ratings and keywords are there. A backup you have never restored from is a hope, not a plan.
4. Use Collections for Working Sets
Collections are where your brain lives. A collection is a set of references to photos, not a copy and not a move — the underlying files stay exactly where they are, and a photo can sit in as many collections as you like. That makes them the right tool for anything temporary.
Typical ones: a collection per client or per shoot for delivery, a Selects collection for the frames you actually like, a Proofing collection you send out for approval, and a year-end Favorites. Group them into collection sets so the panel does not turn into a wall. A personal work set, a client work set, and an archive set is three, and it is plenty.

For speed during a cull, the Quick Collection is the one people underuse. Click the flag on a photo and it drops into the Quick Collection; the flag then moves to the next image automatically, so you can flag a whole sequence in seconds. When the batch is done, drag the Quick Collection’s contents into a real collection and clear it.
To sort flagged photos in bulk later, open Quick Develop, switch the attribute filter at the bottom of the panel to Flagged, and grade from there. To keep flagged frames permanently, drag them into a named collection before clearing the flags.
Check: pick any photo in a collection, look at the Folders panel, and confirm it still sits in its original folder. If the folder structure changed, you dragged in the wrong panel.
5. Apply Keywords and Metadata Consistently
Keywords are your retrieval layer. Unlike a folder name, a keyword can carry as much meaning as you want, and a photo can carry many at once. A portrait might be tagged with the client’s name, the location, the session type, and a usage flag, then show up in four different searches at once.
Build the list before you tag anything, and keep it short enough to actually use. A workable structure has four groups:
- Who — client, family member, model. Keep the client’s name in a sub-keyword under a parent keyword, so you can search for all of their work or all of one project.
- Where — city or region first, then a specific spot if it matters.
- What — genre or session type: ceremony, portrait, landscape, product.
- Usage — the practical tags that decide whether you can license it: commercial, editorial, model-released, print-sold.
Type keywords while you import rather than afterward. Set your metadata and import preferences once, select your shoot folder, hit import, and the whole batch arrives titled and tagged. Retrofitting twenty years of photos by hand is how a project dies in week two.
Captions and titles deserve the same attention, and for most working photographers the title is the field they actually use. Lightroom reads IPTC Title and IPTC Caption straight from each file, which means they survive if you ever leave Adobe software.
Check: open a photo you shot last month and read its title and keywords without opening anything else. If you cannot tell what it is, the system is not doing its job yet.
6. Add Ratings, Color Labels, and Flags
Ratings, color labels, and flags are the fast layer. They cost one keystroke and they answer questions while you are still culling, which keywords cannot because typing a keyword per frame would be miserable.
A workable convention: five stars for the frames you would actually deliver, one to three stars for keepers and alternates, a red label for images that need retouching, a green label for images cleared for a client, and a flag for anything you still owe yourself a decision on. Colors are faster than stars for workflow states and reset instantly, so use stars for quality and colors for status.
Flags are the temporary one. Mark an image on a shoot, deal with it later, clear the flag. If you leave flags set for months, the Quick Collection quietly fills with hundreds of images and stops being useful.
Check: apply a filter at the bottom of the Library grid for Color Label equals Red. If your retouching queue is not exactly what you expect, your convention has drifted and you need to reset it deliberately.
7. Create Smart Collections for Repeat Searches
A Smart Collection is a saved set of rules that refills itself. Create it once and it keeps working forever, which makes it the highest-value automation in the Library module — the thing that makes a system self-correcting instead of depending on your discipline.
Four worth building on day one:
- Unrated, no keywords — Rule set to Rating is less than 1 star, and Keyword is empty. This surfaces everything you imported and forgot. It shrinks on its own as you work.
- Untitled — IPTC Title does not contain anything. The other half of the self-correcting pair.
- Recent selects — Rating is greater than or equal to 4 stars, and Capture Date is in the last 30 days. Your personal edit queue, filled automatically.
- Needs retouching — Color Label is Red, and Flag is unmarked. Reappears in five-star picks you have not finished.
Build them in the Library Develop or Library module under Collection, then Create New Smart Collection, and set the Match options to All or Any deliberately. Choosing Any when you meant All quietly gives you a collection that is too large, and it is the most common Smart Collection mistake.
Limitations worth knowing: Smart Collections cannot be nested inside collection sets in Lightroom Classic, they do not follow you into a different catalog, and they cannot reference images outside your current catalog. They also rebuild live, so a rule matching 40,000 photos will slow the panel while it populates.
Check: run the Untitled collection after a week of normal work. If the number is not shrinking, you are not titling on import, and that is the habit to fix rather than the rule.
8. Test, Export, and Maintain the System
Run the whole thing once end to end before you trust it. Import a single shoot, apply your keyword preset, cull with ratings and flags, drop the selects into a collection, export that collection to the Exports folder, and confirm the files land where the client folder expects them. Ten minutes now saves an argument with a client later.
Set delivery up so you do not have to remember it. In the Export dialog, put your client-delivery export preset inside each collection’s name, so every export is automatically named for its destination. For handoff to a retoucher, File, Create Collection Set, then Save as Catalog produces a small catalog containing just that shoot with its metadata intact, and you can zip that with the XMP files.
Maintenance is short and it is what keeps a system alive:
- Once a month, run your Unrated and Untitled Smart Collections and clear a batch.
- Once a quarter, verify a backup restore.
- Once a year, Compact your catalog in File, Catalog Upgrade, or run the Catalog Integrity Check tool if something feels off. Compact Catalog Without Optimizing is the gentler option if you are not chasing a corrupted index.
- When a shoot closes, clear its flags and move the collection into a year archive set.
Check: after a full year, open the oldest shoot you can remember. If finding it took more than a few clicks, the folder structure failed and your metadata carried the whole load.
Common Mistakes
Nearly every mess I have seen in forums traces back to one of six habits, and all six have a straightforward fix.
Treating a collection as a backup. Collections are references. Delete the catalog and every one of them is a list of paths to nothing. The fix is boring: back up the .lrcat file, the RAW files, and the XMP sidecars on a schedule, and check that the catalog backup preference is actually switched on in Preferences.
Building folders six levels deep. Nested folder trees look tidy in Finder and become unmanageable the moment one shoot needs a second location. The fix is to limit the disk to year, month, and shoot name, and push everything else into metadata where renaming costs nothing.
Relying on filenames to carry meaning. Renaming files in Finder is the same mistake as moving them: the catalog’s path goes stale. And even if you edit inside Lightroom, a filename is a poor search tool, because there is only one of it per photo. Use titles and keywords for meaning, and let the filename be a stable identifier like the camera’s original name.
Mixing metadata conventions halfway through. A library with two keyword systems, four flag habits, and a leftover “final_final_v2” folder is harder to search than a clean one. Pick one convention, apply it to the new work, and migrate the old in batches rather than all at once.
Editing the catalog from unstable storage. Opening a catalog on an external drive that disconnects mid-session, or on a card reader, risks an index that needs rebuilding. Keep the active .lrcat on the internal drive, and use Smart Previews in Edit, Preferences, Performance if you want to travel with originals at home.
Reorganizing files without a migration plan. Moving a 200,000-photo archive by hand in Finder is how libraries get ruined. The safe order is: back up first, clean folders inside Lightroom one shoot at a time, build the new keyword set as you go, and only merge or reimport at the very end.
Two smaller ones worth a mention. Deleting RAW files during culls is a choice, not an organizing tactic — a RAW file is the only thing that lets you revisit a decision years later, and storage is cheaper than reshooting. And a separate catalog per client does not give you separate search; Lightroom cannot search across catalogs at once, so the fragmentation is entirely on you to manage.
Frequently Asked Questions
Should I use folders or collections in Lightroom?
Use both, for different jobs. Folders mirror what is physically on your drive and should hold only facts that never change, mostly the date a photo was taken. Collections are your own saved groups of references, and they are the right place for anything temporary or interpretive, like a client proofing set or your selects from last week. Putting a client’s name in a folder name means renaming folders when projects overlap. Putting it in a keyword means the photo simply carries one more tag.
Does a Lightroom catalog contain my original photos?
No. A Lightroom Classic catalog is a database file ending in .lrcat, and it holds the information about your photos rather than the image data itself. Your originals stay in your own folder structure on your hard drive. The catalog stores where each file lives, plus your ratings, keywords, flags, collections, and every non-destructive edit. That is exactly why moving photo folders in Finder breaks things: the catalog is still pointing at the old path.
How do I reorganize photos in an existing Lightroom catalog?
Back up the .lrcat file and your originals before you change anything, then work in this order. Clean the folder structure first, by dragging folders inside Lightroom’s Folders panel or using the Relocate command, never through Finder. Rebuild your collection sets from scratch rather than trying to untangle old ones. Then import a keyword preset and run the Unrated and Untitled Smart Collections to find work you skipped. Merging or reimporting comes last, once the structure is already sane.
What is the best folder structure for Lightroom?
Year, month, and shoot name, with RAW and Export in separate subfolders inside each shoot. Name the month folders with a numeric prefix, as in 01-January, because alphabetical sorting puts April before August and March before May. Keep your active catalog in its own folder outside the photo tree so it is easy to find when you move machines. Resist adding client or project levels to the disk, since those change and dates do not.
How do I move photos between Lightroom catalogs without losing metadata?
Do not move files. Open the catalog you want to grow, then use File, Import from Another Catalog, point it at the old catalog, and choose which items to bring across. Metadata, ratings, keywords, and collections travel with the import, not the file, so nothing is lost by the merge itself. Afterwards, run File, Catalog Upgrade, Compact Catalog on the receiving catalog and spot-check a few images. Then archive the old catalog rather than deleting it until you are certain.
How often should I back up my Lightroom catalog?
Daily at minimum, and that is easy: turn on the automatic catalog backup in Preferences so Lightroom writes a copy each time you close it. The catalog holds all your edits and metadata, so a lost .lrcat means redoing years of work even with every RAW file intact. Your originals need at least two copies on separate drives with one off-site, and your XMP and ACR sidecar files should go into the same backup job so keywords and settings survive outside Lightroom too.
Conclusion
The system that holds up over a decade is a boring one. One master Lightroom Classic catalog, folders on disk sorted by year and month for the facts that never change, and everything interpretive — clients, locations, genres, status — carried by titles, keywords, ratings, and colors, then surfaced through Smart Collections. Always move files inside Lightroom, never in Finder, and back up the catalog and its sidecars as seriously as you back up the photographs.
Do three things this week. Back up your .lrcat file and turn on the automatic catalog backup in Preferences. Build the year, month, and shoot folder tree and import your next shoot into it. Then make one collection for your current work and one keyword set you will actually use. Add the Unrated and Untitled Smart Collections in 2026 and let them tell you what still needs attention. Everything after that is refinement, and refinement is easy once the backbone is straight.