Rim lighting is simple to describe and easy to get wrong. You put a light behind and above your subject, aim it back toward the camera, and let it graze the outer edge of the head, hair, and shoulders so the subject separates from the background. The trick is not the light itself. It is the angle, the spill control, and how you expose for it.
Here is the whole setup in three lines before we slow down.
- Single light: one source behind the subject, above head height, angled forward and slightly down at the back of the head and shoulders.
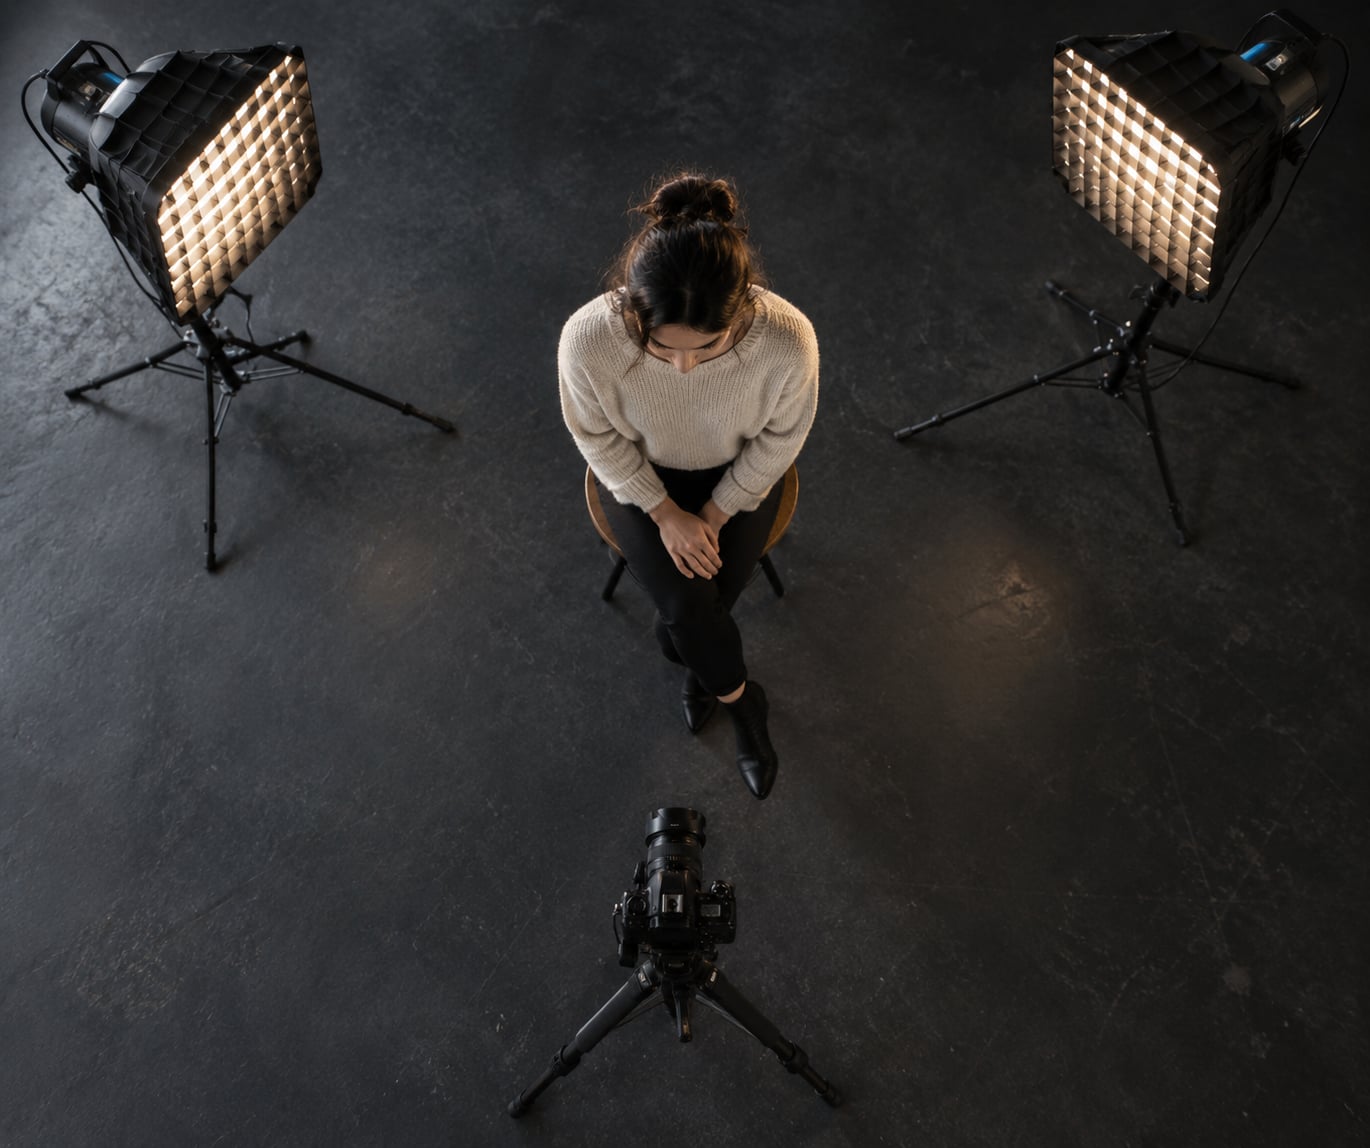
- Two lights: one head on each side, both at roughly 45 degrees behind the subject’s shoulder line, matched in power and distance so the two edges match.
- Control spill: a honeycomb grid, snoot, stripbox, or a black foam board flag keeps light off the face, the background, and the front element of your lens.
I have shot headshots in rooms far too small for a boom, and the setups that work every time are the ones where the distances and angles are written down rather than re-guessed. That is what this guide gives you.
Table of Contents
- What You Need
- Step-by-Step: How to Create Rim Lighting
- Choose a Background and Subject Before You Turn On Anything
- Position the Light Behind the Subject
- Angle the Light Toward the Subject
- Create Separation With Distance
- Set the Camera Exposure
- Shape the Light and Control Spill
- Test, Refine, and Capture
- Where the Rim Light Goes Wrong
- Common Mistakes
- Frequently Asked Questions
- Can I create rim lighting with just one light?
- How do I create rim lighting outdoors?
- Should the rim light be brighter than the face?
- Why is my rim light too wide or covering my subject’s face?
- What camera settings work best for rim lighting?
- Conclusion
What You Need
You need very little. Most beginners already own enough gear to make rim light that looks professional, and the list below tells you which piece does which job.
A gridded or snooted continuous light or strobe is the main source. A speedlight with a grid on a light stand works perfectly well, and a small LED panel is fine for a first attempt as long as it has a distance adjustment rather than just an on/off switch. The important part is that you can point it at the back of the subject and keep the beam off everything else.
For spill control you have three good options, in ascending order of control. A bounce card or a piece of black foam board blocks light at no cost. Barn doors and a grid narrow the beam, which is usually enough for a portrait. A snoot gives you the tightest control, but it is also the easiest to aim badly, so keep the head further back rather than creeping it in close.
A boom arm or a clamp lets the light sit high and behind without a floor stand stealing frame space. If you have no room for a boom, a ceiling bounce works: point a gridded head up at the ceiling from behind the subject, and the ceiling throws a soft top-rear light down onto the head and shoulders. It is the workaround that keeps a small studio usable.
You also want a reflector or a piece of white foam board for a quick fill on the shadow side, and a hand-held light meter if you want the setup to be repeatable across sessions. Metering each head separately, the way professionals do, is what takes the guessing out of rim light photography.
Subject and background conditions matter more than most people expect. The edge is easiest to see on a subject with a matte, slightly textured outline: frizzy hair, a wool sweater, a beard, or a shoulder that catches light at a glancing angle. The background should be at least a few stops darker than the rim itself, and it should be far enough behind the subject that the rim does not land on it. Dark hair is the hardest case and the most common complaint, which I cover further down.
Step-by-Step: How to Create Rim Lighting
Choose a Background and Subject Before You Turn On Anything
You control the rim by controlling the contrast around it, so choose a dark background before you choose a light power. A subject whose tone sits close to the background will merge into it no matter how good the edge is, because the eye reads shape from tone difference first and highlight second.
Dark clothing on a mid-grey background is the friendliest combination for a beginner because the rim is one of the few bright things in frame. Push the subject about a meter and a half to two metres in front of the backdrop so the head of the light does not wash the background as well. Reflections matter here: a glossy background, a mirror, a window, or even a large shiny reflector behind the subject will pick up the beam and give the spill away instantly.
Position the Light Behind the Subject
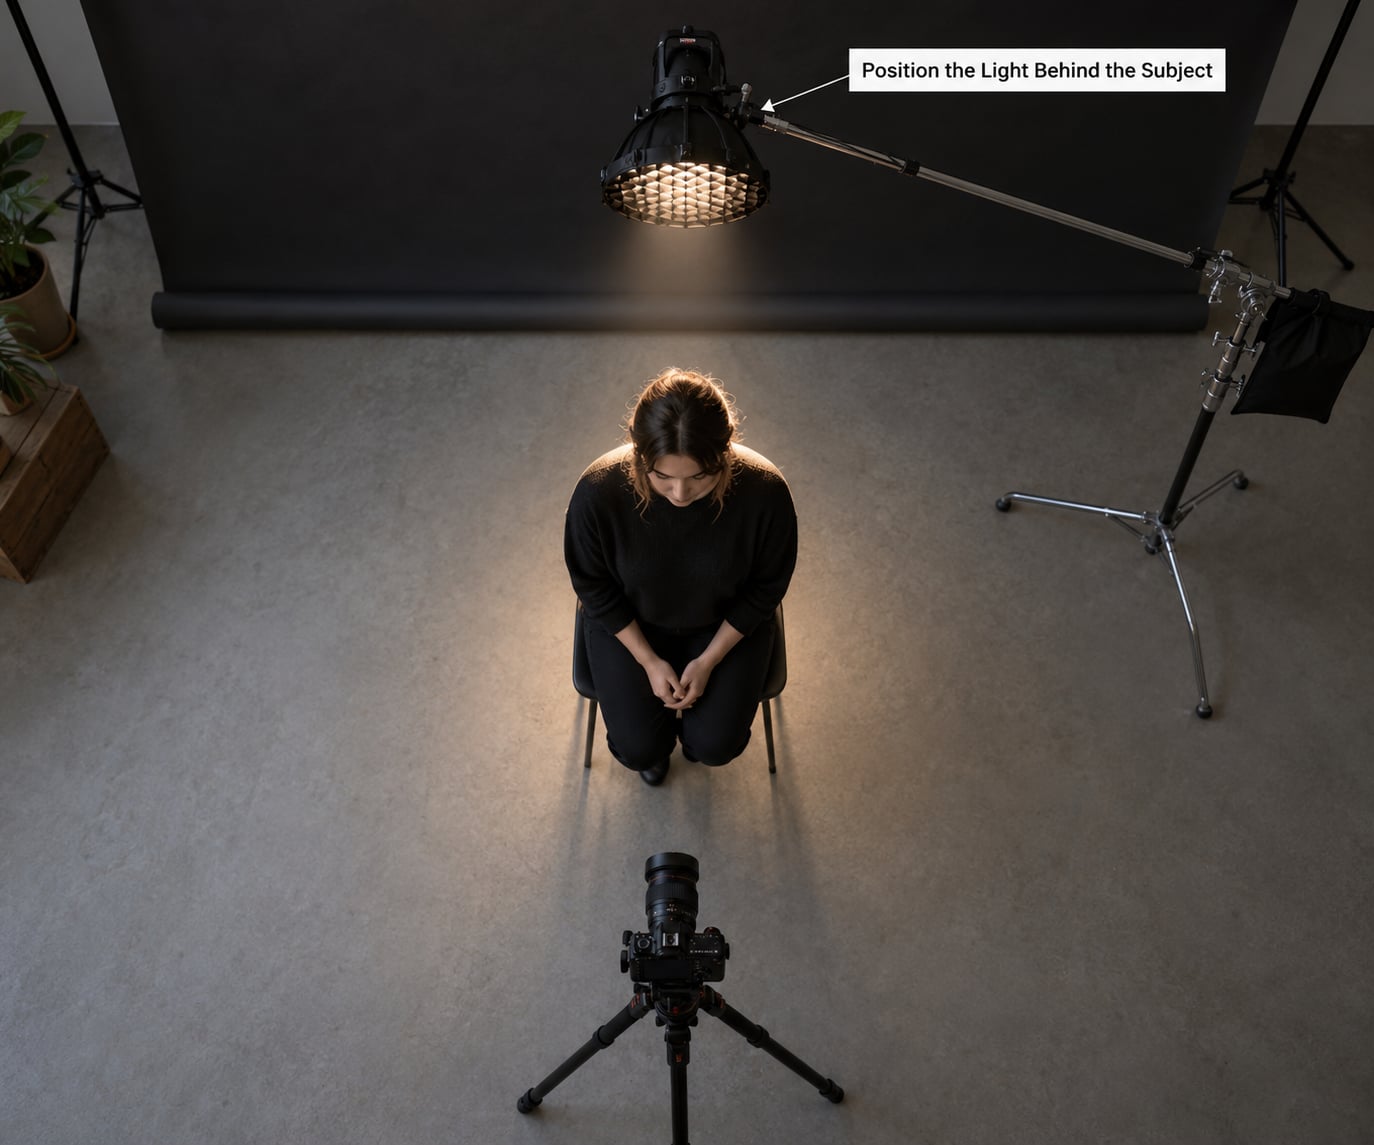
Place the light behind the subject, higher than the top of the head, and angled forward so its beam lands on the back of the head and the shoulder line. A useful starting angle is around 45 degrees off the camera axis rather than straight down the lens.
Three starting positions work for most people, and you can move between them as the look develops. Centred and high gives a clean symmetrical halo, which suits straight-on headshots. Offset to one side gives a single defined edge on that side and is the easiest to keep off the face. Matched on both sides is the two-head version described below, and it is what you want for couples, group portraits, and any frame that needs to read symmetrically.
Height matters more than people expect. As the light rises above the subject, the rim travels from the shoulders up over the crown, and the amount of visible edge on the face decreases. Too low and you are lighting the cheek instead of outlining it.
Angle the Light Toward the Subject
Aim the beam so it skims the outer edge of the subject rather than pointing down the front of them. The rim comes from the grazing angle, where the surface curves away from the lens and bounces light back into it.
Start by pointing at the crown of the head and let the beam spill down over the shoulders, then rotate the light in a few degrees at a time. Small rotations change the shape of the edge dramatically: a light closer to the camera axis wraps the edge around toward the cheek, and a light further back leaves a thinner, more graphic line. Watch the hair first, since it is the fastest way to see whether the beam is aimed correctly. If the head shape reads but the hair does not, move the light up slightly and forward. If the hair lights up but the head disappears into a halo, bring the light down and closer to the subject’s height.
The wrong version of this is very common: a light that ends up too far forward stops being a rim entirely and starts working as fill, lighting the face flatly from the side. The moment you can see the subject’s cheek and eye socket, you have gone past 90 degrees from the camera axis.
Create Separation With Distance
Moving the light, the subject, and the background changes three things at once: how much light spills onto the background, how wide the edge reads, and how intense the highlight is.
Moving the light further from the subject softens the edge and narrows the apparent angle of the wrap, and by the inverse square law it drops the brightness. Moving the light closer makes the edge harder, brighter, and narrower, which is why a snoot brought in too close gives you a single hot spot on the crown instead of a rim. Most of the time the fix for a weak edge is distance, not power.
Moving the subject further from the background separates the two tones and stops the beam from spilling onto the backdrop. It also changes how wide the rim looks, because the edge and the background no longer sit at the same depth and the eye reads them as separate planes.
Set the Camera Exposure
Meter for the face or body first, then reduce exposure until the rim highlight stays defined without clipping, and accept a darker face than feels comfortable in the viewfinder.
Here is the order that avoids the classic frustration. Turn off every light except the rim, take a test shot, and look at the highlight. Adjust the rim until the edge is bright and controlled with no spill on the face. That isolation test is the fastest way to know your rim is right, and it is the step people skip.
Then add the key, set the exposure so the face sits where you want it, and bring the rim back up in small increments until the edge returns. If you find yourself protecting the face while destroying the rim, the rim is under-powered or aimed badly, not over-exposed.
For camera settings, shoot RAW so you have room to recover the highlight later. A wide aperture keeps the background soft and separates planes, which helps the edge read. Set your highlight warning to on and watch the histogram; the rim should approach the right-hand end without shearing into a flat white line. In video, keep the rim two or three stops above the face and expose for the face, accepting that the edge will sit near the top of the waveform. A gimbal or tripod helps, because a brighter rim makes a longer exposure and a longer exposure makes a shaky photographer visible.
Shape the Light and Control Spill
A hard source gives you a narrow, crisp edge. A soft source gives you a wider, more gradual one, and it wraps around the head instead of tracing it.
Soft is usually the better first choice, because a larger source at the same power is more forgiving of small aiming errors. Professionals often prefer diffuse over gridded for exactly that reason. Hard is not wrong, it is a choice: a bare strobe pointed past the subject can produce a convincing flare-style edge, and the flare can be intentional rather than a mistake.
Whatever the source, put something between the light and the camera. A black flag near the front of the head blocks direct line of sight to the lens, a grid keeps the beam off the background, and a snoot narrows it to a cone you can place on the crown. The test is simple: look at the front element of the lens from the side while the rim is firing. If you can see the light source, you will get flare and you should flag it.
To break up an edge that is too hot or too even, add a narrow reflector as negative fill on the rim side, which darkens the edge and gives it definition, or move the subject a few degrees and let the highlight fall across the shoulder instead of the crown. A small piece of black tape on a gel can also knock down the centre of a snoot’s beam if the coverage is too wide.
Test, Refine, and Capture
Check the histogram, the viewfinder, the highlight clipping, the edge shape, and the face exposure before you change anything else, and then make one small change at a time.
The order that keeps you out of spirals is: isolation test on the rim alone, then edge shape, then face exposure, then final composition. If you adjust power and angle and exposure at the same time, you learn nothing about which change did what. Note the light-to-subject distance while it works, because a tape mark on the floor or a knot in a piece of string on the stand will get the same setup back for you next session.
Make sure the set repeats. A setup you cannot rebuild is a happy accident, and headshot clients who come back a month later expect the same frame.
Where the Rim Light Goes Wrong
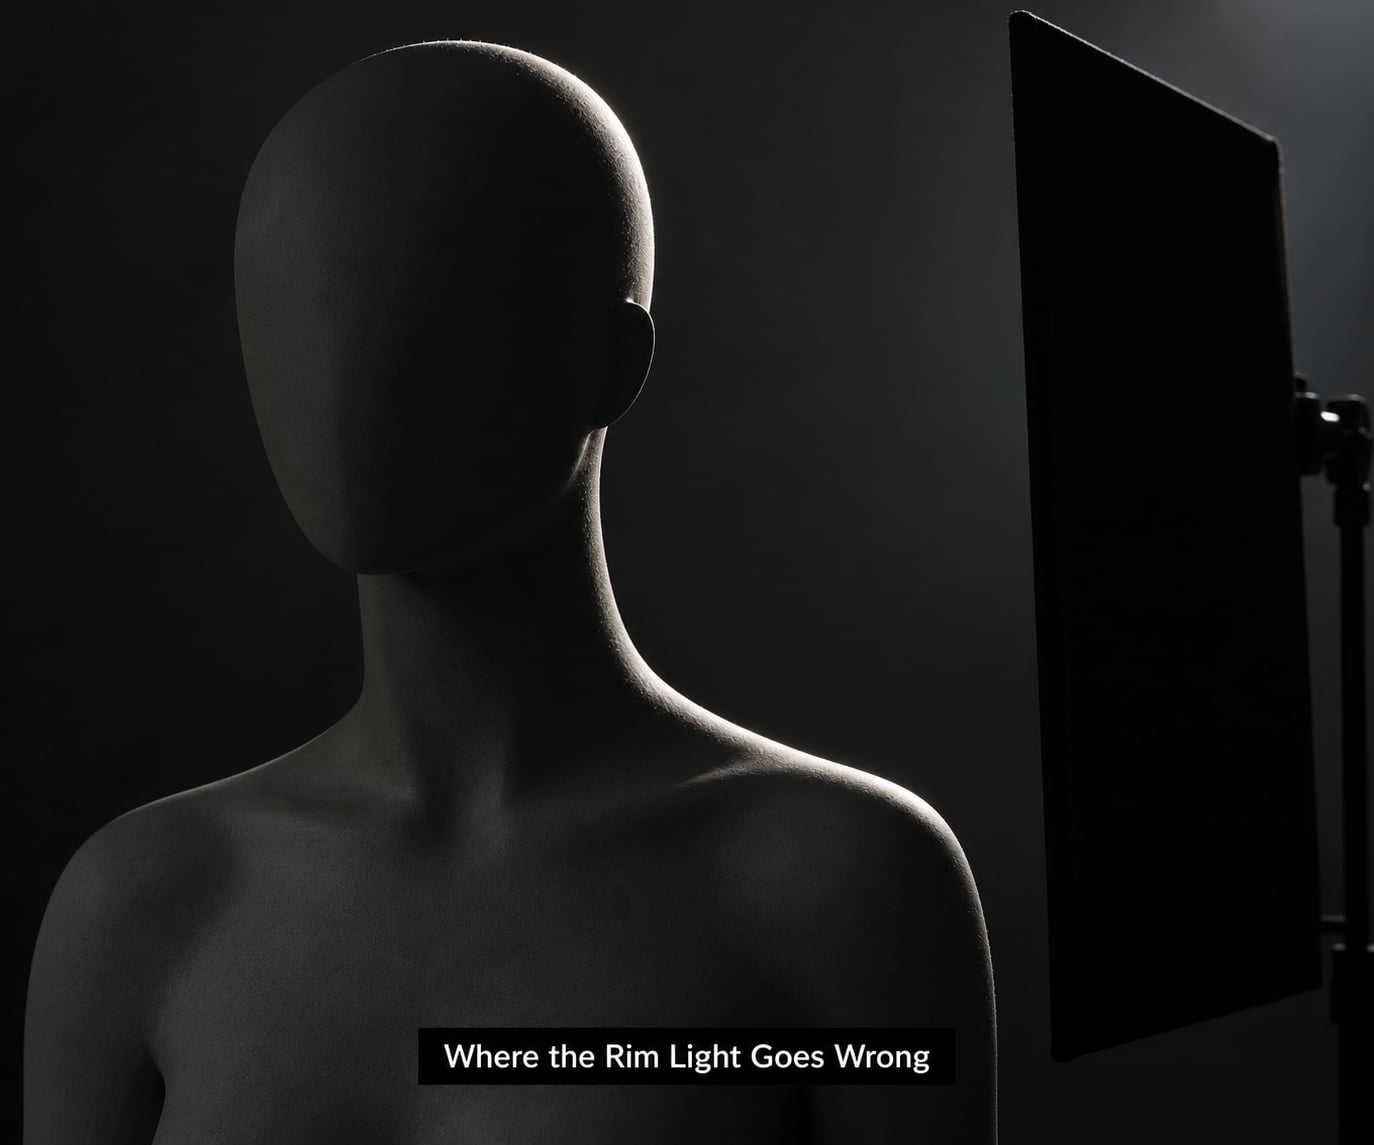
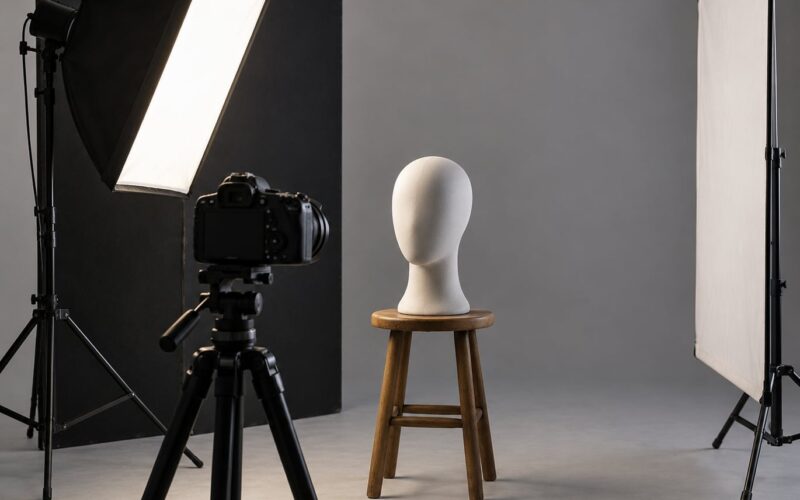
On a matte grey mannequin bust against a dark background, a correctly placed rim produces a narrow, even highlight running along the top of the head and down one shoulder, with no light on the face and a black flag holding the spill off the camera.
Now compare that with the failures. When the highlight is a single bright patch on the crown, the source is too close or the snoot is too narrow. When the whole head glows and the edge blurs, the light is too far back or too soft. When the cheek and eye socket are visible, the light has swung forward past the shoulder line. When the edge appears and disappears as the subject turns, the distance is too short to cover the rotation.
Common Mistakes
Almost every rim light that fails has done one of six things. Here is the symptom, the cause, and the change that fixes it.
| Symptom | Cause | Fix |
|---|---|---|
| No rim visible at all | Light is level with or below the subject, so it lights the back of the head and shoulders flat | Raise it above head height and aim it down at the crown and shoulder line |
| One hot spot on the crown, nothing else | Source or snoot is too close, so the beam is narrower than the head | Move the light back 60 to 90 cm, or widen the beam with a grid or diffusion |
| Rim is lighting the face | Light is too far forward, so it has become a side fill | Swing the head back behind the subject until the cheek falls into shadow |
| Rim disappears into the background | Subject is too close to the backdrop, or the background is lit | Move the subject forward a metre or two and flag the background |
| Rim is too soft to read | Source is too large or too far back | Move closer, switch to a smaller source, or add a grid |
| Flare across the frame | The camera has a clear line to the light source | Add a black flag between the head and the lens, or change the camera angle a few degrees |
Two more problems are worth calling out because they are about the subject rather than the light. Dark hair absorbs the beam, so the setup that halos a blonde subject can do almost nothing to a dark-haired one. Add a second head higher and slightly behind, diffuse the source so it wraps rather than points, and accept that dark hair needs more power rather than a different position. Frizzy and curly hair catch light beautifully but produce an uneven halo, so keep the light further back to make the edge wider and less specific.
Finally, keep the rim from out-powering the key. A rim should dust the area above the subject and read as a highlight, not become the brightest thing in the picture. If the edge is drawing more attention than the eyes, drop it a stop and add it back later in editing instead.
Frequently Asked Questions
Can I create rim lighting with just one light?
Yes, and for most portraits one light is the better starting point. Place it behind the subject above head height, angle it forward at roughly 45 degrees off the camera axis, and let it graze the back of the head and shoulders. A single offset head on one side gives a defined edge that is easy to control and easy to keep off the face. Add a second head only when you want symmetry or are shooting groups and couples.
How do I create rim lighting outdoors?
Put the sun behind your subject and shoot with the light coming over their shoulder, usually within a couple of hours of sunrise or sunset when the sun is low. Meter for the face, which will be in shadow, and the backlight becomes the rim. A reflector held low in front bounces light back into the face. Watch for flare by keeping the sun just outside the frame edge and shifting slightly if the lens catches it.
Should the rim light be brighter than the face?
In exposure terms the rim is brighter, usually by two or three stops, but it is a thin highlight rather than a large area, so it reads as an accent instead of taking over. The real rule is proportion: the rim should never out-power the key. If the edge pulls more attention than the eyes, turn it down a stop and add it back in editing where you can control it precisely.
Why is my rim light too wide or covering my subject’s face?
Too wide usually means the light is too close or the source is too large, so move the head further back or fit a grid. Covering the face means it has swung too far forward and become a side fill, which happens when the light crosses the subject’s shoulder line. Swing the head back behind the subject until the cheek falls into shadow, and flag the front of the head to keep spill off the lens.
What camera settings work best for rim lighting?
Shoot RAW, use a wide aperture so the background stays soft and the edge reads cleanly, and set the highlight warning to on so you can see the rim approaching clipping without going past it. Expose for the face, then lower exposure until the edge stays defined. In video, expose for the face and let the rim sit near the top of the waveform, and use a tripod because a bright rim often means a longer exposure.
Conclusion
Learning how to create rim lighting comes down to three repeatable decisions: the light sits behind and above the subject, the beam grazes the outer edge instead of pointing at the camera, and everything else is kept off the face and off the background with a grid, snoot, or flag.
Start with one light placed slightly above and behind your subject, aimed at the edge of the head and shoulders, then reduce your exposure until the highlight stays defined and controllable. Once that looks right, meter the rim head on its own, note the distance, and build from there.