Knowing how to use a bed sheet as a diffuser comes down to one change: hang a plain white cotton sheet taut between your light source and your subject, and the light passes through the fabric and spreads out instead of arriving as a small hard source. That single adjustment turns a squinting window portrait or a shadow-striped flash shot into soft, even light, and it costs nothing but a sheet you already own.
The whole build takes about five minutes. What matters is the size of the sheet relative to your subject, how flat you stretch it, and how you compensate for the light it absorbs. Get those three right and the technique works with window light, a pop-up flash, a speedlight or a bare bulb.
Safety first, because this is the question people get wrong. Never drape fabric over a hot bulb, a halogen lamp, a heater or a fireplace, and keep the sheet well clear of any heat source. For lamps at home, the sheet belongs on a frame in front of the source or over the window, never touching the fixture.
Table of Contents
- What You Need
- How to Use a Bed Sheet as a Diffuser Step by Step
- How to Use a Bed Sheet as a Diffuser: Build the Rig
- Position the Sheet and Subject
- Set the Exposure and White Balance
- Test the Light and Refine the Result
- Build Mistakes to Avoid
- Common Mistakes
- Frequently Asked Questions
- What color bed sheet works best as a light diffuser?
- Can I use a bed sheet as a diffuser with a speedlight or continuous light?
- How far should the subject stand from a window with a sheet diffuser?
- Should the bed sheet be thin or thick for soft lighting?
- Why does my sheet diffuser create uneven light or bright patches?
- How do I prevent a white bed sheet from reflecting a color cast?
- Conclusion
What You Need
You need very little. Most people already have everything except a way to hold the fabric flat.
- A camera and a lens you like — any camera that exposes manually or in shutter-priority mode works, and a 50mm or 85mm lens gives flattering compression for portraits.
- A plain white cotton sheet — one solid white, no pattern, no stripes, no logos. Cotton diffuses well and is easy to iron flat.
- Two supports — two lengths of PVC pipe, a large embroidery hoop, a light stand, or a door frame with binder clips.
- Clips or tape — binder clips, clothes pegs or gaffer tape to hold tension on the fabric.
- Optional — a white reflector or a piece of white foam board for the shadow side, and a small hand-held meter if you shoot in manual.
White cotton is the safest pick because it stays neutral in colour. Cream and beige sheets warm skin tones slightly, grey sheets cool them, and any printed pattern transfers onto the subject as visible stripes and logos. If white is all you own, that is still better than no diffusion at all.
On size, the sheet should be larger than the subject by a wide margin. A single portrait wants a sheet roughly three times the width of the head and shoulders. A couple or a family needs something that covers the whole group, otherwise you get soft light in the middle and hard edges on anyone standing near the frame.
How to Use a Bed Sheet as a Diffuser Step by Step
The process runs in five stages: build the rig, place it, set exposure, then inspect and refine. Work through them in order and you will see the softness improve before you ever touch your editing software.
How to Use a Bed Sheet as a Diffuser: Build the Rig
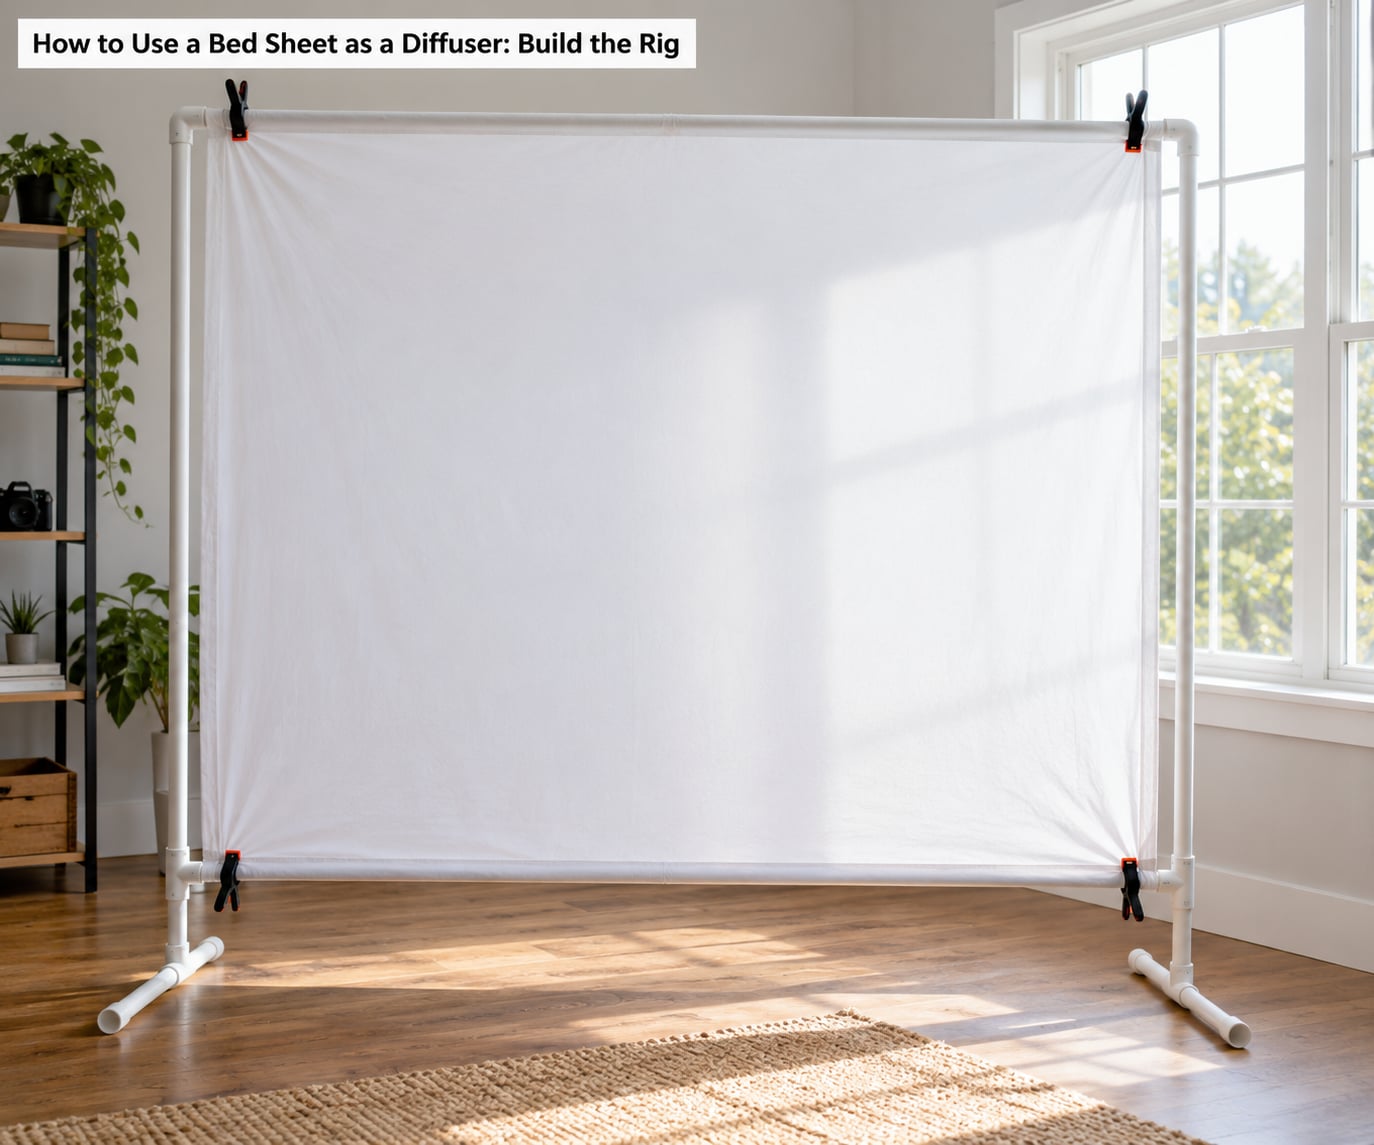
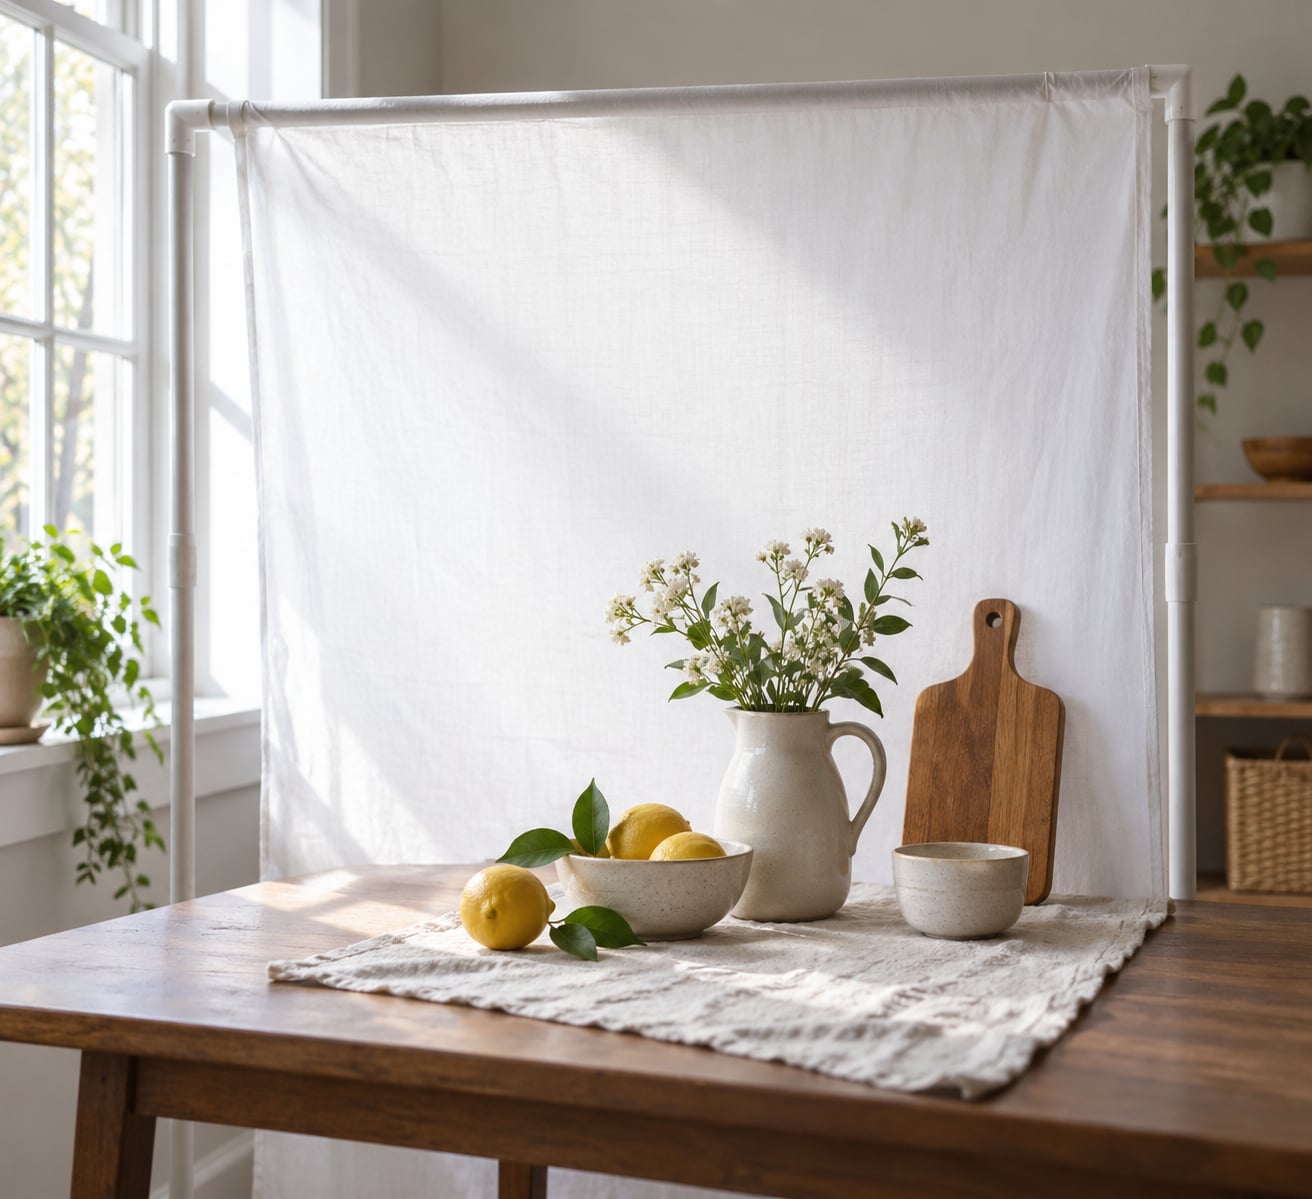
Stretch a white cotton sheet between two supports or over a frame, pull it flat, and fix it in place so the light has to pass through it.
- Pick the sheet. White, unpatterned cotton, freshly washed. Success signal: it passes light through the single layer when held to a window.
- Build the frame. Two PVC pipe lengths with a clamp, an embroidery hoop, or a door frame with clips at the top corners. Success signal: the frame holds still when you walk past it.
- Stretch and clip. Pull the fabric taut from every side before you clip it, and work outward from the centre. Success signal: no slack you can push through with a fingertip.
- Flatten the wrinkles. Iron it or steam it, or wet a cotton sheet slightly and let it dry stretched on the frame. Success signal: a fingertip drawn across the fabric skims without catching.
- Place it between light and subject. Roughly 20 to 40 cm in front of the source, with the subject a metre or more beyond it. Success signal: the brightest part of the frame is the fabric, not the bulb.
Wrinkles matter more than people expect. A crease in the fabric acts as a small lens that concentrates light, and it prints a visible streak on the subject. I have seen more hot spots come from an un-ironed sheet than from a badly placed softbox.
Position the Sheet and Subject
Move the subject further from the window and the shadows get shorter and softer, because the sheet stays roughly the same distance from the light while the subject grows farther away from it.
For a single portrait, place the subject about a metre and a half to two metres from a diffused window, turned about 45 degrees toward the glass. Facing the window square on gives a flat, shadowless look that flatters some faces and drains others. The angle keeps shape in the face while keeping the shadow edge soft.
Keep the sheet as close to the source as you safely can and as far from the subject as practical. That maximises the ratio between the size of the apparent source and the distance to the face, which is the whole trick. Push it to 20 cm from a pop-up flash if your rig allows it, and let the fabric do the work.
For a speedlight or continuous light on a stand, hang the sheet from the stand’s crossbar and clip it to the uprights. Outdoors, clip it at four corners and weigh the bottom edge so a gust does not turn the whole thing into a sail.
Set the Exposure and White Balance
A single white cotton layer removes roughly 1 to 1.5 stops of light, and a second layer takes away about one more. A stop is simply a doubling of the light, so 1.5 stops means the diffused shot needs two and a half to three times the exposure of the bare setup.
Shoot in manual or shutter priority. Meter the diffused light rather than remembering the settings from the bare flash, then set your ISO and aperture where you want them and let the shutter speed land wherever it needs to.
Most people get this wrong by opening up from the settings they used without the sheet and stopping a stop short. Check your histogram after the first frame: if the highlights on the brightest part of the fabric are clipped and unrecoverable, you have not given the exposure compensation yet. If the fabric reads as flat grey, you have given too much.
Keep the white balance fixed while you adjust. A fabric that picks up the colour of the room or a warm bulb will not be corrected by moving exposure, and switching to auto white balance mid-shoot will shift skin tone between frames.
Test the Light and Refine the Result
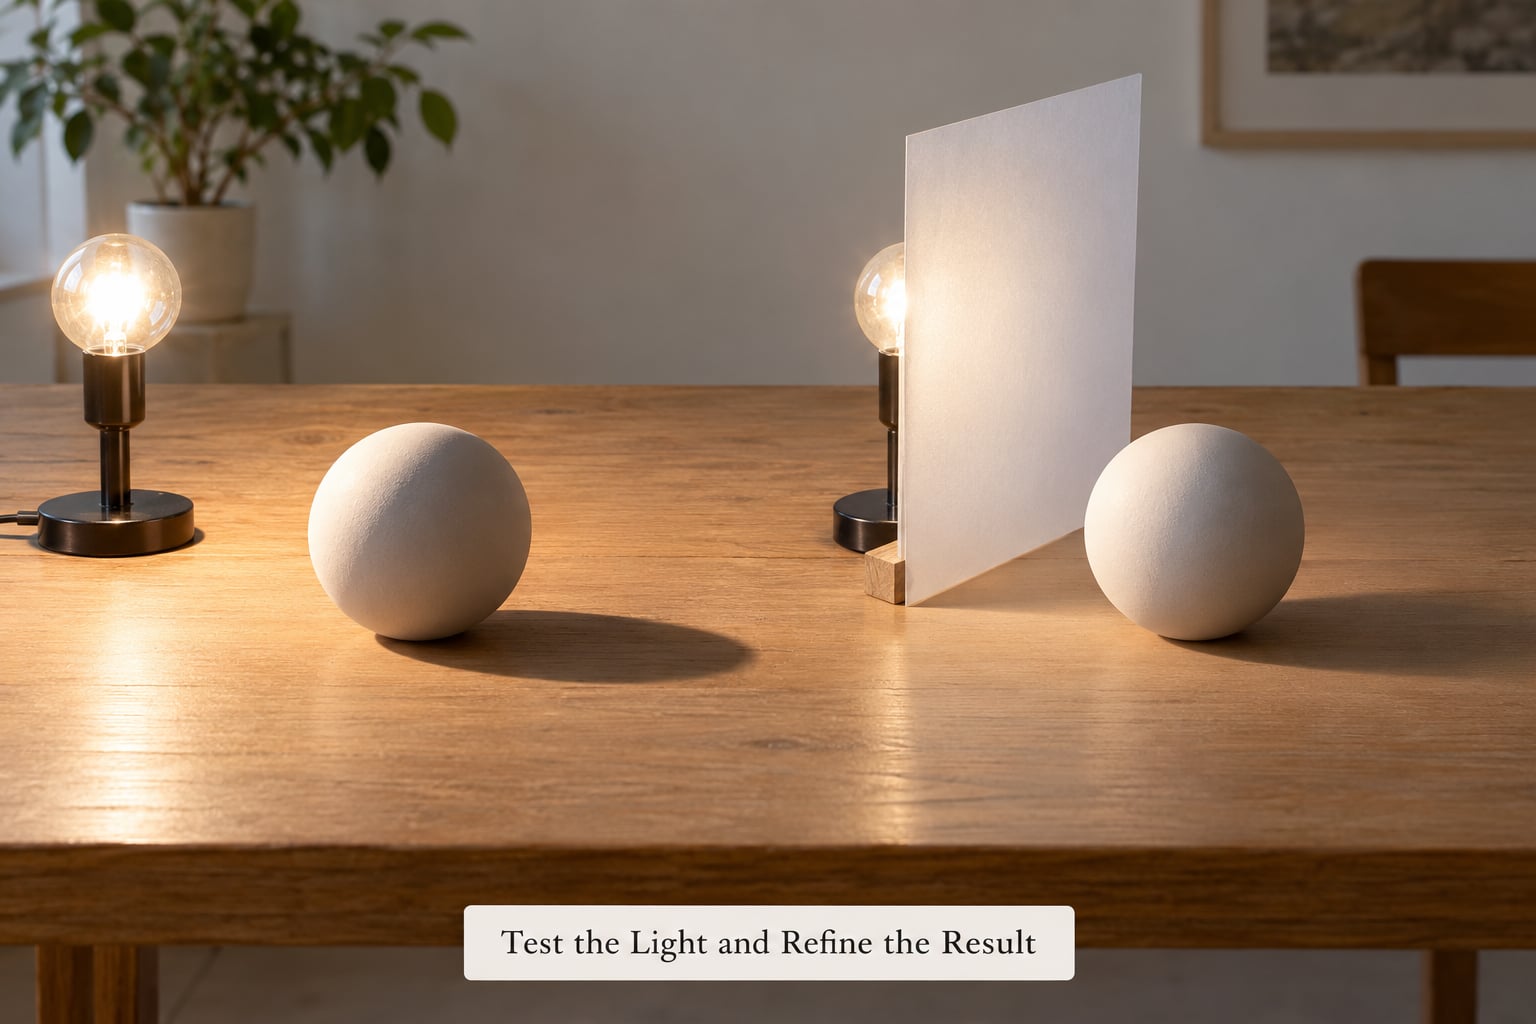
Read the result by looking at shadow edges, catchlights, skin tone and background brightness rather than at the overall brightness of the frame.
Shadow edges tell you whether the fabric is doing its job. A hard edge with a crisp outline means the sheet is too small, too close to the subject, or slack enough that light is leaking around the edge. A wide grey gradient is what you are after.
Catchlights on the eyes should be broad and soft, roughly rectangular or round depending on your frame, not tiny pinpoints from a single bulb peeking past an edge. Skin should look even from forehead to chin with no dark band under the brow or along the shadow-side cheek. If the background is brighter than the subject, add a white reflector or move the subject back.
Move the sheet, the subject or the light in small increments and take one test frame after each. Most sessions resolve within four or five frames once you know which of the three you are adjusting.
Build Mistakes to Avoid
Six things cause nearly every failed sheet diffuser, and each has a quick fix at the build stage.
- Wrinkles in the fabric. Iron or steam the sheet before clipping, and re-tension it after it dries. Success signal: no streak visible on the subject’s face.
- Sheet pressed against the light. Hold it 20 to 40 cm away. Touching a hot fixture is a burn and fire risk, and a close sheet scorches and yellows.
- Cream, grey or patterned fabric. Switch to plain white. Success signal: skin tone reads neutral against a grey card in the frame.
- Uneven tension. Re-clip from the centre outward so the fabric pulls flat rather than sagging in a curve.
- Mixed light sources. Block off or switch off any room lamp or second window that is brighter than the diffused source. Success signal: only one shadow direction appears.
- Blown highlights or a colour cast. Add the missing stop of exposure if the fabric is pure white, and correct white balance on a fixed setting before you touch exposure again.
Common Mistakes
These are the problems that show up after the build is finished, and what actually fixes each one.
- Bright patches on the subject. Usually a crease or a fold. Smooth the fabric, re-clip from the centre, and shoot another test frame.
- Soft light in the middle, hard edges on the outside. The sheet is too small. Move the whole rig closer to the light source or use a wider frame, because source size relative to subject is what sets the softness.
- Light leaking around the frame edge. The subject can see past the side of the fabric. Extend the frame past the edge of the source or angle the rig so the subject cannot see the gap.
- The shot came out two stops darker than the bare flash. Expected. Add about 1.5 stops of exposure for one white cotton layer, plus one more stop for a second layer, and open the aperture first if you can.
- Skin looks green or yellow. Diffusion fixes hardness, not colour. Set white balance on the diffused frame, and check the bulb or window you are using for a warm cast.
- The sheet is blowing around outdoors. Clip all four corners, add weight along the bottom edge, and pick a spot out of the wind rather than trying to out-muscle it.
- The fabric ended up in the frame. Shoot slightly wider than you need and crop in, or move the rig far enough back that it sits outside your angle of view.
A few things improve the setup without buying anything. Hanging a second white sheet about 30 cm behind the first gives you roughly another stop of loss and noticeably smoother falloff, which matters when you are filling a large room. Hanging the fabric off a window frame while shooting is the fastest version of the whole technique, no rig at all. And the same sheet doubles as a backdrop if you hang it taut behind your subject on a separate frame, which is how hobbyists get both jobs from one piece of fabric.
If you own no white sheet, a plain white shower curtain, a sheer net curtain or a piece of muslin all work, though each blocks more light and the net curtain stripes the subject slightly. For a small pop-up flash, the community trick of folding a sheet of laser printer paper into a loose wrap works and loses less light than cotton, and Photrio members confirm plain white sheets and parchment taped to window glass as the standard alternatives.
When a bought diffuser is worth the upgrade: once you are doing paid work regularly, folding the fabric becomes a tax on every setup. A collapsible frame is faster, lighter to carry and directional, so it also lets you flag light where a sheet will not. Learn on the sheet first so you know what you are buying.
Frequently Asked Questions
What color bed sheet works best as a light diffuser?
A plain white cotton sheet with no pattern, stripes or logos works best. White reflects nearly all the light that hits it, so you lose the least brightness, and it stays neutral so skin tone does not shift. Cream and beige sheets warm the light, grey sheets cool it, and any printed pattern shows up as visible stripes on the subject. If white is all you have, a cream sheet still beats bare light.
Can I use a bed sheet as a diffuser with a speedlight or continuous light?
Yes. Hang the sheet from your light stand crossbar, clip it to the uprights, and keep it 20 to 40 cm in front of the flash head or LED panel. Leave a little slack so the fabric does not scorch against a hot fixture. Budget about 1 to 1.5 stops of extra exposure for a single white cotton layer and check the histogram on your first frame before you commit to the settings.
How far should the subject stand from a window with a sheet diffuser?
About 1.5 to 2 metres from the diffused window for a single portrait, turned roughly 45 degrees toward the glass. The farther the subject stands from the light, the softer and shorter the shadow edges become, because the sheet subtends a wider angle from that distance. For a couple or family, move the whole group back together so the sheet stays wider than the group, or the people near the frame edges will get hard light again.
Should the bed sheet be thin or thick for soft lighting?
Thin and translucent is the right answer. A lightweight cotton or muslin weave passes light through while scattering it, which enlarges the apparent source. A heavy thick cotton sheet blocks more light and scatters it less evenly, leaving hot spots and a heavier exposure loss. If your only sheet is thick, use it as a double layer further from the light, or switch to a shower curtain or muslin for a cleaner diffusion.
Why does my sheet diffuser create uneven light or bright patches?
Bright patches almost always come from wrinkles, folds or a slack frame. A crease in the fabric concentrates light and prints a streak on the subject. Uneven light across the frame usually means light is leaking around the edge of the sheet, so the subject can see past it. Iron or steam the sheet, pull it taut from the centre outward, and widen the frame until it extends past the edge of the source on every side.
How do I prevent a white bed sheet from reflecting a color cast?
Diffusion softens light, it does not correct colour. Set your white balance on the diffused frame with a grey card or a fixed setting, and check the source itself for a warm cast from an incandescent bulb or a cool cast from a shaded window. Switching to auto white balance between shots will make skin tone drift frame to frame. If the cast is in the bulb, no sheet will remove it.
Conclusion
Start by hanging a plain white sheet between a window and your subject, stretched flat and clipped at the corners, then take one test frame and read the shadow edges. Give it about 1.5 stops more exposure than you used without the sheet, and adjust the distance until the edges look like a wide grey gradient rather than a drawn line. Once you have seen soft light for yourself, the pop-up flash and the speedlight in your bag stop being a compromise.