A photography blog that gets traffic is a text-led companion to your portfolio: how-to posts, technique tutorials and shoot write-ups built around the questions your ideal clients actually type into Google. You publish consistently, answer one search query per post, and let each post build authority for the next. Expect six to eight months before steady visitors show up, not six days.
The reason so many photography blogs sit flat is simple. The site is a wall of beautiful images with a caption underneath, and there is almost no text for a search engine to match to a question. A portfolio converts someone who already found you. A blog finds the people who don’t know you yet.
Last updated for 2026.
Table of Contents
- What You Need
- Step-by-Step: How to Write a Photography Blog That Gets Traffic
- 1. Choose a Specific Photography Niche
- 2. Find Searchable Blog Topics
- 3. Plan Posts Around One Search Intent
- 4. Create Useful Original Posts
- 5. Optimize Titles, Headings, and Images
- 6. Publish Consistently and Improve Existing Posts
- Common Mistakes
- Frequently Asked Questions
- How often should a photographer publish blog posts?
- Do I need original photos for a photography blog to rank?
- How many blog posts do I need before I get traffic?
- How do I choose keywords for a photography blog?
- How do I know whether my photography blog is working?
- Conclusion
What You Need

You need less than most people assume. No paid SEO suite is a prerequisite, and no agency retainer is required either.
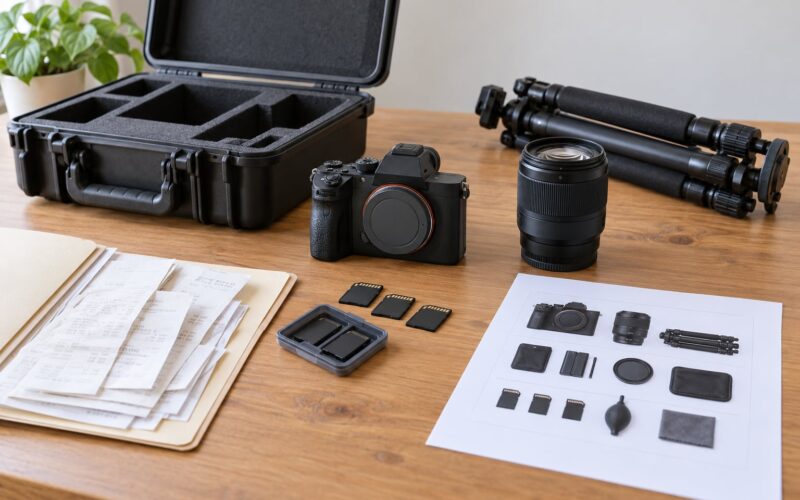
- A defined audience. One group of people you photograph, named plainly. Wedding couples in one region, parents booking newborn sessions, or small brands shooting product.
- A finished or nearly finished project. Real work with real details: the location, the light, what you changed and why.
- An editing routine you can describe. Even five steps you repeat every time.
- Image optimization set up once. Descriptive file names before upload, compression, and a plan for writing alt text.
- A way to measure. Google Search Console and Google Analytics, both free, connected to the site.
If you can answer those five, you can publish today. If you cannot name your audience, fix that first because every later decision depends on it.
Step-by-Step: How to Write a Photography Blog That Gets Traffic
1. Choose a Specific Photography Niche
Narrow the blog to one subject you can describe in a sentence. “Natural-light portrait photography for outdoor families” works. “Photography blog” does not, because nobody searches for that.
Pick the niche where your experience overlaps with a real question. Portraits, product, editing workflows and gear reviews all have active searchers. Pick one, write it into your bio, and let every post reference it.
How do you know it is narrow enough? If a post about the topic would still make sense to someone who never buys your kind of work, widen it back toward your actual clients.
2. Find Searchable Blog Topics
Topics come from what people ask, not from what you find beautiful. Type your niche into the search bar and read the autocomplete list, the related searches, and the questions under the results. Every one of those is a real query with real demand behind it.
Then judge each idea on three things: demand, difficulty, and whether it matters to your business. A query with modest volume that only your ideal clients type is worth more than a high-volume query nobody in your area searches for.
Weak topic: wedding photography tips. Specific topic: what to wear to an engagement session in cold weather. The second one matches an actual search, and you can answer it completely in one post.
Some tools are worth paying for later, not first. The free answer is Search Console’s own query report, which shows you exactly what your existing pages already get found for.
3. Plan Posts Around One Search Intent
Search intent is what the person typing the query actually wants. Learn, compare, solve, or act. Before you write a word, decide which one your post serves, because it dictates the format.
A “how to” query wants numbered steps and a finished result. A “best X” query wants a comparison and a clear pick. A “why does my photo look flat” query wants a diagnosis and a fix. Mixing all three into one post usually satisfies none of them.
How do you tell? Look at what currently ranks. If the top results are all tutorials, write a tutorial. If they are all gear round-ups, write a round-up with your own verdict inside it.
One post, one intent. This is the single biggest reason photography posts get impressions and no clicks.
4. Create Useful Original Posts
Generic tips get buried. What ranks is specific: your settings, your mistakes, your sequence of decisions, the frame you nearly missed.
A useful post contains at least three of these. Your own photographs with a short caption explaining the setup. A screenshot of your editing window. A number: shutter speed, f-stop, minutes in the edit, hours on location. A failure worth describing. A comparison shot showing the difference a change made.
Do blog posts increase SEO? Yes, when each one answers a query better than what is already ranking. Thin posts on thin topics dilute the site; a post that solves a real problem earns links and keeps visitors reading.
Write it the way you would brief a second photographer standing next to you on location. Concrete, unhurried, and honest about the parts that did not work.
5. Optimize Titles, Headings, and Images

Images are where photography blogs usually lose. Upload IMG_4832.jpg and you have told a search engine nothing. Rename the file to golden-hour-family-portraits-park.jpg before upload and write alt text that describes the picture in plain words, mentioning the subject once.
Then handle the rest of the page:
- URL: short, lowercase, hyphens, no dates. /natural-light-family-portrait-tips/
- Title tag: the query in plain words, under about 60 characters, near the front.
- H1: one per post, and it should read like the title tag.
- H2 and H3: phrase them the way a person asks, not as clever labels.
- Meta description: two sentences describing what the reader will be able to do afterwards.
- Internal links: two or three links to older posts, with descriptive anchor text. Link from the older post to the new one too.
- Speed: export at a size the page can carry, compress, and let images below the fold load lazily.
Example of a finished title tag: Golden Hour Family Portraits: 8 Settings That Work. It names the topic, promises a number, and reads like a search someone would type.
If your platform allows it, add Article and ImageObject structured data to posts and FAQPage data to your question sections. No photography competitor in this space bothers, which is exactly why it is worth doing.
Speed matters more here than on a text site. A gallery of full-resolution files will bury any good writing, so decide the display size first and export for it.
6. Publish Consistently and Improve Existing Posts
Cadence is the part nobody covers and everybody asks about. Fewer, better posts on a schedule you can keep beats a burst of thirty posts followed by silence.
| Posts published | Cadence that gets you there | What usually happens |
|---|---|---|
| 10 | 1 per week | Mostly indexing. Search Console is your only real feedback. |
| 25 | 2 per week | A handful of pages get impressions and low click-through. Expectations are still mostly low. |
| 50 | 2 per week | First steady traffic. A few posts carry most of the visits. |
| 100 | 2 per week, plus refreshes | Topical authority becomes visible and new posts index faster. |
A Reddit user in r/SEO described getting their first steady organic visits at roughly one to two a day after eight months of blogging. That is unremarkable, and it is the honest shape of this. A case study cited in the same research puts the realistic range at six to eight months for a new blog, shortened to four or five by publishing many optimized posts quickly.
Nobody quits at post fifteen because nothing is happening. Fifteen posts is not a signal either way. Judge the work at the fifty mark, then refresh what you already have: add a missing section, swap in a better photo, answer a question in the comments, link to a newer post. Updating a post that has traction beats starting a fresh one.
Running out of ideas is the same problem solved differently. One shoot can carry five to eight posts: the technique behind it, the gear list, the edit before and after, the timeline, the client story, the mistakes, and the location guide. You are not out of ideas, you are out of angles you have thought to take.
Then check Search Console once a month. Pages that get impressions but few clicks need a better title. Queries you rank for on page three need more depth. Pages nobody opens can be quietly improved or left alone.
Common Mistakes
Almost every stalled photography blog I have looked at makes the same handful of errors, and each has a straightforward fix.
Targeting everyone. A blog about photography in general competes with everything and helps nobody. Fix it by choosing one audience and describing them in the first two lines of every post.
Copying what already ranks. You cannot out-write ten established sites on the same generic article. Fix it by covering a sub-question none of them touch, with your own photographs.
Publishing without original photos. Borrowed images make a post forgettable and thin. Fix it by using your own work, and by adding the settings and story that only you know.
Stuffing keywords. Repeating the exact phrase until it reads badly works for nobody. Fix it by using the phrase where it genuinely fits and leaning on natural wording everywhere else.
Ignoring search intent. A tutorial answering a shopping question gets impressions and exits. Fix it by matching the format to the query before drafting.
Weak image descriptions. Default file names and empty alt text waste the strongest thing you have. Fix it by renaming files before upload and writing a plain description of the picture.
Abandoning the schedule. Six weeks off and the topic loses momentum. Fix it by committing to a smaller number you will actually hit, and protecting the time like a shoot booking.
Two habits do most of the remaining work. Take the questions your inbox and comments already contain and turn them straight into posts, and give every old post one internal link to a newer one so nothing sits orphaned.
Before you hit publish, run this check:
| Element | Why it matters | How to do it |
|---|---|---|
| One query per post | Keeps intent clear | Name the query in your notes before drafting |
| Title tag | Decides most click-through | Under 60 characters, query first, add a number |
| Meta description | Triggers the click | Two sentences, one concrete benefit |
| H2 and H3 | Shows structure to readers and crawlers | Phrase them as the questions people ask |
| File names | Describes the image to search | Lowercase words, hyphens, subject first |
| Alt text | Names the photo for screen readers and crawls | One plain sentence describing the picture |
| Image weight | Protects page speed | Export at display size, compress, lazy load |
| Internal links | Moves readers and authority deeper | Two or three links with descriptive anchor text |
| Captions | Adds text under an image-heavy page | Explain the setting, not the feeling |
| Author and date | Signals a real person wrote it | Byline with credentials plus an updated date |
Frequently Asked Questions
How often should a photographer publish blog posts?
Most working photographers do best at two posts a week, which is roughly eight a month and enough to build topical coverage without burning out. One post a week still works if it is well researched, but progress takes longer because the site covers less ground. What matters more than the number is that you keep the schedule for six months, since search engines reward steady coverage of a subject rather than occasional bursts.
Do I need original photos for a photography blog to rank?
Original photos are close to essential, and not because of search engines. Images from your own shoots give readers the settings, location and context that make a tutorial useful, which is exactly what thin posts with borrowed pictures lack. They also make the post impossible to duplicate. You can get partway with well-credited library images in a gear post, but for anything technique-based, use your own work.
How many blog posts do I need before I get traffic?
Realistic answers from photographers reporting their own results cluster around fifty posts before consistent traffic, and six to eight months of publishing to get there. The first ten posts mostly teach the search engines your site exists, so judging results then leads to quitting early. Judge at the fifty mark, then keep improving the posts that already get impressions instead of chasing new ones.
How do I choose keywords for a photography blog?
Start with your niche plus a question your clients ask you, then check the autocomplete suggestions and related searches for real phrasing. Judge each idea on demand, difficulty, and whether your ideal clients would type it. Long-tail phrases win here because competition is lower and intent is clearer. Once the site is live, Search Console shows you the exact queries your pages already get found for.
How do I know whether my photography blog is working?
Search Console is the honest measure because it shows impressions, clicks and your average position on queries that actually matter. Look at pages with impressions but few clicks first, since that is a title and description problem you can fix this week. Then check queries sitting just below the top ten, which is where depth and better photos pay off. Analytics tells you which posts hold attention and lead to enquiries.
Conclusion
Choose one focused photography audience, answer one specific question they type into Google, and publish a post built from your own photographs, settings and mistakes. Add a clear title, real alt text, two internal links and a stated next step. Do that eight times a month for six months and check the numbers before you decide whether it is working.