Most weak portraits are not a camera problem, they are a light problem. The ten common portrait lighting mistakes to avoid below all show up on the screen as soon as you zoom in: dark eye sockets, one blown cheek, skin that reads green, a background brighter than the face. Each one has a cause you can name and a fix you can make in under a minute, and none of them require expensive gear.
What photographers struggle with most is not exposure or focus. It is reading light before pressing the shutter, and knowing whether a flat, dull result comes from the settings or from where the source sits relative to the face. Once you can name what the light is doing, the rest is adjustment.
Table of Contents
- Common Portrait Lighting Mistakes at a Glance
- 1. Placing the Light Directly Overhead
- How to recognize and fix overhead light
- 2. Mixing Light Colors Without Checking White Balance
- 3. Using One Light Without Shaping the Shadows
- 4. Positioning the Light Too Close
- 5. Pointing the Light Straight at the Subject’s Face
- 6. Ignoring Background Separation
- 7. Using Too Much Light on Reflective Skin
- 8. Letting the Background Light Compete with the Face
- 9. Failing to Control Reflected Light
- 10. Setting Exposure Before Evaluating the Light
- Why camera settings can’t fix common portrait lighting mistakes
- Frequently Asked Questions
- How do I fix uneven lighting in photos?
- What is the 3 lighting rule in portrait photography?
- Is a reflector better than fill flash for portraits?
- How do I get catchlights without a light?
- Why do my portraits look flat even in good light?
- Is midday sun really unusable for portraits?
- Conclusion
Common Portrait Lighting Mistakes at a Glance
Scan this table first. Find the symptom you keep seeing in your own frames, then jump to the matching section for the cause and the correction.
| Mistake | How it shows up in frame | Fastest fix |
|---|---|---|
| Light directly overhead | Dark eye sockets, bright forehead, sharp band under the nose | Raise it and move it to one side, 45 degrees up |
| Mixed light colors | Hands a different tone than the face, or a green skin cast | Lock white balance instead of leaving it on auto |
| No shaping of shadows | Either a black shadow side or a completely flat face | Angle the key, then add negative fill |
| Light too close | Hard shadows, hotspots, harsh rim, lost falloff | Move it back and up, double the distance for a third of the light |
| Light aimed straight at the face | Flat features, dark eye sockets, a distracting catchlight | Rotate the light 30 to 45 degrees off the camera axis |
| No background separation | Subject and background the same brightness | Flag, dim or move the background several feet back |
| Too much light on reflective skin | Specular blowouts on forehead, nose, cheeks, chin | Feather the source and stop down a third or half a stop |
| Background competing with the face | Bright patch or colored light the eye jumps to first | Subtract it before adding anything |
| Uncontrolled reflected light | Uplighting from a tabletop, shadows filled by a white wall | Flag the surface or add a black panel |
| Exposure set before the light is judged | Camera settings rescuing a setup that cannot work | Evaluate source, shadows, highlights, background, then dial in |
1. Placing the Light Directly Overhead
Overhead light comes from the single worst angle a face can be lit from. The source sits where the subject’s own brow is, so the eyes drop into shadow, the forehead and nose bridge go bright and shiny, and everything below the cheekbones falls away.
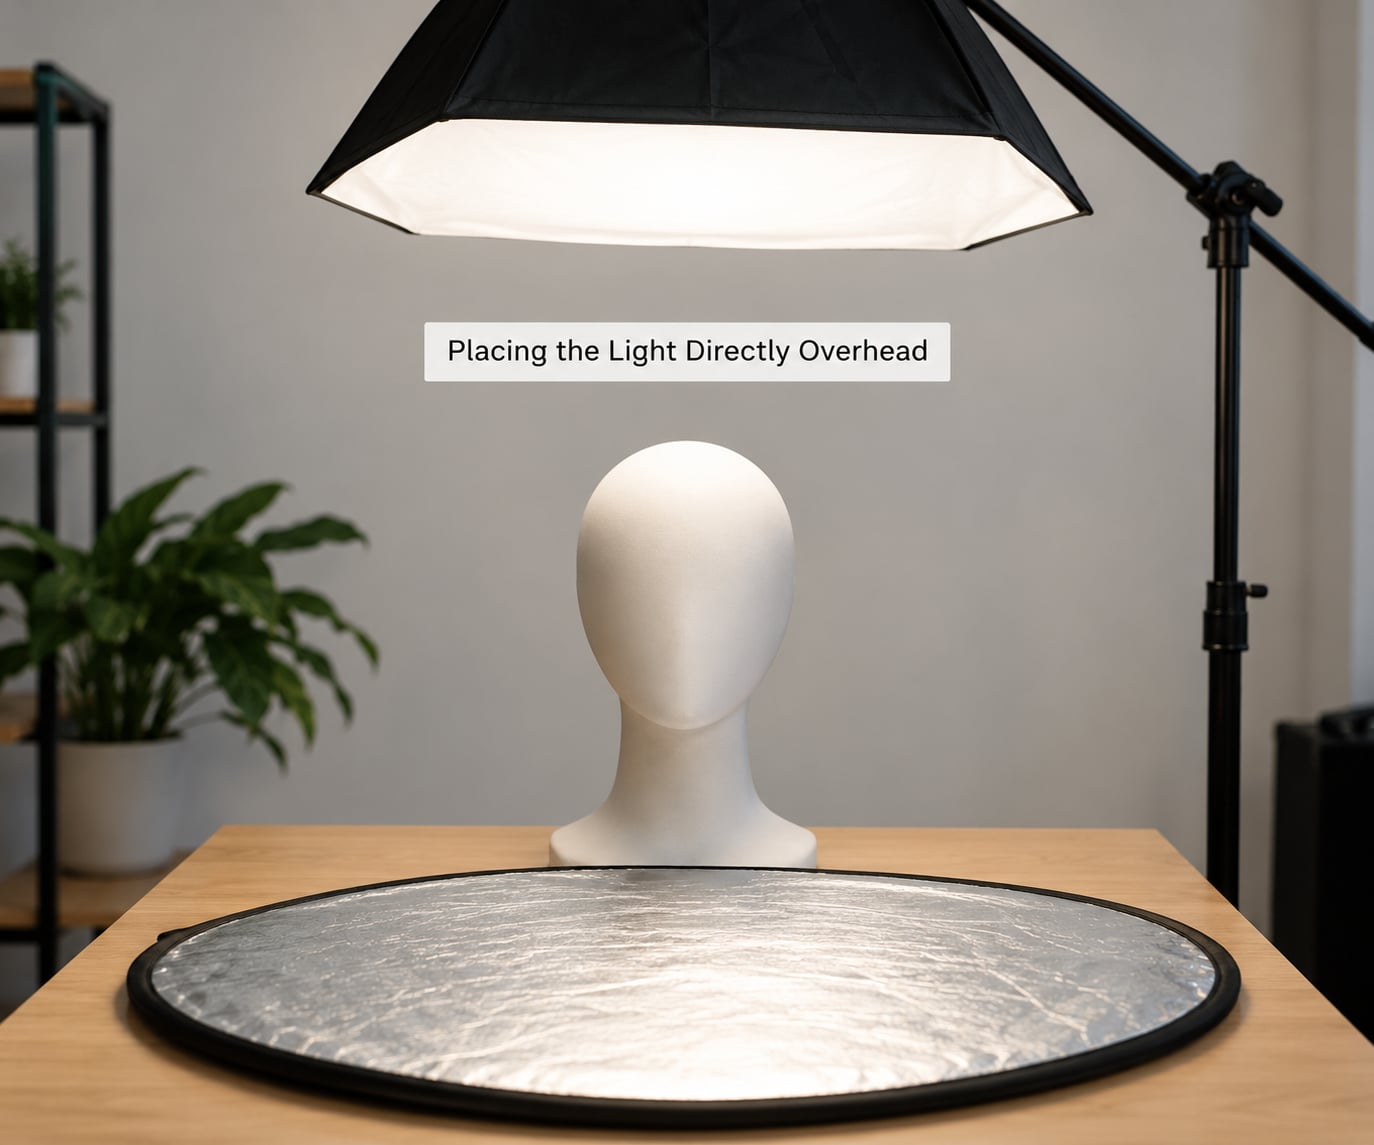
The fix is not to add light. It is to raise the source above eye level and swing it to one side, roughly 45 degrees off the camera axis, until the shadow from the nose falls down and away rather than straight down.
How to recognize and fix overhead light
Check three things in order. First, look at the catchlights: if they sit in the middle of the iris or above it, the source is high. Second, look at the shadow under the chin; if it is a hard horizontal band across the neck, the light is too high and too bare. Third, look at the forehead and nose, which will be brighter than the cheeks by two stops or more.
Then move the source up and toward one side by about 45 degrees, raise it until the shadow under the nose points diagonally, and put a white reflector or fill flash low and opposite to lift the shadow side. What matters is that the shape of the shadow changes when you change the source position, because the shadow is simply the record of where the light did not reach.
2. Mixing Light Colors Without Checking White Balance
A face lit by more than one source will show two different skin tones: a warm side and a cool side, or a bright cheek that reads pale next to a shadow side that reads orange. The fix is to set white balance manually and match the sources before you shoot.
Shot in auto white balance, a frame can also drift while the subject moves between a warm wall and open shade. Set a custom white balance from a neutral surface, or set a fixed Kelvin value and change it only when you move to a different kind of light.
Reflected color is the quieter version of the same mistake. Shoot a face above vivid green grass or in front of a red brick wall and the skin picks up that color, strongest on the side nearest the surface and fading with distance. A global tint shift cannot fix it, because the cast is uneven across the frame. Move the subject, turn them away from the colored surface, or place a white reflector between the surface and the face.
3. Using One Light Without Shaping the Shadows
A single unmodified light produces either a very dark shadow side or a very flat face, and both look careless. The mistake is treating one light as one decision instead of the start of a shape.
Shape it with position first. Moving the key closer to the camera axis fills the shadows and flattens the face. Moving it further out creates a longer, more sculpted shadow edge. Two light positions that look almost identical in the setup produce completely different faces.
Shape it with negative fill next. A black panel or a piece of dark fabric placed on the shadow side, just outside frame, adds contrast without adding light. This is the tool no beginner reaches for and the one that makes a single-light portrait look deliberate.
4. Positioning the Light Too Close
Move a lamp from two feet away to four feet away and it does not get dimmer by a small amount. Light intensity follows the inverse square law, so doubling the distance cuts the brightness to roughly a quarter. Two feet versus four feet is about one and two thirds stops of light.
Distance also changes the apparent size of the source. Softness comes from the ratio of source size to distance from the subject, not from the source alone. A one foot softbox held two feet from a face still throws fairly defined shadows, because the same light arrives from a narrow solid angle. Push it back to four feet and the shadows visibly relax.
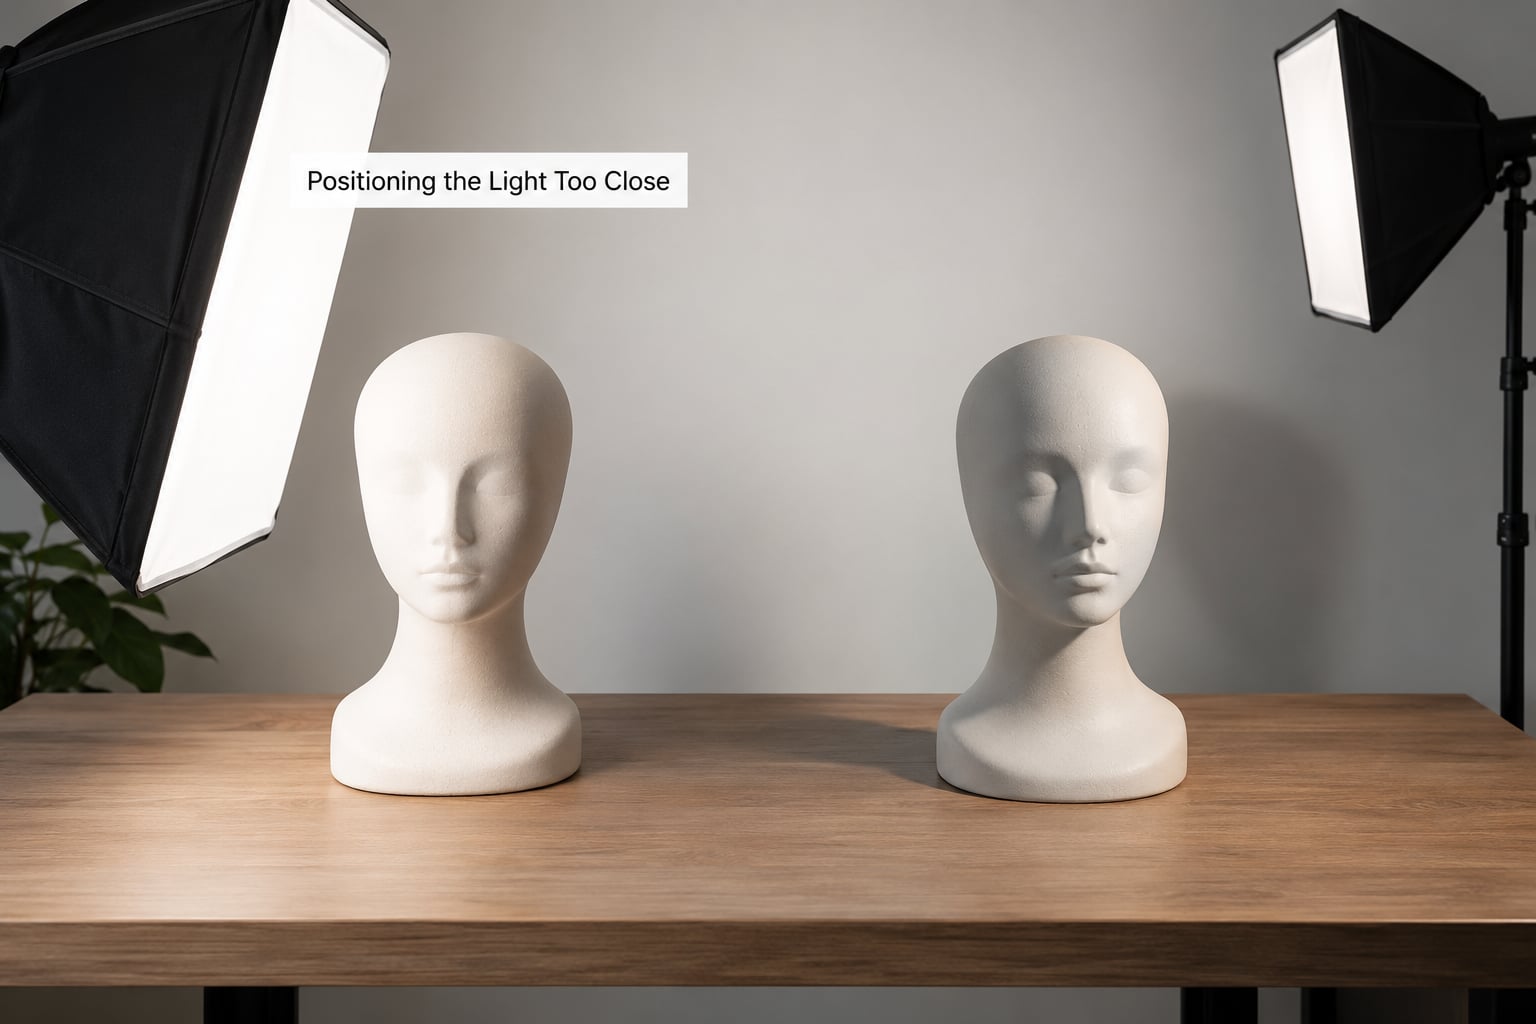
Beginners keep lights close because they want more brightness, and they raise the ISO and open the aperture to compensate. The cost is hard shadows and blown highlights. Moving the light back and up usually costs nothing at all.
5. Pointing the Light Straight at the Subject’s Face
Front light is the least interesting light to give a face. With the source on the camera axis, the shadows from the nose and cheekbones fall exactly where they came from, so depth disappears and the face looks pressed flat.
Rotate the source 30 to 45 degrees off axis. Features gain depth, the nose gains a shadow that describes it, and the catchlight moves to the upper edge of the iris where it looks natural rather than pasted into the middle. If the background needs to stay even, rotate the background light instead and let the key do the modelling.
6. Ignoring Background Separation
Separation is a brightness comparison, not a blur trick. If the subject and the background sit at the same level, the eye has nothing to grip and the portrait reads flat no matter how sharp the face is.
Three things fix it. Flag the background so it goes a stop and a half darker than the skin, then meter for the skin. Move the subject further from the background so falloff darkens it naturally. Or light the background separately with a dimmer source aimed at the wall rather than at the face.
Shallow depth of field does not rescue a busy background. A blurred bright window or a pale wall still reads as a bright patch, because the eye reacts to overall luminance, not to focus. People regularly ask why a wide open lens still leaves a cluttered wall distracting, and the answer is that blur removes detail but leaves tone.
7. Using Too Much Light on Reflective Skin
Skin is reflective, especially oilier skin, and the brightest spots land in predictable places: the center of the forehead, the bridge and tip of the nose, the tops of the cheekbones, and the center of the chin. Those specular highlights blow out to white before the rest of the face is properly exposed.
Three adjustments fix it. Feather the source, aiming most of the light at the top of the head and letting only part of it reach the face. Diffuse it, since a large soft source spreads the highlight instead of concentrating it. And control exposure on the skin, checking the histogram or the highlights warning rather than trusting the brightness of the screen.
A reflector placed low and opposite adds gentle light back into the shadows without touching the brightness of the shiny areas.
8. Letting the Background Light Compete with the Face
A bright patch on the wall, a colored accent light behind the shoulder, or a window falling in frame will pull the eye away from the face before the viewer registers anything else. This is one of the common portrait lighting mistakes to avoid that photographers notice only after the shoot.
The instinct is to add another light. Try subtracting instead. Turn the background source down until the background sits about one to two stops under the skin. Move it so it stops landing in frame. Swap a colored gel for a warm white. Or move the subject until the bright patch is behind the camera rather than behind the head.
9. Failing to Control Reflected Light
Portrait studios are full of white surfaces, and every one of them is an unplanned light. A white ceiling fills the shadows under the eyes and turns a sculpted portrait into a flat one. A pale tabletop bounces uplight onto the chin and under the nostrils. A white wall behind the subject lifts the shadow side from behind.
Flag the surface. A black card, a dark blanket, or a sheet of black foam board placed just outside the frame takes the bounce away and puts the contrast back. If you want fill, add it deliberately with a reflector or a second source at a known position rather than accepting whatever the room gives you.
10. Setting Exposure Before Evaluating the Light
Camera settings cannot rescue poor lighting design. Dialing in a lower aperture makes a flat face flatter. The useful order is: look at the source, check the shadow direction, check the brightest highlights, compare the background to the face, then set the exposure for skin.
That order matters most when you mix flash with ambient daylight. The pattern that works is to set the shutter to the maximum sync speed, drop the ISO as low as the light allows, and then balance the flash and the ambient light with the aperture alone. Raise the flash power or move it closer when the surroundings are too bright for the ambient level you need.
Why camera settings can’t fix common portrait lighting mistakes
Settings decide how the sensor records what falls on it. They do not decide whether the shadow side is empty, whether the background is louder than the face, or whether a catchlight exists. Fix the light and the settings become a short list of two or three numbers. Fix the settings first and you will spend the session chasing a problem that has not moved.
Frequently Asked Questions
How do I fix uneven lighting in photos?
Start by finding the brightest part of the frame, then meter for it, since exposure is locked to that tone. Next compare the subject to the background and dim or flag the background until it sits one to two stops under the skin. Finally, walk a reflector or fill source across the shadow side and watch the ratio change on the rear screen. Unevenness is almost always a ratio problem, not a power problem.
What is the 3 lighting rule in portrait photography?
The three lights are key, fill, and background. The key is the main source that shapes the face and creates the shadows. The fill lifts the shadow side to control the light ratio, which is the difference in brightness between the lit and shadowed areas of the face. The background light controls how the wall or backdrop reads relative to the subject. You can run all three with one source plus a reflector and a flag.
Is a reflector better than fill flash for portraits?
A reflector is the faster choice. It costs nothing, adds about one to two stops of gentle fill, and never changes the color of the scene or the ambient balance. Fill flash gives you more light than you may want and keeps working in shade, but it changes exposure and white balance, so you have to recompose the settings around it. Most beginners should master the reflector first and add flash once the ratio feels predictable.
How do I get catchlights without a light?
Catchlights need a small, bright source in the right place, and outdoors you already have one: the sky. Place the subject so open sky is reflected toward the camera side of the eyes, with their face angled slightly away from the brightest patch of sky. A window works the same way, since the bright rectangle reflects in the iris. A phone screen showing a white image also works as a cheap source, though it puts off very little light.
Why do my portraits look flat even in good light?
Flatness comes from too much light on the shadow side, or too little difference between the light and shadow sides. It usually means the key is sitting close to the camera axis, or that a white wall or ceiling is bouncing fill in from outside your control. Move the key further off axis, add a black panel on the shadow side, and flag the wall. A wide open lens will not fix it, because the contrast is already gone.
Is midday sun really unusable for portraits?
Not unusable, just unforgiving. Harsh overhead sun puts shadows under the brow and nose and creates bright patches on the forehead. You have three options: move the subject into open shade for soft even light, put them in the shade of a building or tree while keeping open sky as the fill, or keep the sun and turn the subject so it lights them from the side. Side light at midday still needs fill to keep the shadow side alive.
Conclusion
Start every portrait session at the same checkpoint: the height of the light, the distance from the subject, the angle to the camera, whether the color is consistent, and whether the background reads quieter than the face. That check takes about fifteen seconds and it catches most of the common portrait lighting mistakes to avoid before you have lifted the camera.
Only then set the exposure for skin. None of this needs a bigger light or a newer lens. Moving a lamp six inches up, walking a reflector across the shadow side, and flagging a bright wall will do more for your portraits this year than any gear change you can make.