Learning how to photograph artists and musicians comes down to research, one dependable light, and direction that treats the instrument as part of the person rather than a prop. A full studio session runs two to four hours; a rehearsal-space portrait takes forty minutes once you know what you are looking for.
The difference between a usable shot and a great one usually isn’t gear. It’s whether the artist looked like themselves, whether the frame says something about how they play, and whether the file works cropped square for a streaming profile or tall for a poster.
Below is the workflow I actually run, from the first listen through delivery.
Table of Contents
- What You Need
- How to Photograph Artists and Musicians: Step by Step
- 1. Research the Artist’s Work and Story
- 2. Plan the Session Around the Music
- 3. Discuss Image Use, Releases, and Comfort
- 4. Build a Simple Lighting Setup
- 5. Create Authentic Poses and Performance Moments
- 6. How to Photograph Artists and Musicians in Action
- 7. Direct, Shoot, and Adapt Efficiently
- 8. Edit, Proof, and Deliver the Story
- Common Mistakes
- Frequently Asked Questions
- How do you photograph musicians without a stage?
- What is the best lighting setup for an artist portrait?
- Should I photograph musicians live or in a studio?
- Do I need a model release to photograph a performing artist?
- How do you capture movement while playing an instrument?
- Conclusion: Start With Research and Trust
What You Need
Camera and lens: any camera with reliable autofocus, paired with something in the 50mm to 85mm range. That range keeps a flattering working distance, holds background distance in small rooms, and stays wide enough for a full-length frame with a cello or a double bass. A fast prime is more useful than a zoom because venues are dim and fussy.
Lighting: one large soft light as your key, a black flag or V-flat for shaping shadows, and a small white reflector. That’s the whole kit for a portrait session. Add a second light only when the location gives you nowhere to bounce.
Audio: for live work, bring the camera’s own headphone jack and shoot silent frames rather than stills, so you are not fighting with an audio feed or a venue’s sound engineer.
Storage and backup: two cards in the body if it takes them, and a laptop or drive you can hand the artist copies from the same evening. Artists who see a thumbnail of a good frame usually relax noticeably, and that change shows up in the next ten minutes.
Paperwork: a plain-language model release for recognizable people, a property release for locations with logos or signage you don’t own, and a short written note on where images will run and for how long. Bring printed copies. People sign faster on paper than on a phone.
For a jazz trio in a club, that list is enough. For a five-piece band in a daylight studio, add a second reflector and more time than you think.
How to Photograph Artists and Musicians: Step by Step
1. Research the Artist’s Work and Story
Spend twenty minutes before you pack a bag. Listen to three tracks, watch any live footage you can find, and read one interview.
You’re looking for four things: influences, stage persona, how they physically play, and the room their music lives in. An ambient recordist who performs in a windowless studio looks completely wrong against a brick wall, and a loud festival act in the same gear looks right.
Write a one-paragraph brief with three portrait ideas you could actually defend. “Moody side light” isn’t an idea. “Seated on the floor with the cello between their knees, window light from the camera left, half the face in shadow” is. If your brief is just the genre, you haven’t researched yet.
2. Plan the Session Around the Music
Decide what the images are for before you decide where to stand. Streaming profiles need a tight, centered head and shoulders. Press kits need a clean environmental portrait. Album artwork needs something with negative space. Tour materials need action.
Then match the location to the priority. Performance sequence, environmental portrait, studio setup, and documentary coverage are four different jobs, and cramming all four into ninety minutes usually produces none of them well.
Check practical things too: where the sun falls at your start time, whether you can move furniture, whether the venue allows flash, and how long the artist can realistically stay. A three-hour block with breaks scheduled beats a six-hour block where everyone is exhausted by hour two.
3. Discuss Image Use, Releases, and Comfort
Say out loud where the images will appear and for how long. Press, streaming, social, and merchandise have very different usage implications, and artists who know the answer up front don’t ask about it later.
Get written permission for recognizable people and for private property you’ll photograph. Photographing in a public place and publishing commercially are separate questions, and the release is cheap insurance either way.
Ask what’s off-limits. Some artists don’t want their tattoos shown, some are recovering from an injury, some have told you they’re tired of being photographed in a certain way. Ask about retouching limits too, because removing a scar or a grey streak without a conversation turns a collaboration into a bad surprise.
Agree on breaks. Hands, wrists, and backs give out faster than people expect when you’re holding an instrument in a fixed posture.
4. Build a Simple Lighting Setup
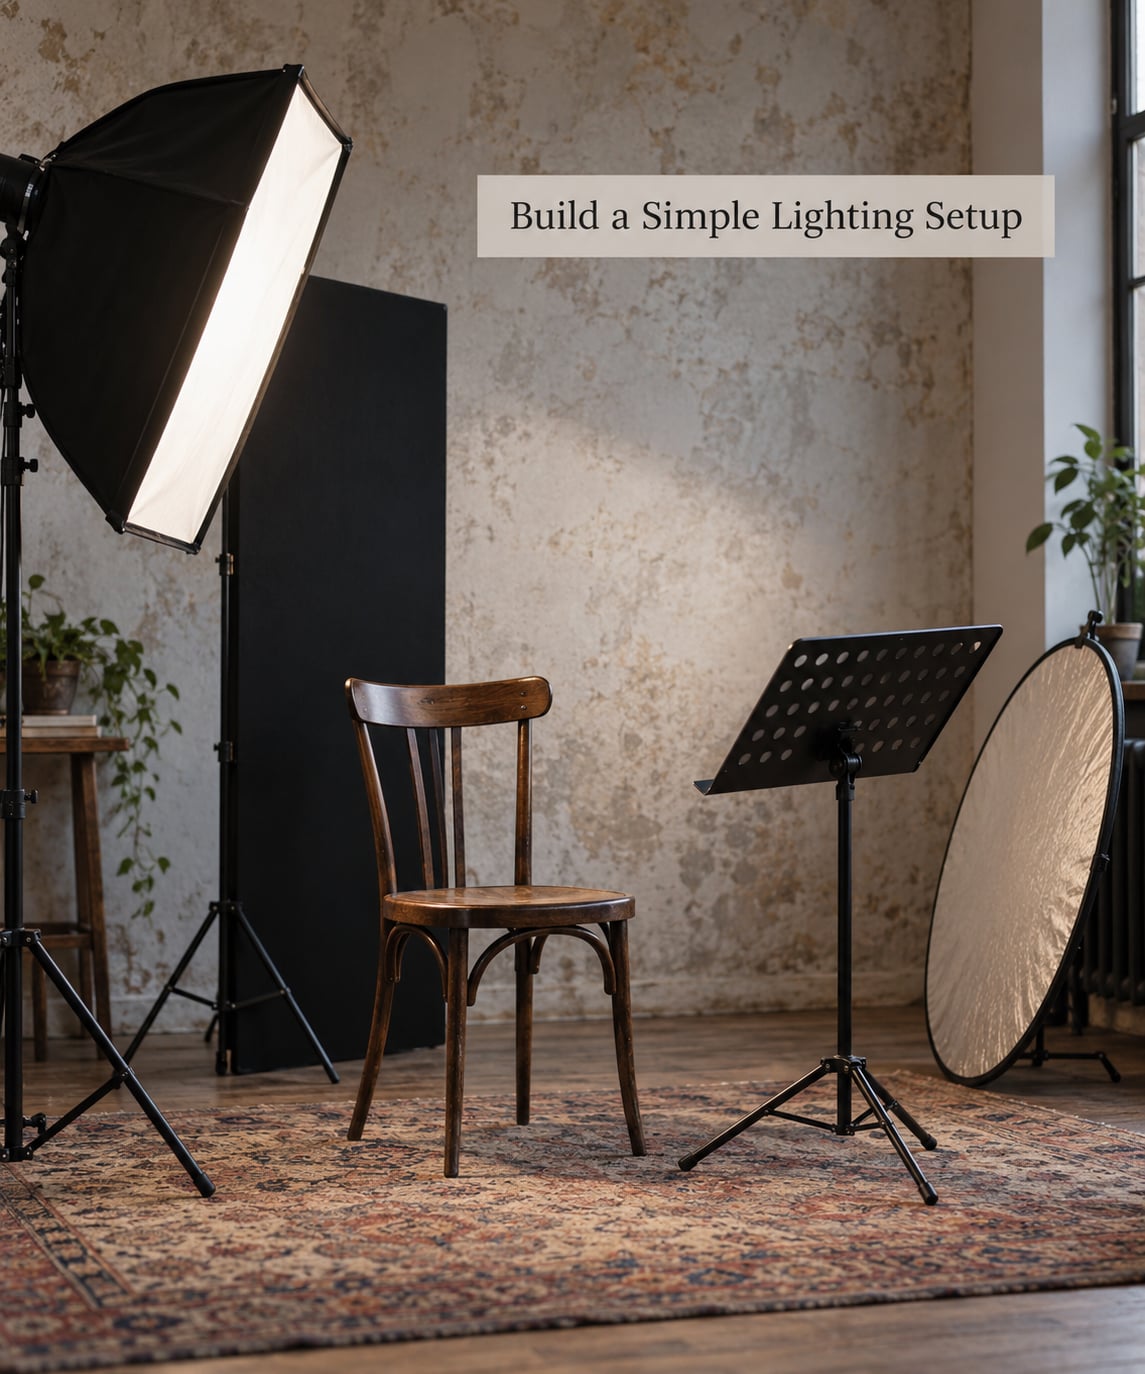
Set up and test before the artist arrives. Put the key at roughly 45 degrees off camera axis and slightly above eye level, feathered back so it wraps instead of pointing flat at the face.
Shoot a stand-in object or a friend at the working distance and check three things: the catchlight shape, the direction the shadow falls, and whether the face separates from the background in the crop you plan to use.
Watch the background edges, not just the subject. A bright strip of wall behind a shoulder is the thing that ruins an otherwise fine frame, and it’s much easier to fix with a flag now than in software later. For indoor fluorescent locations, black and white is often the honest answer.
5. Create Authentic Poses and Performance Moments
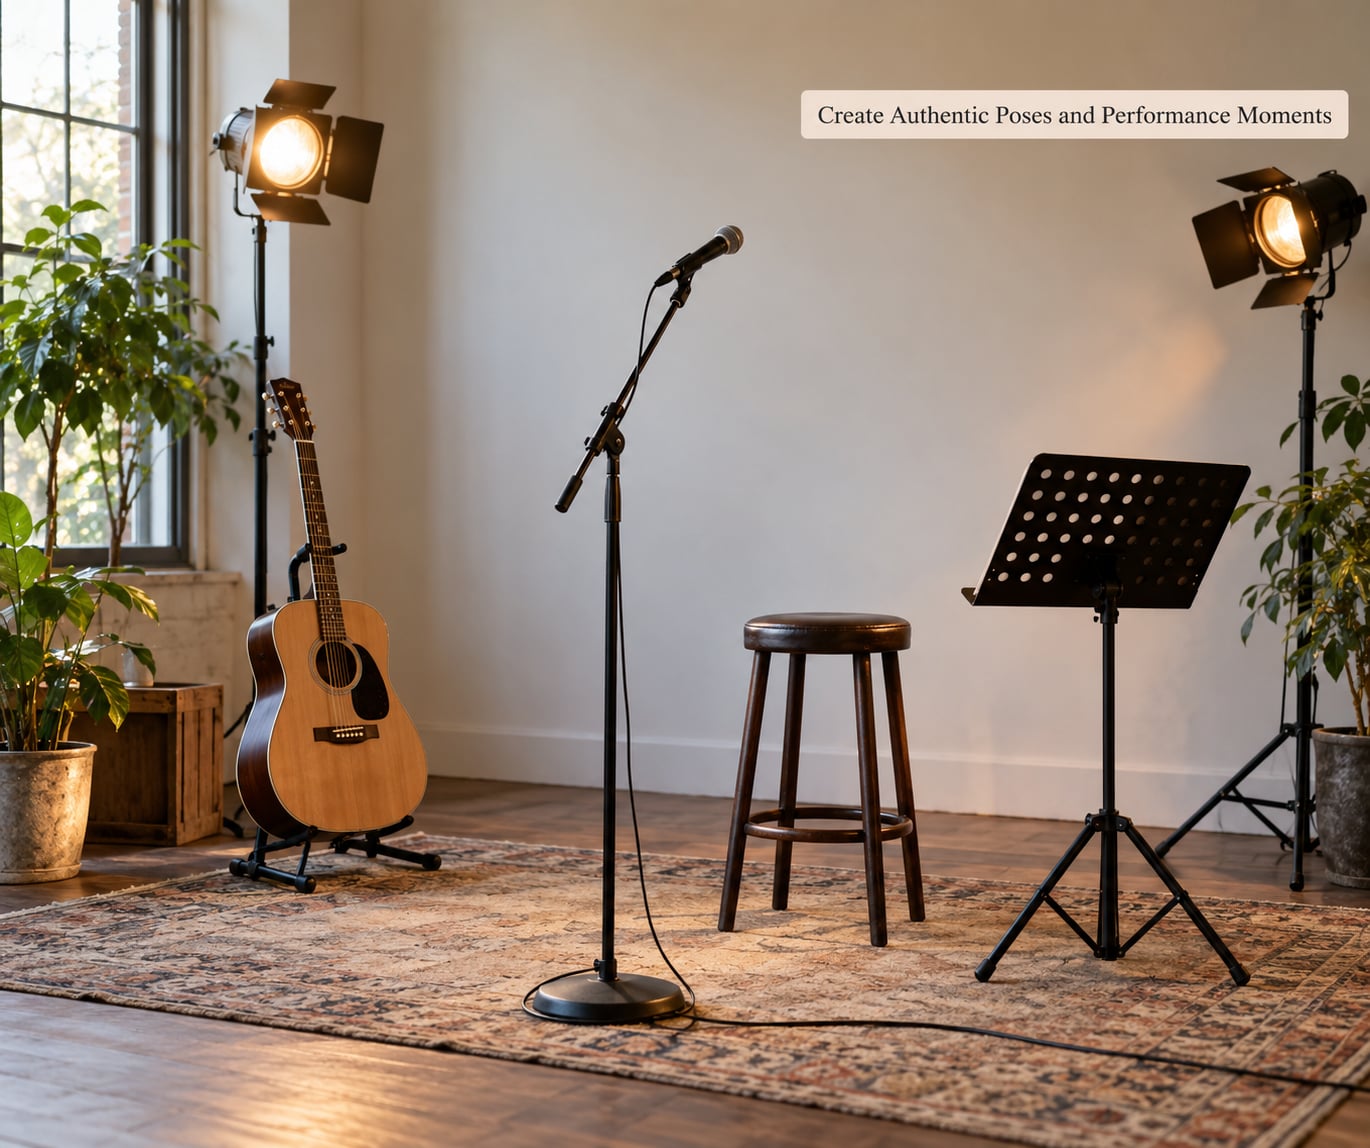
Ask how they naturally hold the instrument, then ask them to do that for a few minutes without thinking about the camera. Watch rather than talk. Most stiff portraits come from a photographer filling silence.
Then introduce specifics, not abstractions. “Turn a little toward the light” works. “Be more expressive” does nothing. Give one instruction, take a few frames, then change one thing at a time so you know what fixed it.
Watch hands, which are where musician portraits usually go wrong. Fingers splayed over frets, wrists bent into the neck, elbows locked straight. Move the elbow or rotate the wrist a few degrees and the frame changes completely.
Capture the moment posture and concentration look natural rather than arranged. Those frames are rare and they carry the whole set.
6. How to Photograph Artists and Musicians in Action
Action shots fail when the gesture or the instrument gets lost. Pick one focal priority per frame: hands, face, or the instrument’s body. Trying to hold all three sharp at once usually means one of them isn’t.
Vary the crop as you shoot. Wide for room and energy, medium for the instrument relationship, close for hands and expression. A set that stays at one distance reads as a series of accidents.
For motion, keep the shutter fast enough that a fast hand doesn’t smear, and accept a shallower depth of field rather than a sharp background and a soft face. Some misses are fine. Burry the frame rate in volume.
Watch for obstructions. Microphone booms, stand hardware, and monitor wedges regularly sit right where a face wants to be. A half-step to the side solves it more often than any lighting change.
7. Direct, Shoot, and Adapt Efficiently
Shoot the important frames first. If you only get fifteen good minutes, they should be headshots and one strong environmental frame, because those are the images that get used.
Keep directions short and physical. Ask for a hold, take a burst, review one frame on the camera screen, and adjust. Showing the artist the image builds confidence faster than any amount of reassurance.
When a strong moment appears, stay with it instead of returning to your list. The best frames in most musician sets come from abandoning the shot list for two minutes.
Review in sequences rather than single shots. Open the group of ten similar frames, look for the one with the posture and the eyes, and delete the rest early so your final edit is a selection rather than a triage.
8. Edit, Proof, and Deliver the Story
Build the proof as a set of stories, not a folder dump. Clean headshots, environmental portraits, action frames, instrument details, and a group shot read as a coherent campaign.
Keep adjustments restrained. Straighten horizons, recover blown stage highlights, match skin tones between setups, and correct white balance against something neutral in the frame. Stage lighting is wildly colored; fixing it is work, but a heavy grade that flattens the room loses the atmosphere that made the night worth shooting.
Retouch only what was agreed. Skin cleanup, a distracting cable removed, a background edge tidied up. Anything that changes a person’s shape belongs in a conversation first.
Deliver properly sized files: web-ready JPEGs at full pixel resolution for streaming and press, a square or vertical crop for profile use, and a smaller embedded version for email. Include the usage terms and credit line in the same message, and give the artist the originals they paid for. If you shoot how to photograph artists and musicians for a label or a manager, send them the same set the artist gets.
Common Mistakes
Cluttered backgrounds. The frame is fighting a pile of cables, a fire exit, and half a drum kit. Clear the area first, then move the subject a step or two to put distance between them and the background.
Harsh or mismatched light. A bare on-camera flash straight down the middle of the face flattens everyone. Turn it off, put the key at an angle, and let the flag do the work.
Generic posing. Crossed arms and a stare produce a stock photo. Ask what the artist was doing ten minutes before you arrived and start there.
Forcing a serious expression. Smiling isn’t wrong either. Give the artist a prompt, then a short silence, and keep both options.
Over-retouching. If the skin looks like plastic, the grade is too strong. Pull it back before delivery.
Missed focus on movement. Use continuous autofocus with a wider focus area or a single tracking point, and check your shutter speed against how fast the hands actually move.
Poor timing. Rock and electronic acts often have their most expressive seconds in the loudest passages. Learn one track and anticipate instead of reacting.
Vague direction. “Be more relaxed” is not a direction. “Shoulder down, weight onto the back foot, chin toward the light” is.
Two habits help more than anything else on this list. Treat the instrument as part of the person, never as furniture to lean on, and never use a flash during a live performance unless the venue and the performers have agreed to it in advance.
Frequently Asked Questions
How do you photograph musicians without a stage?
Rehearsal rooms, living rooms, and practice spaces work better than people expect. Clear the background, put the key light near a window or a doorway, and shoot close so the room disappears behind the subject. Ask the player to work through material rather than pose for you, and frame the hands and the face. Long lenses help in tight spaces because you can back up without needing room.
What is the best lighting setup for an artist portrait?
One large soft light at roughly 45 degrees and slightly above eye level, feathered back, plus a black flag to shape the shadow and a white reflector to lift the dark side. That single-source setup gives you depth without flattening the face and stays fast when you are moving between locations. Add a second light only when the room offers nowhere to bounce.
Should I photograph musicians live or in a studio?
Live work captures energy and gives you documentary frames a studio cannot, but light changes every few seconds and access may be restricted. A studio gives you repeatable control and clean headshots for press and streaming. Most working photographers do both: studio portraits for promotional assets, live coverage for campaigns and editorial. If the goal is a consistent look across a release, choose the studio.
Do I need a model release to photograph a performing artist?
A release is a written agreement covering commercial use, and it is worth having whenever recognizable people appear in images you plan to publish or license. It should name the usage, the duration, and the credit. Rules vary by country and state, so check locally or ask a lawyer to review your template. For editorial use the requirements can differ from advertising, so clarify the intended use in writing.
How do you capture movement while playing an instrument?
Use continuous autofocus with tracking and keep the shutter fast enough for the fastest hand in the frame, then widen the aperture so the face stays sharp against a soft background. Shoot bursts around gestures you have learned from one track. Accept that some frames will miss, shoot more than you think you need, and watch for stands and cables crossing the face before you worry about settings.
Conclusion: Start With Research and Trust
How to photograph artists and musicians well is mostly preparation: listen first, decide what the images are for, get permission in writing, and build one setup you understand well enough to set up in the dark.
Start with the research brief and a conversation about usage. Everything after that, lighting, posing, action frames, and delivery, gets easier once the artist trusts the process and you know what the pictures need to do.