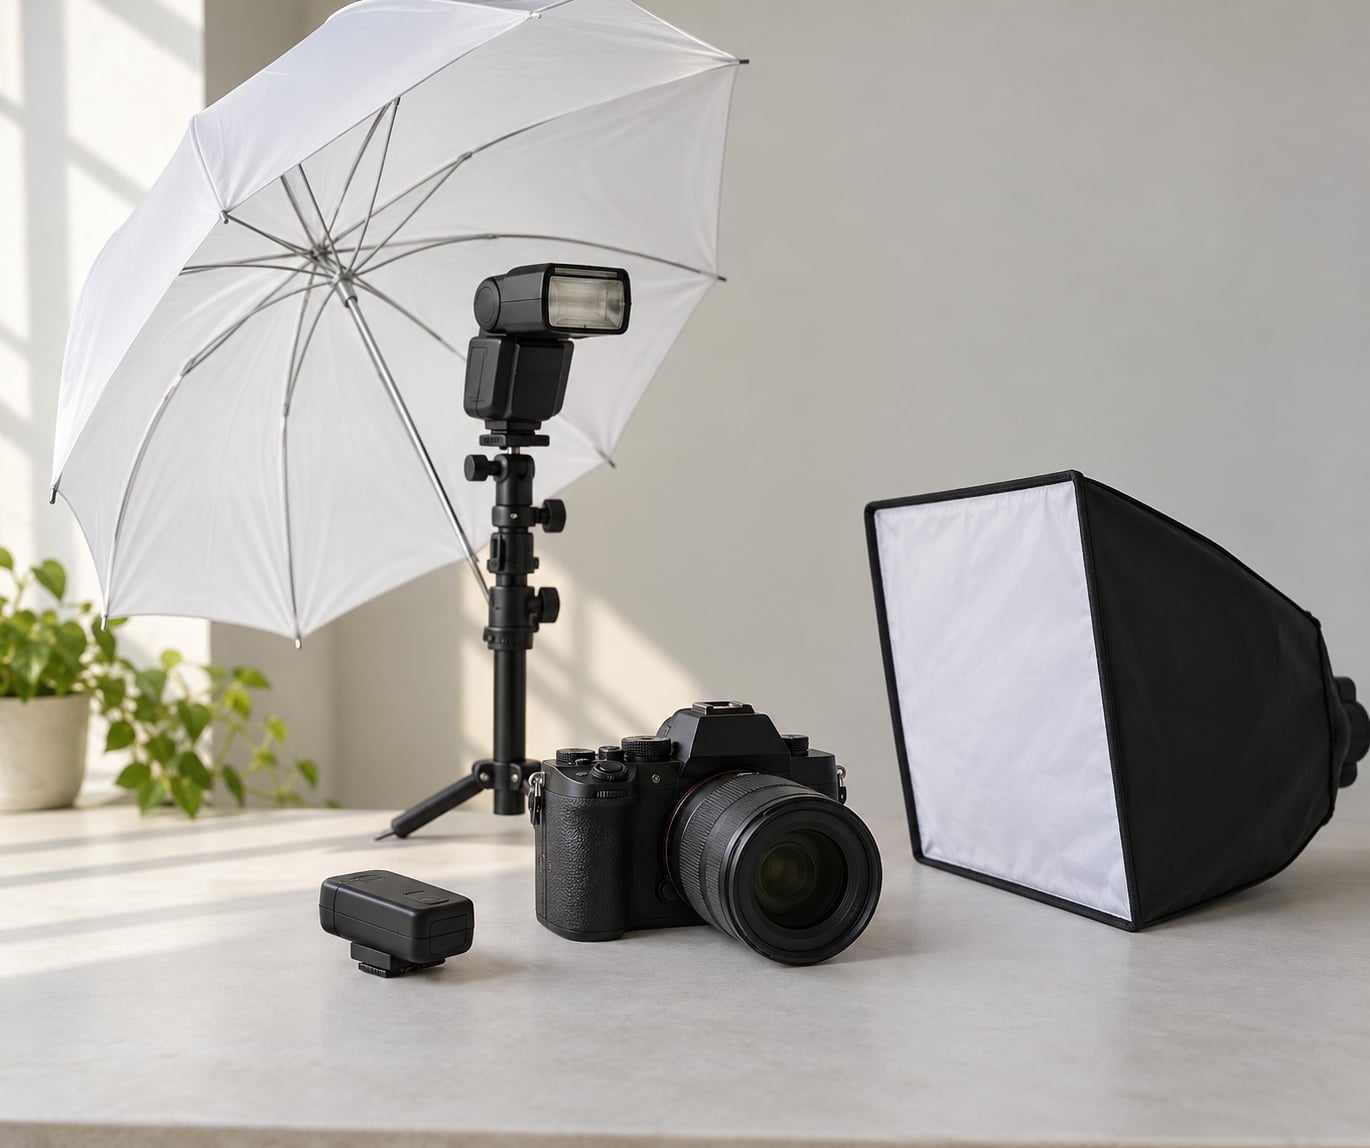
Learning how to use off camera flash for beginners comes down to six moves: put the flash on a stand, fire it remotely from the camera, angle it roughly 45 degrees off the camera axis, soften it with something bigger than the flash head, meter it so the background stays where you want it, then repeat that exact setup until it stops being a decision. Half an hour of that repetition is worth an afternoon of reading.
The reason it feels intimidating is usually exposure maths, and most of that maths is optional. You can ignore the exposure pentagon, the guide numbers and flash meters entirely for your first hundred shots and still get clean, repeatable results from one button on the back of the flash.
Here is the kit, the setup, and the fixes for the six things that go wrong most often.
What You Need
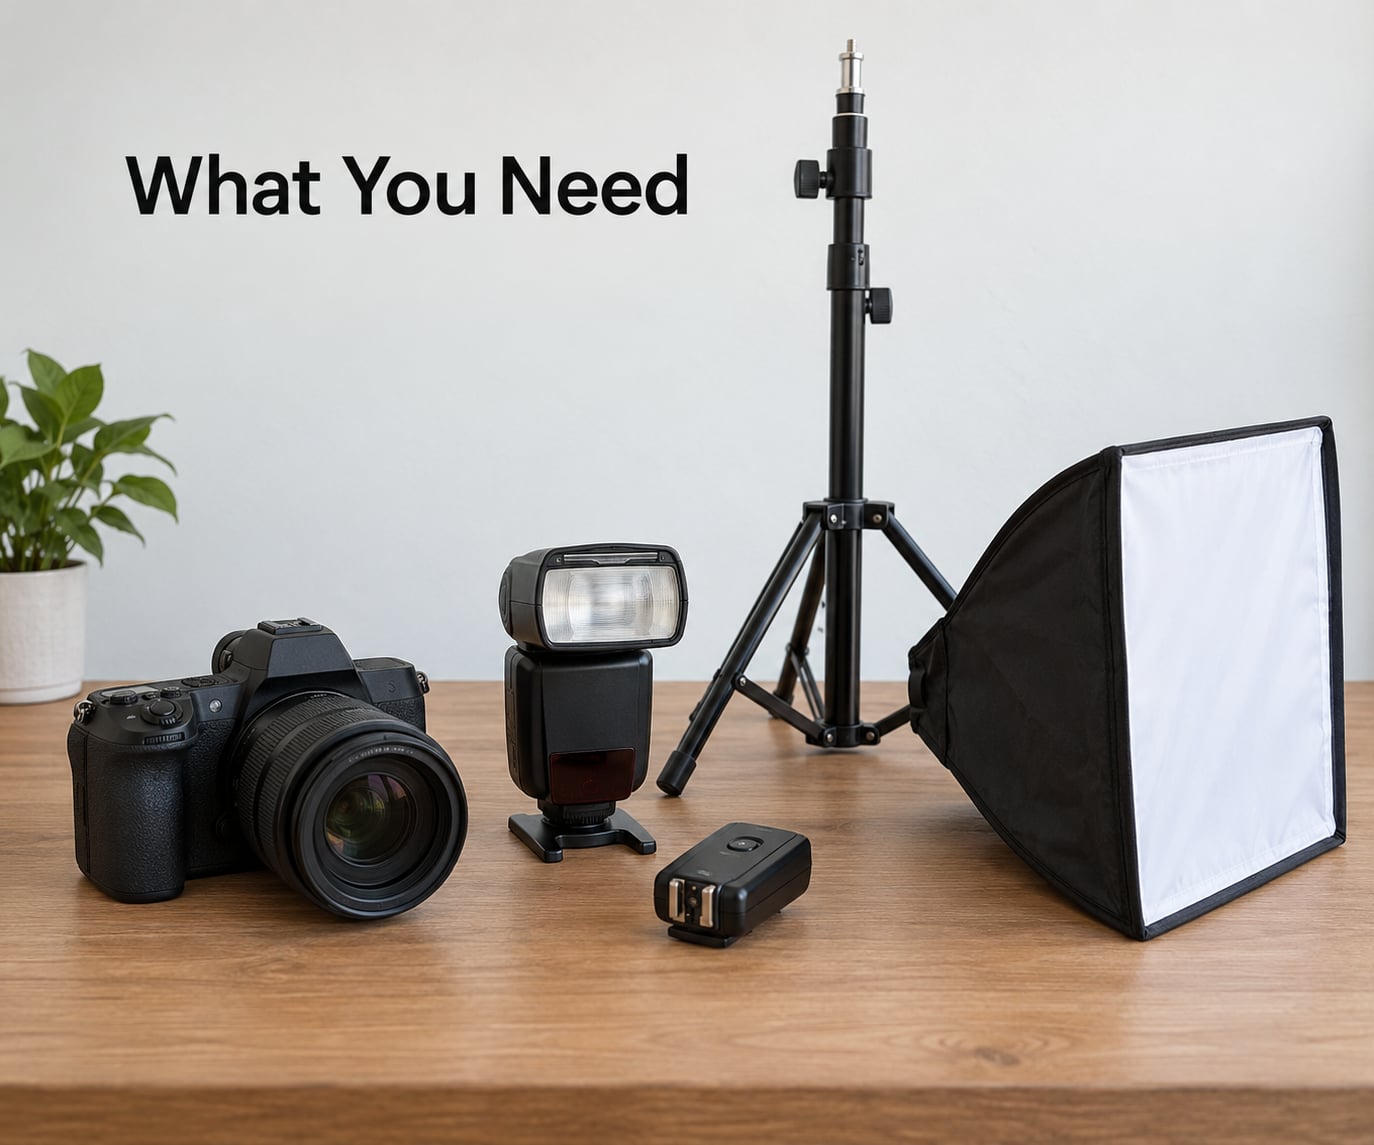
Minimum viable kit is five items, and you can borrow or improvise three of them. Everything else is an upgrade you can add once the basic setup feels boring.
A camera with a hot shoe. Every DSLR and mirrorless body made in the last decade has one, and that shoe is what holds the transmitter. No hot shoe, no radio trigger, no off-camera flash that does not need a cable.
One speedlight. A speedlight is just the portable flash unit that normally sits in the hot shoe, used on a stand instead. This is the single piece of gear that changes your pictures. A budget unit from Godox or Yongnuo does everything a beginner needs; if it does manual power, it is enough for months.
Something to hold the flash. A light stand with a cold shoe mount is the usual answer, because it holds the flash high and off to one side while you shoot from underneath. Cheap folding stands work. In a pinch, a small tabletop tripod clamped to a shelf, or even a foam block balanced on a bookshelf, does the same job.
A way to fire it. Radio triggers are the default in 2026 and worth the money. An optical system built into the flash and camera works too, and a cable works best of all for a static setup. More on that below.
One modifier. A bare flash pointed straight at a face is the least flattering light you can possibly make, and it is the mistake nearly every beginner makes first. A white shoot-through umbrella, a small softbox, or even a folded white bedsheet over a stand will fix it. Modifiers are cheap and matter more than the flash itself.
The optional list is short. A white foam board or reflector for filling shadows, a couple of coloured gels to match the light to a sunset, and eventually a second flash once the one-light version feels automatic. Buy none of these yet.
Jargon you will meet in the manual
Transmitter, receiver and trigger. The transmitter sits in the camera’s hot shoe and repeats the shutter signal. The receiver clips to the speedlight and turns that signal into a firing command. Brands usually sell the pair together and call it a trigger.
Channel, group and ID. Three numbers that have to match on both the transmitter and the receiver before anything happens. Channel keeps you clear of other photographers, group lets you fire a subset of flashes at a time, and ID is a finer version of channel inside that group. Mismatch any of the three and the flash simply never fires.
Slave mode, or remote mode. The setting on the flash that tells it to listen to a trigger instead of waiting for the camera’s own hot shoe. On most flashes it lives in the wireless or flash mode menu and is labelled slave, remote or Gr.
TTL. Through-the-lens metering, where the camera measures the light coming back and picks the flash power for you. It is excellent for moving around and awkward the moment you start moving the flash yourself. Learn manual first and use TTL later.
High speed sync, or HSS. Normal flash locks your shutter speed to the sync limit, usually 1/200 second. HSS lets you shoot above that speed, which costs you a noticeable amount of light power.
How to Use Off-Camera Flash: Step-by-Step
The workflow below runs in six stages, and the order matters. Each one assumes the previous stage already works, so a flash firing at the right power tells you nothing until you know where it is pointing and how big the source is.
1. Set Up the Flash and Camera
Put the receiver on the speedlight and slide the speedlight onto the light stand. Set the flash to manual flash power rather than TTL or auto, then pick a starting power around 1/128 full output. Manual is the right default because the flash is now stationary while you move, and a stationary flash with fixed distance does not need to be re-metered every frame.
On the camera, the transmitter goes in the hot shoe. Match the channel, group and ID on both ends, and set the flash to slave mode. This is the step where beginners lose twenty minutes, so check the three numbers twice before touching anything else.
Set the camera to manual exposure at 1/200 second, f/4 and ISO 200 as a working baseline indoors. Shutter speed at 1/200 sits under the typical sync limit and gives you one stop of latitude either way if your body syncs at 1/160.
Take a test shot to confirm the flash fires. If nothing changed, the problem is the link, not the light: check slave mode first, then the three matching numbers, then the batteries. A powered-up flash that is not in remote mode will happily sit there doing nothing for an hour.
2. Position the Light at About 45 Degrees
Move the flash to one side of the camera and slightly forward, so it sits about 45 degrees to the lens axis and a little above the subject’s eye line. This is the classic key light position and it is the one most portrait photographers keep for years.
The angle does the work. A light directly behind the camera flattens the face, because every shadow points away from the lens where you cannot see it. Move the same light 45 degrees to the side and each shadow rotates away from the camera, which is what the eye reads as shape. That is the whole reason to take the flash off the camera.
Watch two things when you move it. First, shadows: if you see a hard edge cutting across the nose, the light is too low or too close, and moving it slightly forward usually fixes it. Second, hot spots: a bare speedlight at 45 degrees often creates a bright patch on the cheek or forehead facing it, and tilting the flash head slightly down and away from the lens softens that.
Two other positions are worth knowing. At 90 degrees straight to the side you get more drama and more texture, at the cost of hiding one side of the face. Behind the subject, aimed back over their shoulder, you get a rim or backlight that separates them from a dark background. Keep the 45-degree position as your default and move to the others deliberately.
3. Add Diffusion and Control the Light
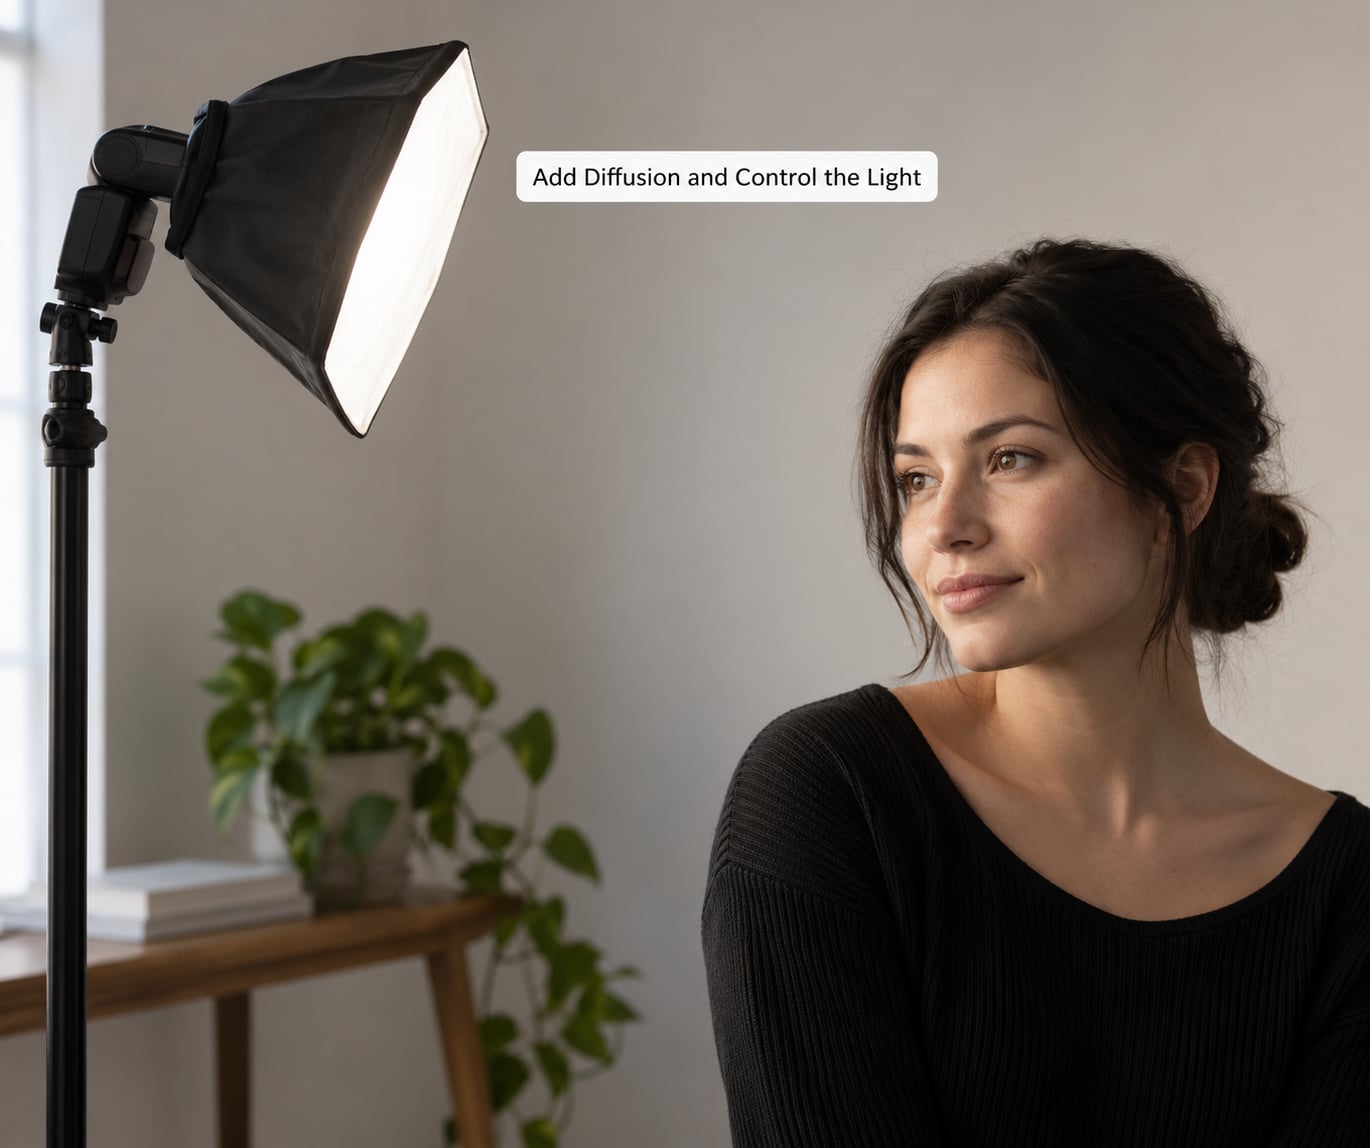
Shadows get their hard or soft edge from the size of the light source relative to the subject, not from the flash’s power setting. A speedlight head is roughly the size of a fist, so at a metre it throws a very hard shadow. The fix is to make the apparent source bigger by putting something in front of it.
A shoot-through white umbrella is the cheapest and fastest option. Mount it on the stand, point the flash up into it, and the umbrella becomes a source roughly a foot and a half across. A small softbox works similarly and gives you more control over direction, because you can shape the edges. A reflector panel opposite the flash bounces light back into the shadow side. Bouncing the bare flash off a white ceiling works too, and costs nothing, though you lose a stop or more of power.
If the light still looks too harsh, the answer is usually one of three things. Move the flash further from the subject, which makes the source look smaller relative to them and therefore softer. Lower the power setting, trying 1/16 instead of 1/8, so the ratio between flash and ambient closes up. Or make the source bigger with a larger umbrella. Do these in that order, one at a time, and you will always know which one did it.
The same three controls fix a background that is too bright. Flash falloff means the light reaching the wall behind the subject is much weaker than the light on their face, so pulling the flash back slightly, or aiming it a touch past the subject, darkens the background without touching the exposure on the person.
4. Meter for the Flash and Protect the Background
This is the part beginners find hardest, and the rule that makes it simple is short: set the ambient exposure first, then add the flash.
In manual flash, shutter speed is your only ambient control. Change aperture or ISO and you change how much light the flash puts on the subject at the same time, which drags your flash exposure around with you. Shutter speed changes the room and the flash stays exactly as you set it.
So dial in your camera settings for the light you can see without the flash, using aperture and ISO, with shutter speed set at or under the sync limit. That decides how bright the background is. Then set the flash power so the subject lands a stop or two brighter than the background. In practice, photographers do this by underexposing the ambient deliberately, usually by one to three stops, so the background falls to a shade darker than normal and the subject pops out of it.
To meter the flash itself, use the flash exposure meter built into your camera. Fire a test shot, look at the flash exposure scale, and move the flash power setting until the indicator sits near zero. Then look at the histogram: the background should sit left of centre, and the subject’s skin should sit to the right of it without the warning blinkers firing.
If your camera lacks a flash exposure scale, a cheap handheld flash meter does the same job in a second, and secondhand ones are everywhere. You can also meter by eye: fire a test shot, zoom in on the back of the LCD, and treat any pixel that is near pure white as clipped.
5. Balance the Key, Fill, and Ambient Light
Key, fill and ambient are three sources of light on your subject, and the ratio between them is what decides whether a portrait looks calm or dramatic.
The key is your flash. Fill is whatever softens the shadow side, and it does not have to be a light at all: a white reflector or foam board opposite the flash is usually enough to lift shadows about half a stop. The ambient is the room, or the sky, or the sun, and it fills everything without direction.
Here is the practical rule. Aim for roughly a one-stop difference between the lit and shadow sides of the face, which reads as natural. Two stops and you have a moody look that flatters some faces and hides others. Three stops or more and the shadow side turns black, which is a style choice, not a default.
When the ambient is bright, the ratio closes on its own. Outdoors at 1/200 with the ambient underexposed two stops, the flash is doing most of the work and you need little fill. Indoors in a dark room with a low ISO, the flash dominates and the shadow side needs a reflector. Watch which situation you are in before you add equipment.
A second flash needs care. Two bare flashes both firing at the same angle produce two separate shadows on the background and cheek, and that doubled edge is the giveaway. Aim the second light from a different direction, raise it above the subject and angle it down, or leave it a good 45 degrees away from the key. If you can see two noses on the wall behind your subject, one of them is badly placed.
6. Practice and Fine-Tune the Setup
Write your settings down and repeat them. Pick a fixed setup, for example flash at 45 degrees, umbrella, 1/200 at f/4 and ISO 200, flash power at 1/16, and shoot twenty frames of the same scene without changing anything. If the light is wrong, you now know which setting to move.
Then work through a checklist after every setup change, in this order. Check that the flash fires at all. Check the histogram for clipping on the skin and for a background sitting where you wanted it. Zoom to 100 percent on the LCD and look for white on the brightest part of the forehead or cheek. Look at the catchlights in the eyes, which should be a small bright rectangle in the same position on both eyes, and their shape tells you what modifier is attached. Check the shadows for edges, hardness and doubles.
Change one variable at a time. Adjusting power, angle and position together tells you nothing about what fixed the problem, and you will end up where most beginners start: convinced the flash is the problem rather than the settings.
One last habit pays for itself fast. After a session, write down the four numbers that worked. Next time you set up in the same room, you start from a known-good point instead of guessing.
Common Mistakes
Fired straight into the face with no modifier. The flash lands as a small bright source, giving red-eye, black eye sockets and a hard shadow under the nose. Fix it before anything else: add an umbrella or bounce it off a wall, and take two steps back.
Subject too dark or background too bright. The flash is probably at the wrong distance or aimed at the backdrop. Move the flash closer to the subject and tilt the head so the beam lands on the face, then check the falloff behind.
Everything blown out. Usually a manual power setting left too high, or TTL fighting you. Drop the flash power one click at a time, or turn on flash exposure compensation in the camera menu and walk it down until the histogram stops blinking.
The flash does not fire at all. Check slave mode on the flash, then confirm channel, group and ID match on both transmitter and receiver, then replace the batteries in the receiver. This sequence solves the problem almost every time.
Background went completely black. Undershooting the ambient, usually after following the underexpose-by-two-stops rule too literally, or shooting past the camera’s sync speed in the wrong mode. Bring the ambient back up with aperture or ISO before touching the flash.
Red eyes in every frame. The light is close to the lens axis and the pupils reflect it straight back. Move the flash further off-axis, and turn on red-eye reduction as a backup, though it darkens the surrounding skin.
The flash has a green or blue colour cast on skin. The flash colour temperature does not match the ambient. Shoot a white card or grey card under both lights, set custom white balance from it, and both will agree again. Gels help when you want the balance set in the flash itself.
Dark banding across the frame. The shutter is above the sync speed without high speed sync enabled, so the sensor is reading part of the sweep while the flash fires. Drop the shutter to 1/200 or below, or switch HSS on and expect to lose several stops of power.
The flash is visible in the frame, or it is blocking the backlight. Stand the flash outside the edge of the lens and slightly behind you rather than between you and the subject, and check the edges of the frame before every shot.
Shadows from two lights. Two unbounced flashes firing from similar angles. Move the second light higher and further round, or use a bare second flash aimed at a backdrop for a glow instead of at the subject.
Frequently Asked Questions
How do I start using off-camera flash with no trigger?
You can, and it is worth trying before you buy anything. Point the flash at the subject from an angle, put the camera in low-speed sync or second-curtain mode if your body offers it, and it will fire a moment after or before the shutter. The light comes straight from the lens axis, so quality will not be great, but the positions are limited. A cheap radio trigger pair gives you proper angles for very little money, which is why most people treat it as the first real purchase.
What flash setting should I use for beginner portraits?
Set the flash to manual power and start around 1/16 to 1/128. On the camera, 1/200 second, f/4 and ISO 200 is a reliable indoor baseline. Fire a test shot, check the histogram, and move one click at a time. Learning manual first sounds harder than TTL but it is faster in practice, because the flash sits still while you move around it and a fixed power setting keeps working.
Should off-camera flash be brighter than the ambient light?
Slightly, yes. Aim for the subject to sit about one stop brighter than the background, which reads as natural daylight. Two stops brighter gives a more separated, fashion-style look. Going much brighter than that makes the flash obvious. You control this by underexposing the ambient first with aperture or ISO, then setting the flash power separately, because shutter speed alone does not change how much light the flash delivers.
How far should I place an off-camera flash from my subject?
Start at about a metre and a half to two metres, roughly an arm’s length plus a step back. Closer than that and you get harder shadows and faster falloff on the background. Further away and the light wraps more gently and the background falls off darker, which is often what you want. Because flash brightness depends on distance, if the shot is too bright, moving the flash back is often a better fix than reducing its power.
Can I use off-camera flash in daylight?
Yes, and it is the main reason portrait photographers carry one. In bright sun you set the ambient exposure, then underexpose it by two or three stops by opening the aperture, raising the shutter speed or dropping the ISO, and fill that gap with the flash. Aim the flash at the subject from 45 degrees and, in open shade, you get the even light of an overcast day without waiting for one. Keep the shutter at or below the sync limit unless you enable high speed sync.
Start with one fixed setup this week. Flash at 45 degrees on a stand, umbrella or white sheet in front of it, 1/200 at f/4 and ISO 200, manual flash power at 1/16, subject or family member in the chair by the window. Shoot twenty frames and change nothing. When that feels automatic, add the trigger, then a second light, then high speed sync, in that order.